First-time pay as go users receive up to 8 hours of free GPU usage
within first 30 days. We will take out 8 hours of free trial usage on
your first bill. If you do not use all 8 hours of free trial, the free
GPU usage will not carry into future billing cycles. Please note that we
will notify you via email once you’ve used all your free trial GPU
hours, and any continuous GPU usage beyond free hours will be charged
according to applied rates.
Reserved plans mean the selected number of GPUs have been reserved for
the users. Users prepay for the reserved term (30 or 90 days),
regardless of the actual amount of GPU used. For further details of
reserved plans, check out Product Specifications.
Reserved plans are ideal for expectant high volume usage over a specific term to help you save money (up to 15% per month) by committing to 30-day or 90-day plan, and QC AI/ML offers one of the most flexible reserved plans in the market.
Reserved plans are ideal for expectant high volume usage over a specific term to help you save money (up to 15% per month) by committing to 30-day or 90-day plan, and QC AI/ML offers one of the most flexible reserved plans in the market.
You can change plan by:
1. Click top right QC icon > Billing > Current Plan > Change
2. If the remaining balance of your current plan is greater than the price of new plan, you're upgrading.
3. If the remaining balance of your current plan is less than the price of new plan, you're downgrading.
4. Notice that upgrade takes effect immediately and users need to pay the difference in prices.
For example, having purchased a 30-day QC-E1x plan, the remaining balance is $615.6, upgrading to $2462.4 30-day QC-E2x, the difference in prices due is:
2462.4 - 615.6 = 1846.8 (balance due at upgrade)
Pending reservation:
If you're downgrading (current plan's remaining balance < new plan's price) your current plan, new plan will take effect after the end of current term. The system will check available resources for your new plan and notify you the result 3 days before your current plan expires. After the system pairs you up with GPUs requested by your new plan, you cannot make any changes until after the new plan is effective.
If a user does not unsubscribe or make any changes to his current plan,
the system will auto-renew the user’s plan at the end of the current
term. Reserved plan users will be charged the plan’s bill on the first
day of current billing cycle, and pay as you go users will be charged
the previous month’s bill on the first day of the current billing cycle.
If payments fail to pay for any reason, the system allows the users to update their payment method and complete the payments within 72 hours of grace period, during which the QC AI/ML’s services stay uninterrupted. However, if the bills are still unpaid after the grace period ends, users’ access to AI/ML services is restricted and must clear overdue bills to continue using the services.
If payments fail to pay for any reason, the system allows the users to update their payment method and complete the payments within 72 hours of grace period, during which the QC AI/ML’s services stay uninterrupted. However, if the bills are still unpaid after the grace period ends, users’ access to AI/ML services is restricted and must clear overdue bills to continue using the services.
Reserved plan users receive invoices at the beginning of their term. Pay
as you go users receive previous month’s invoice on the first day of
their current term.
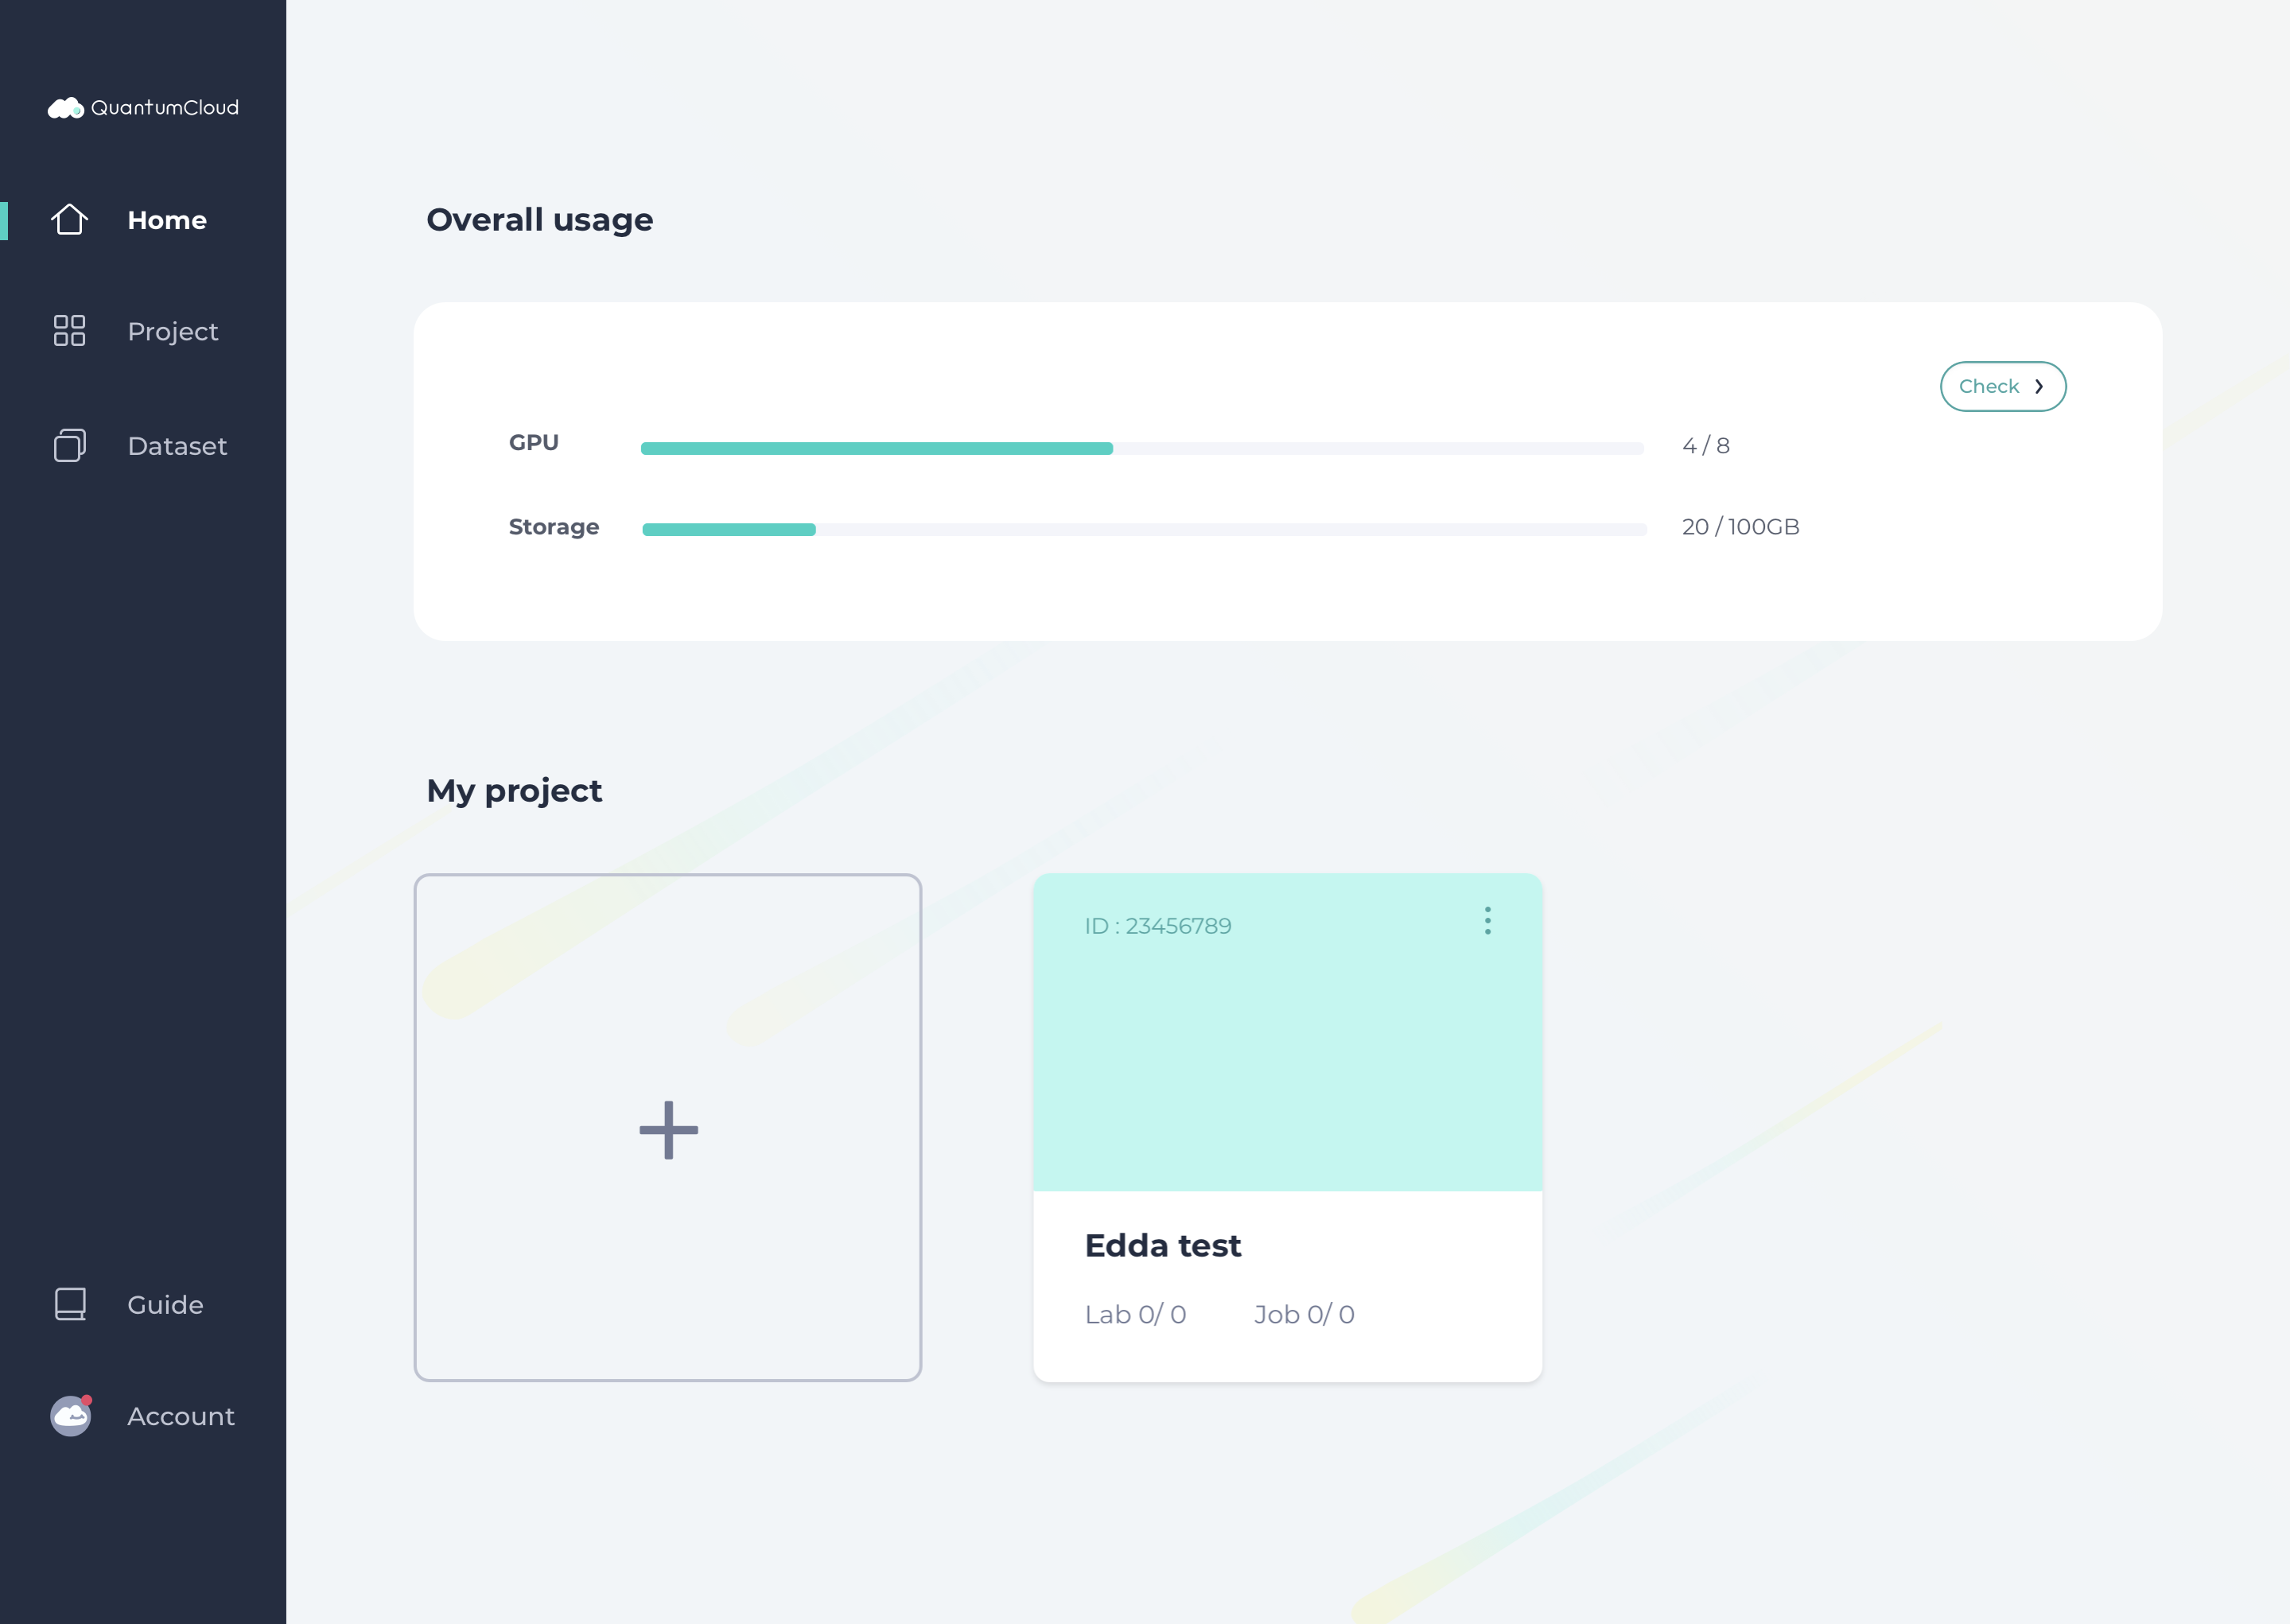
When logging into console, you land on Home page.
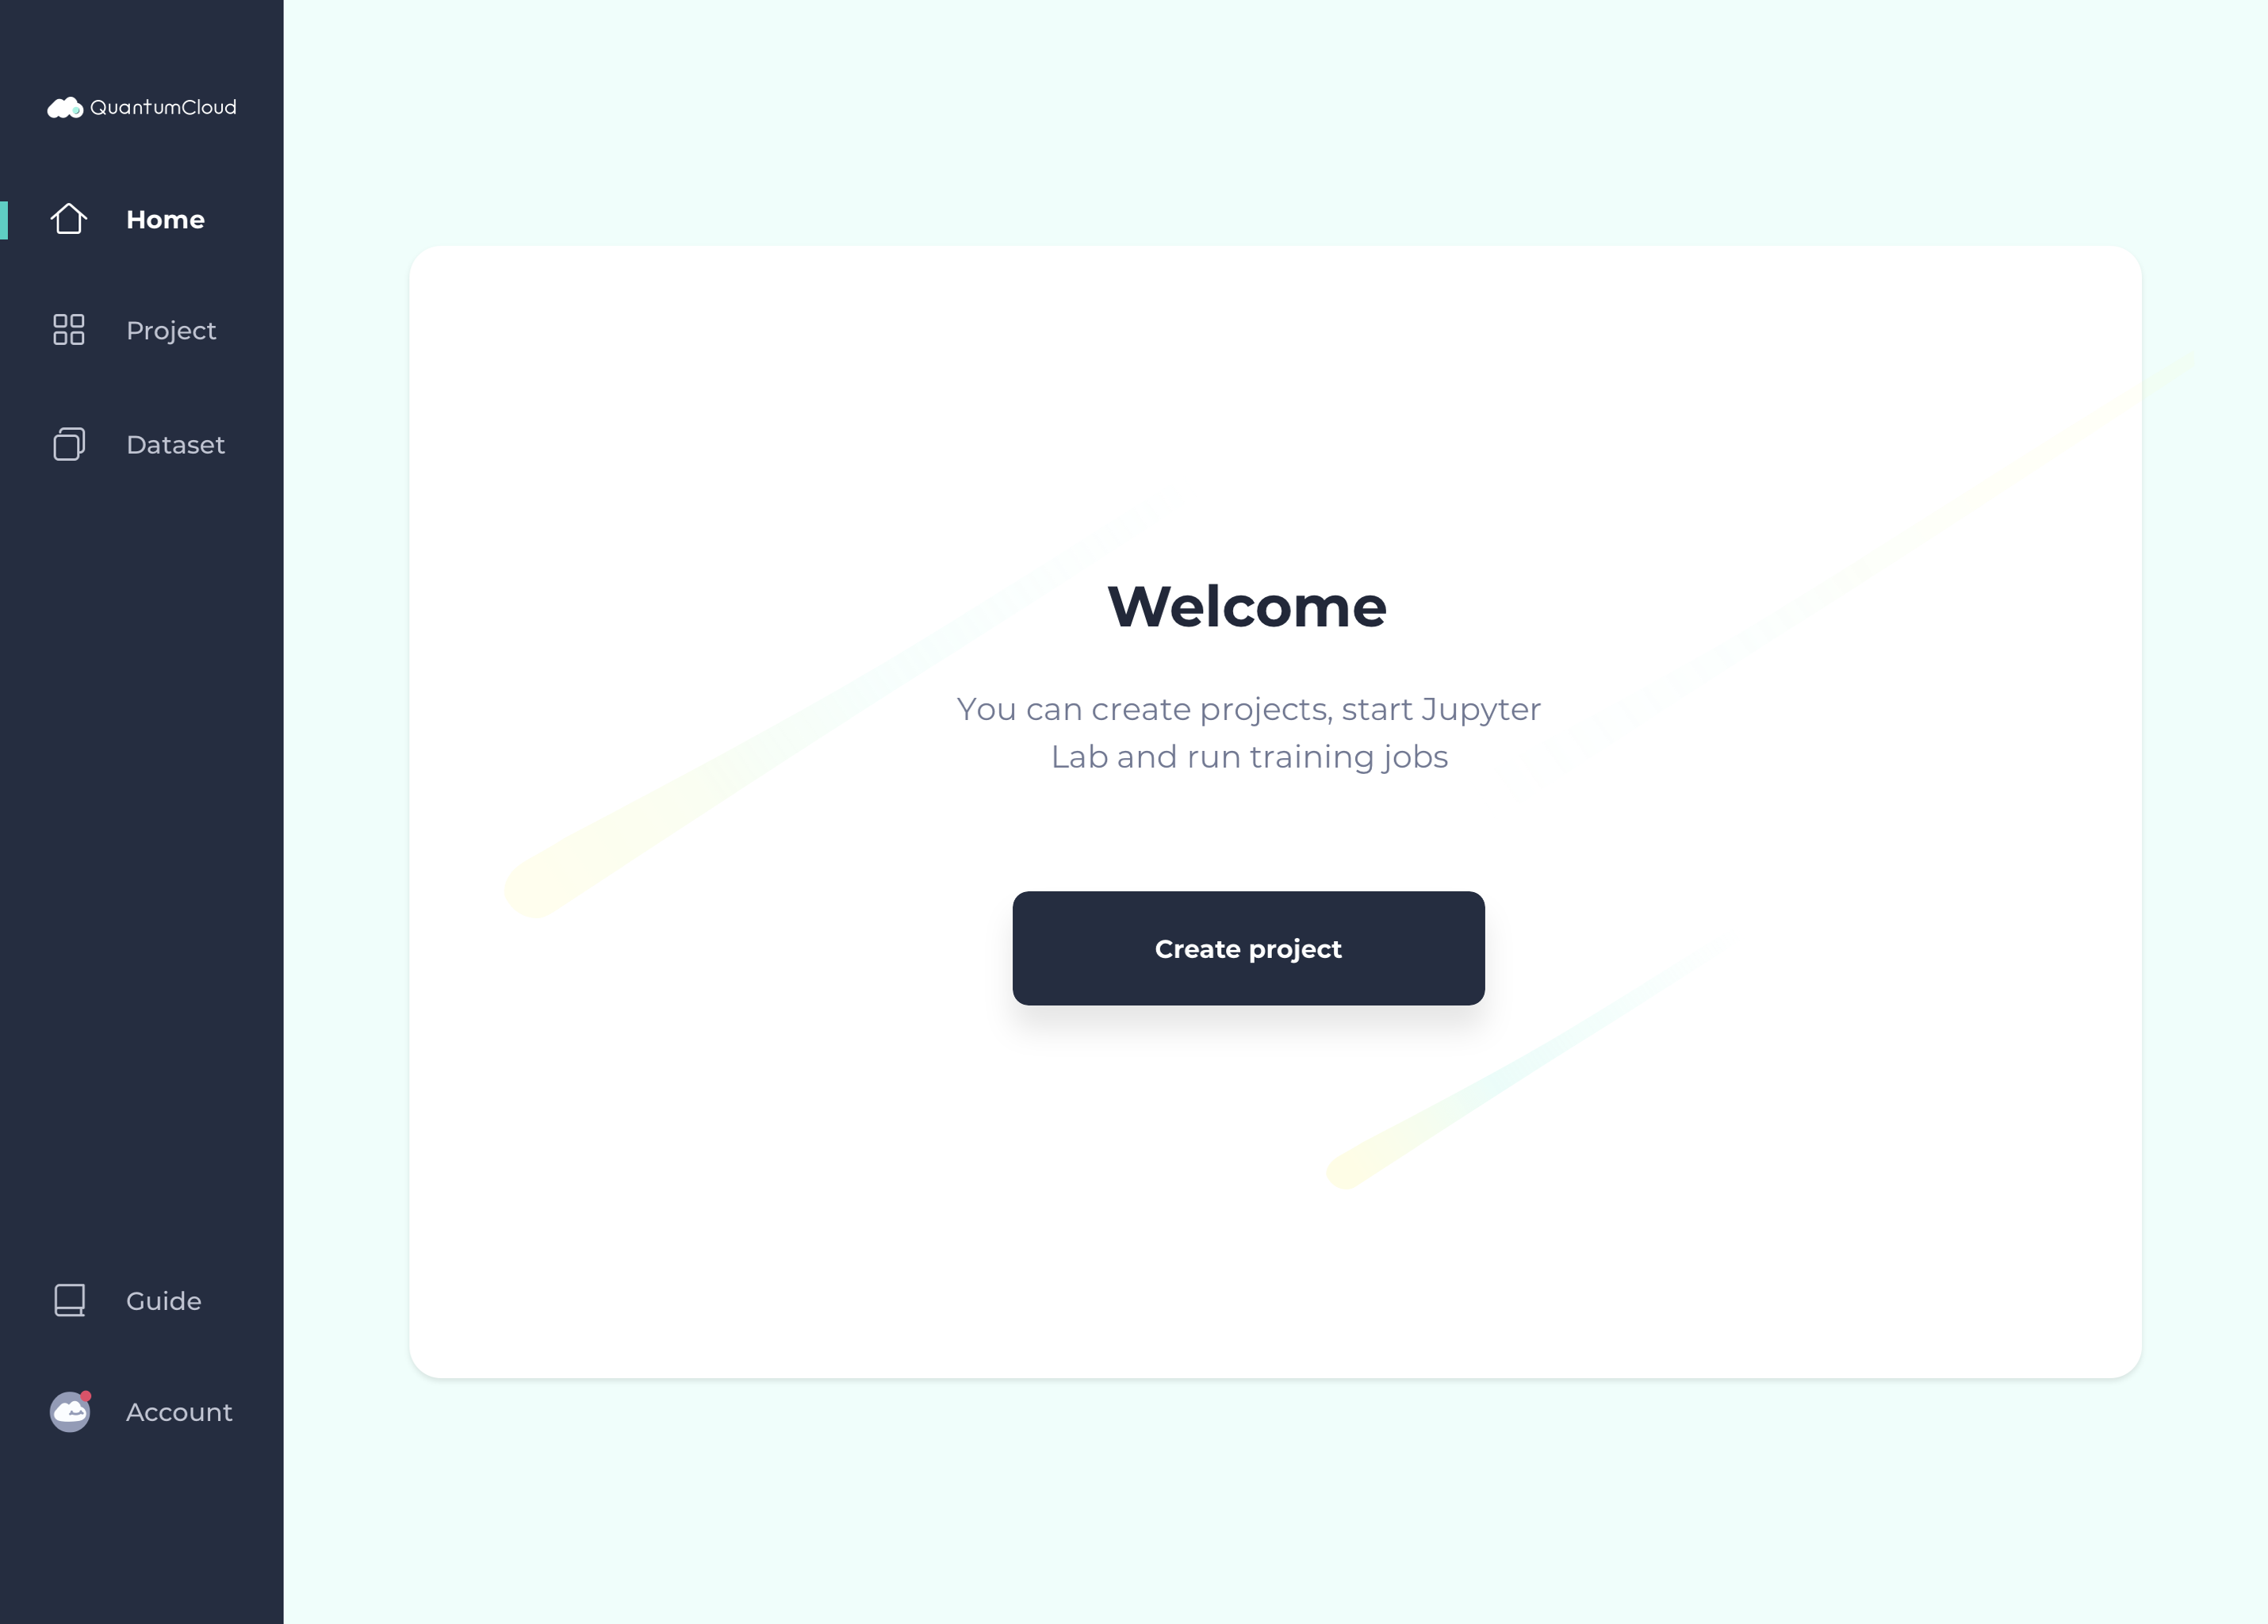
1. Without existing project, the page looks like above. Click Create Project .

2. With existing projects, click + button.

3. Enter a name for your new project. Use only English letters,numbers,"-", "_", and exclude using spaces and consecutive "-" and "_"symbols.
4. Optional: You can also put down a note for the project.
1. Without existing project, the page looks like above. Click Create Project .
2. With existing projects, click + button.
3. Enter a name for your new project. Use only English letters,numbers,"-", "_", and exclude using spaces and consecutive "-" and "_"symbols.
4. Optional: You can also put down a note for the project.

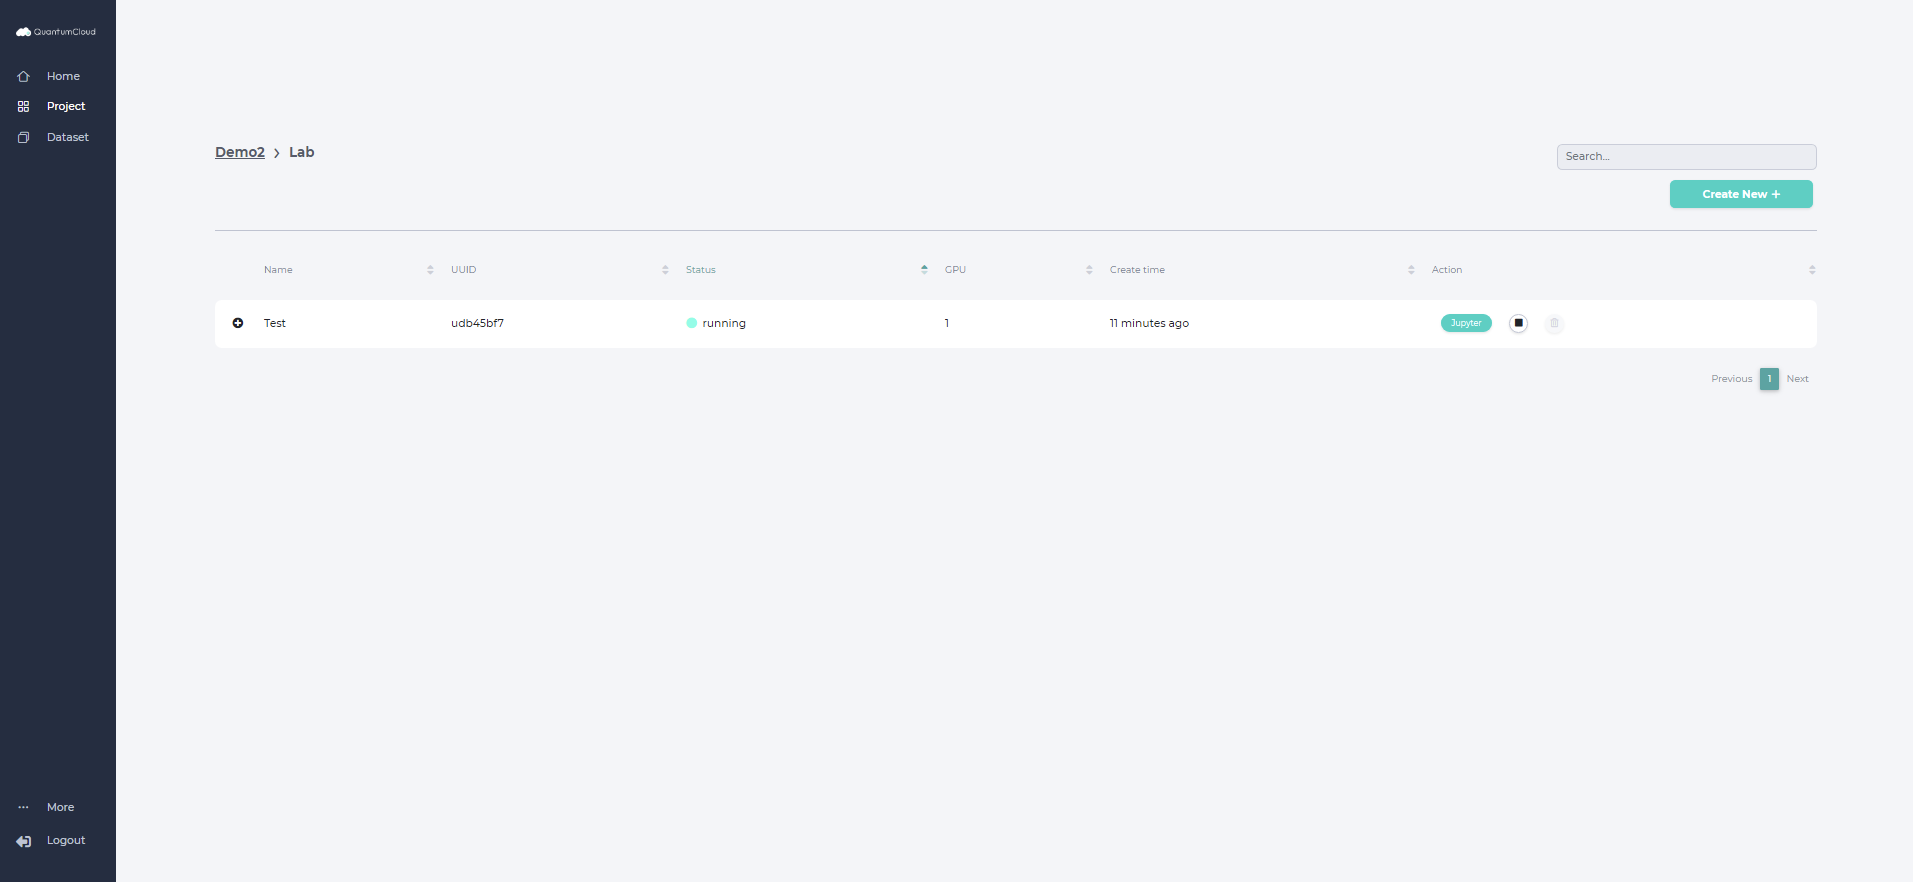
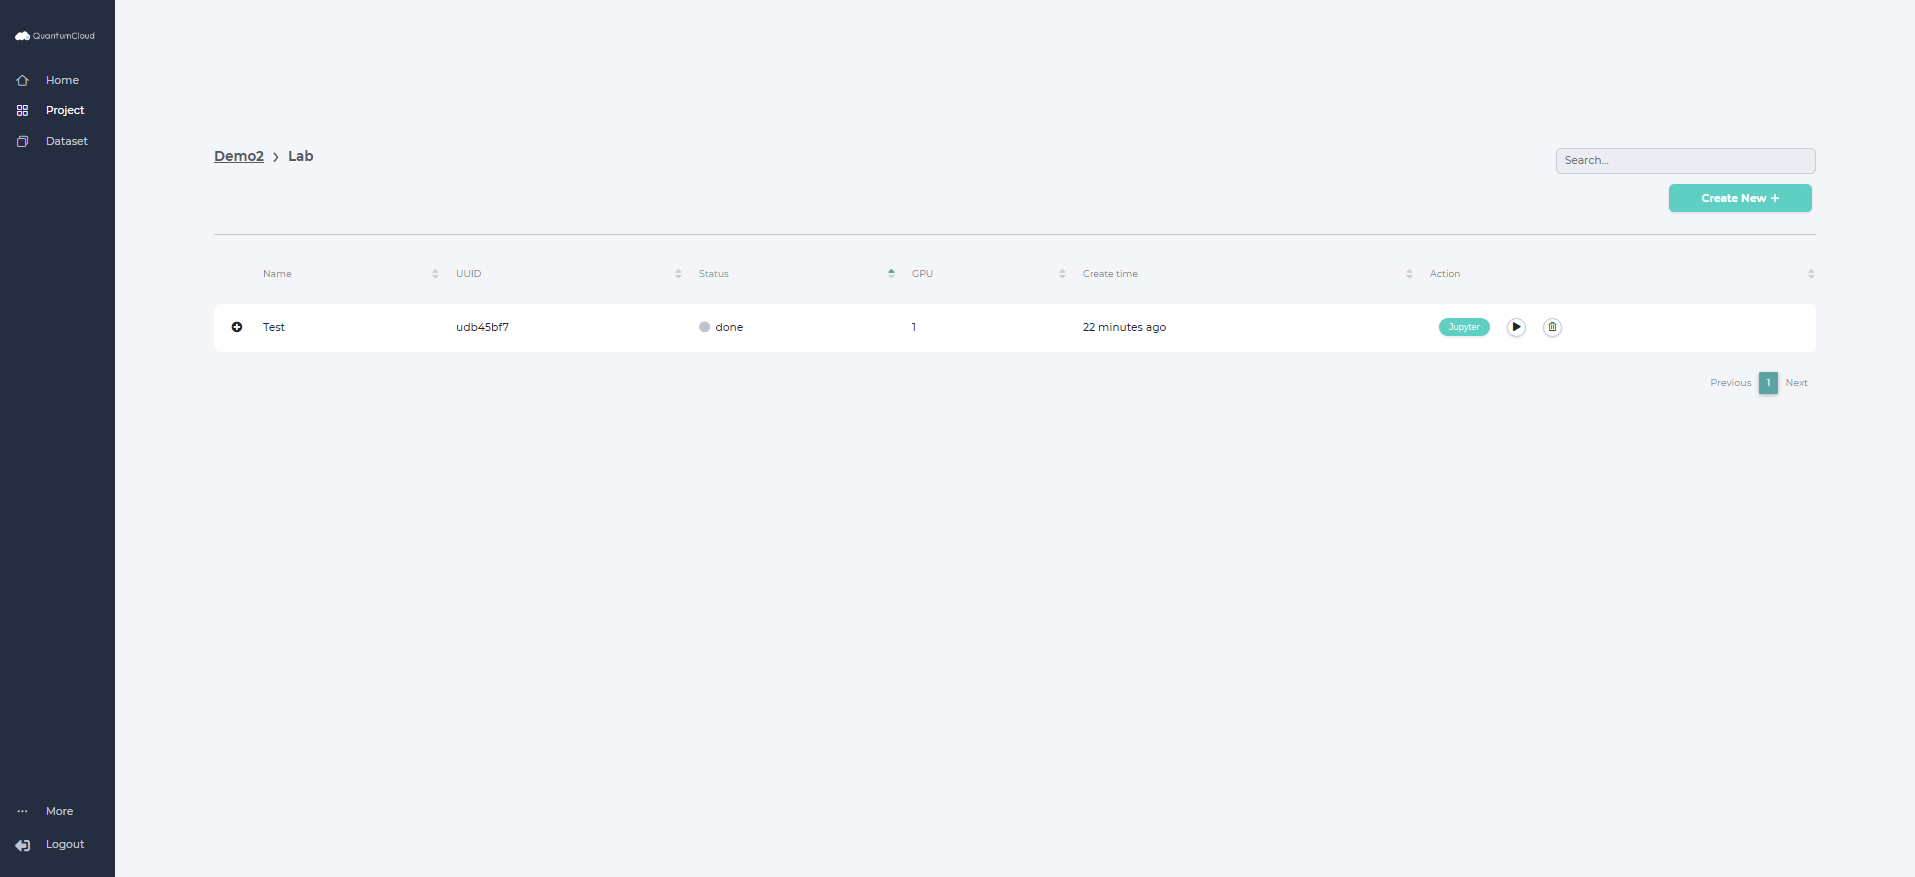
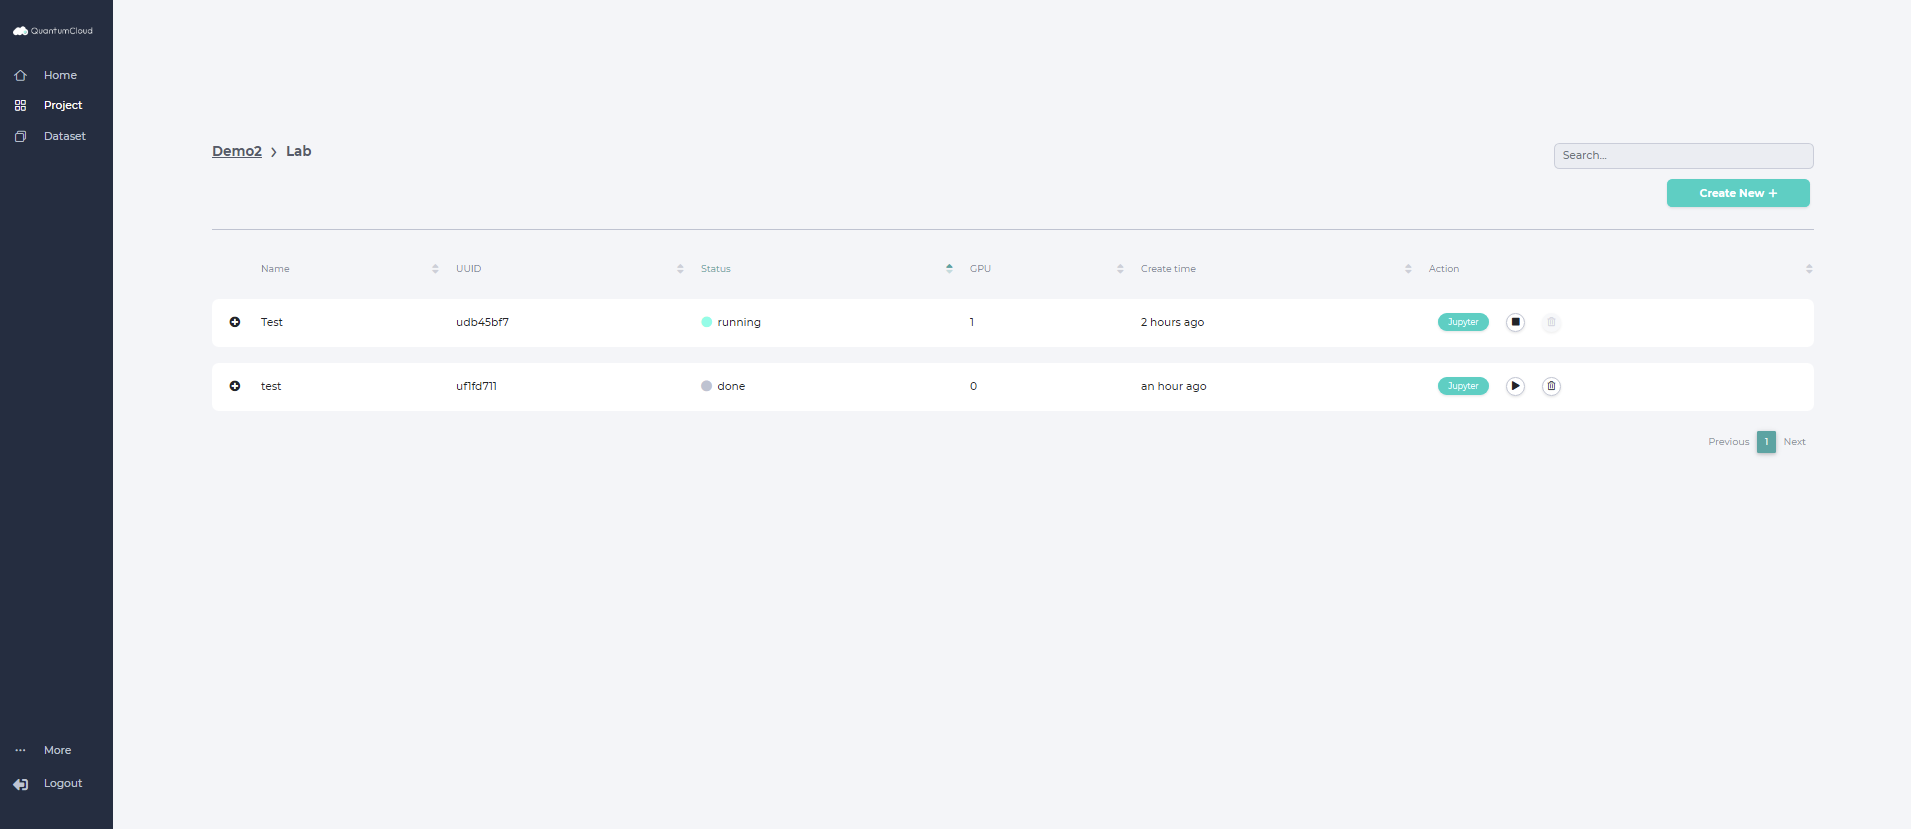
All your projects are displayed under My project on Homepage,arranging from latest to oldest.
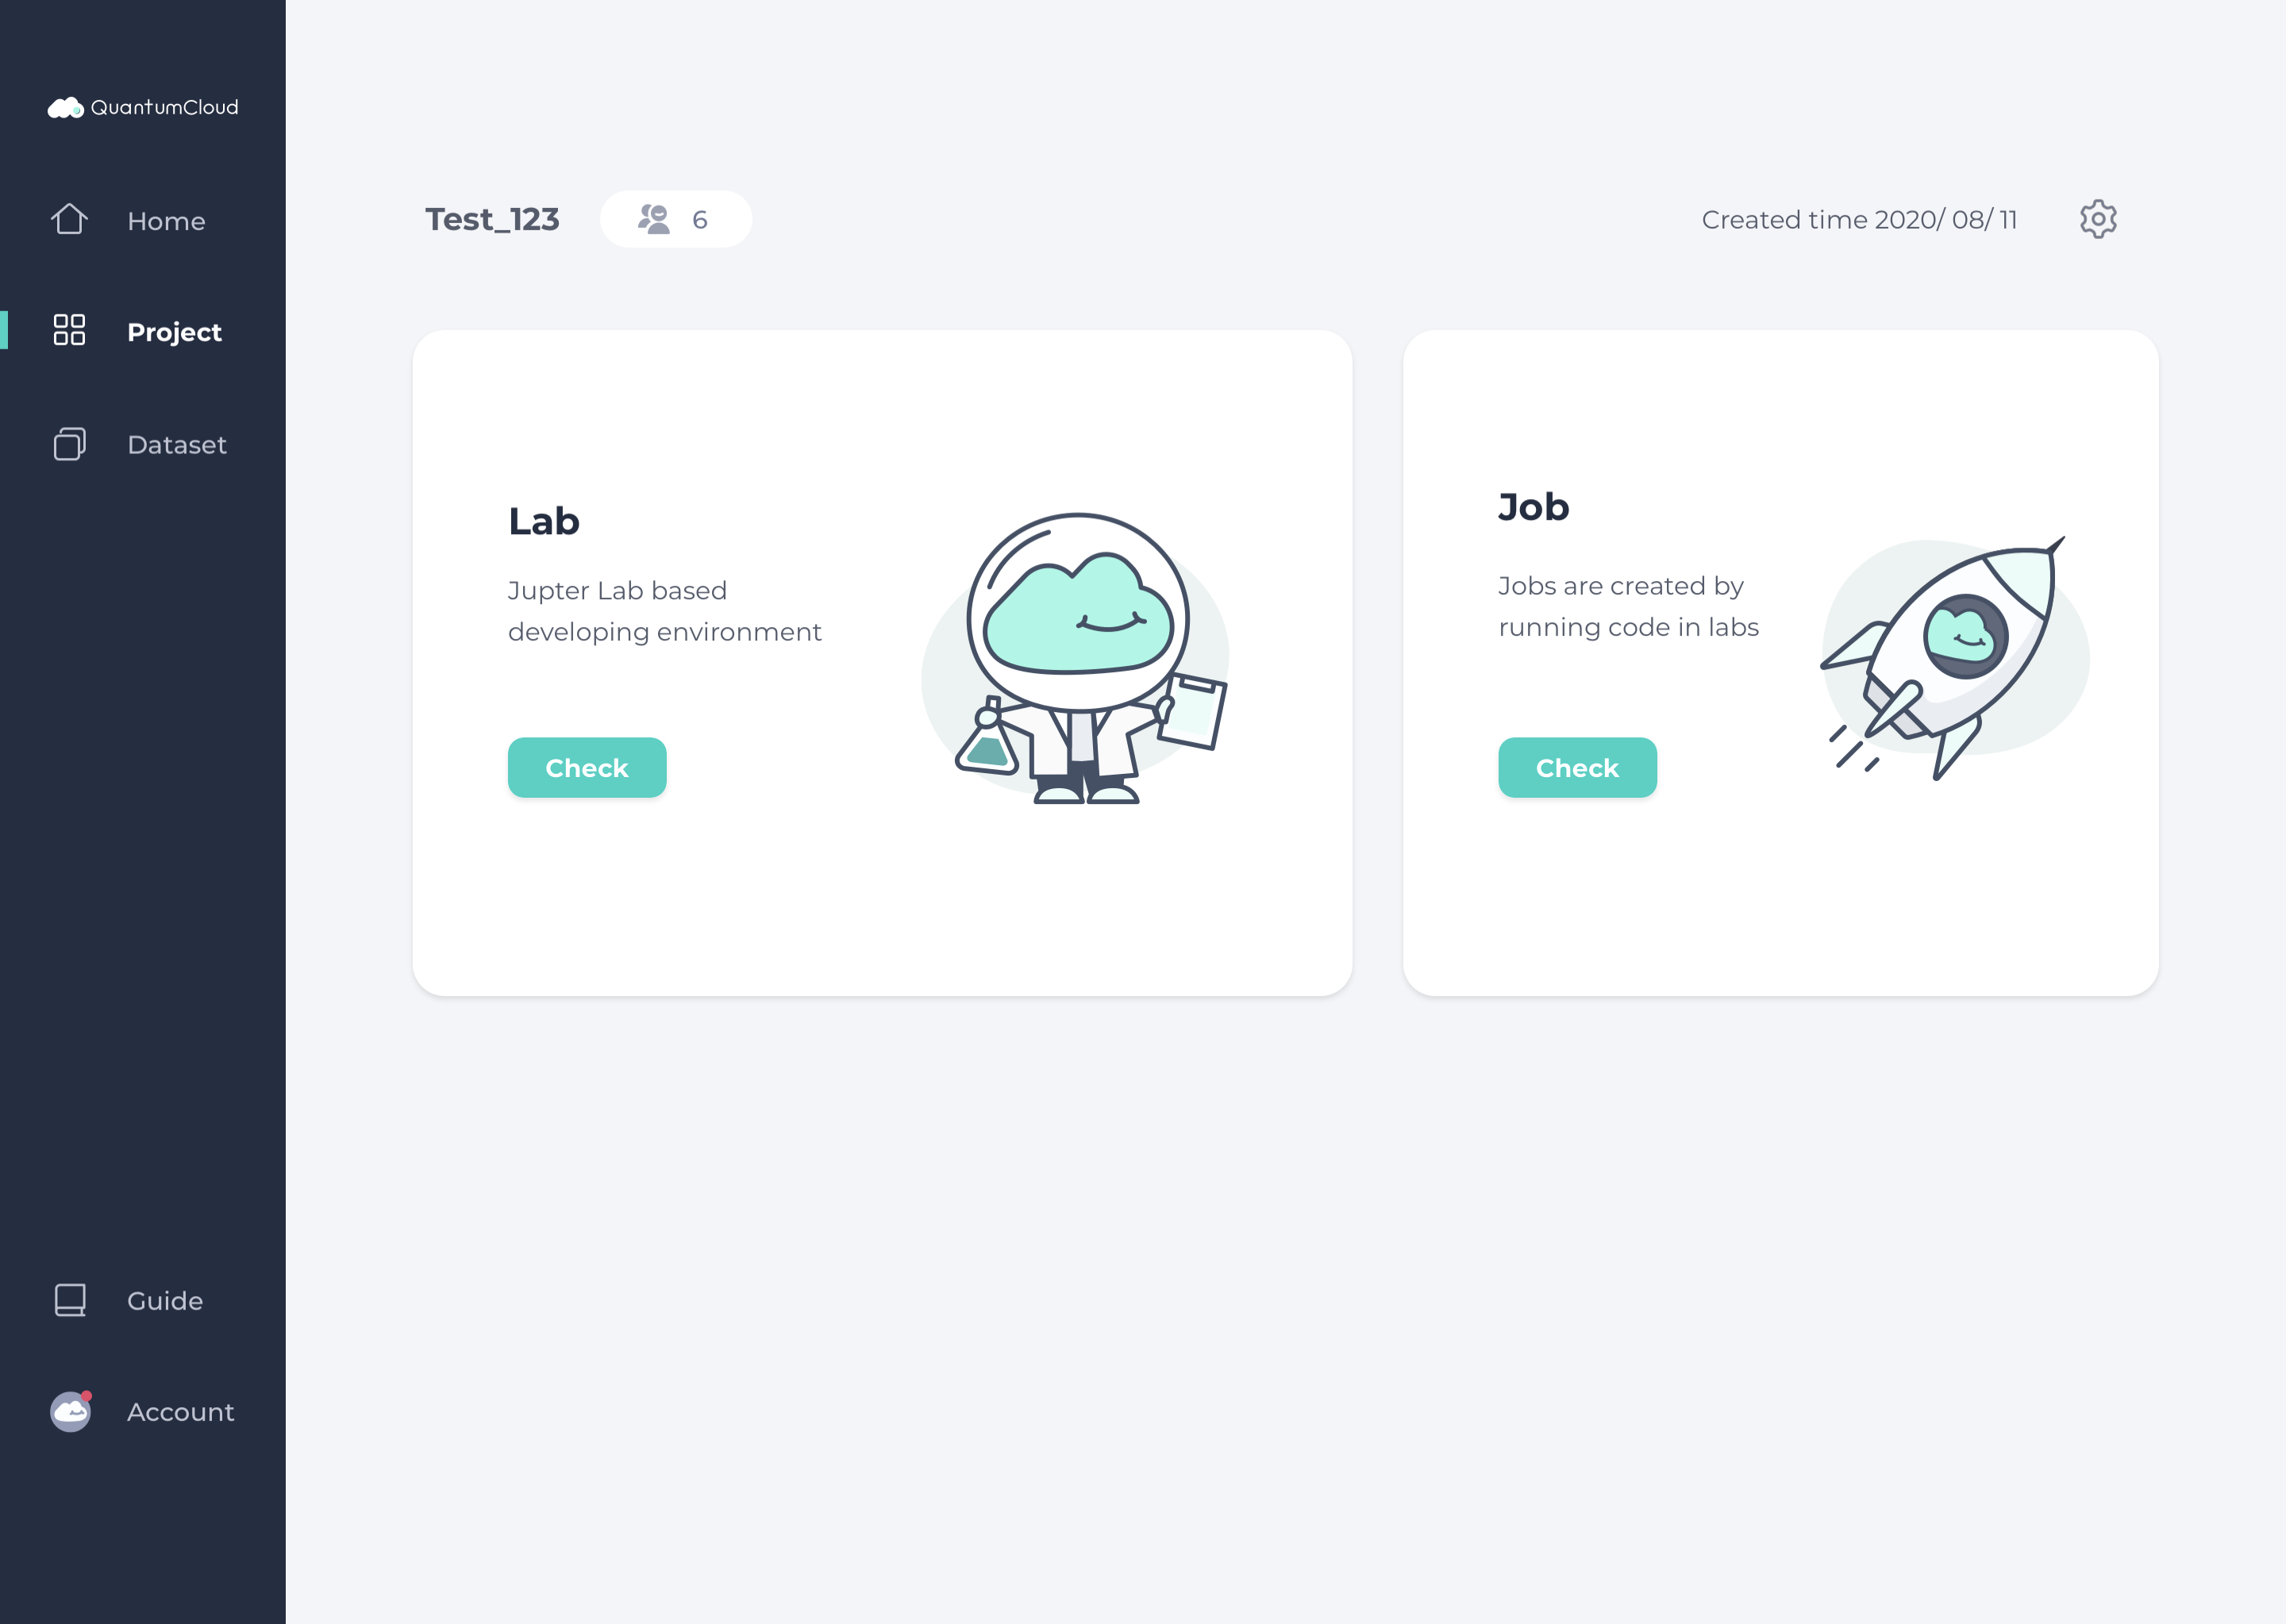
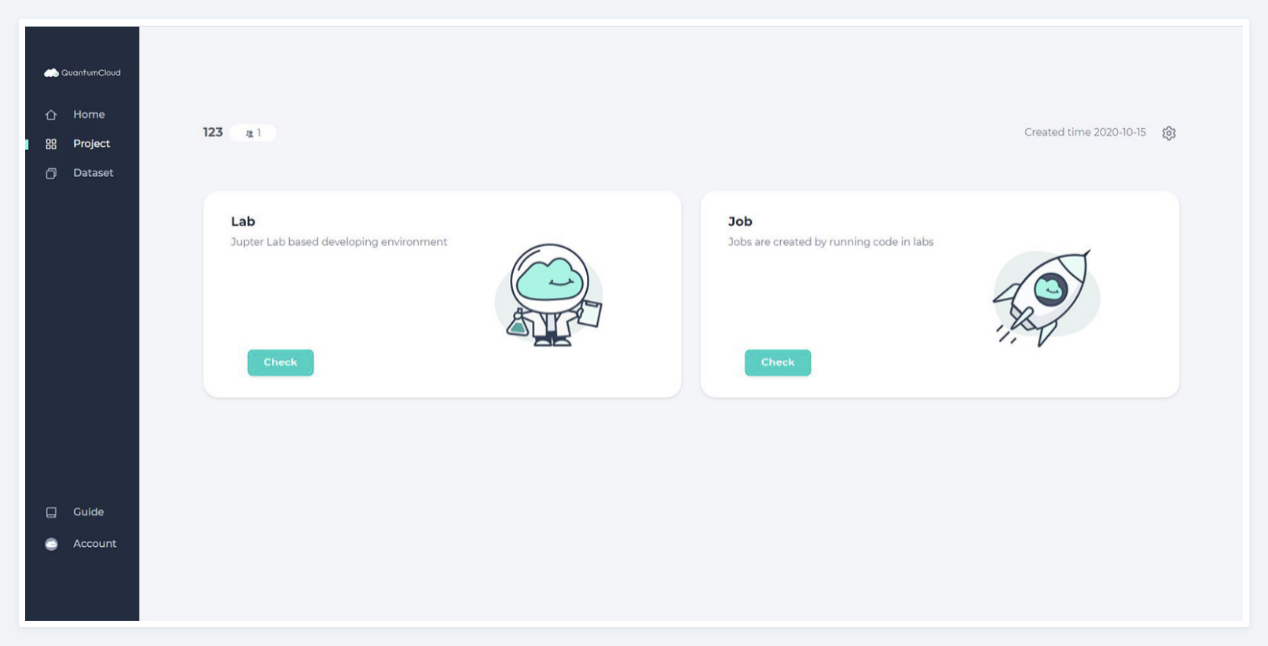
1. Click View on selected project to enter into the project. This directs you to the Project’s page.
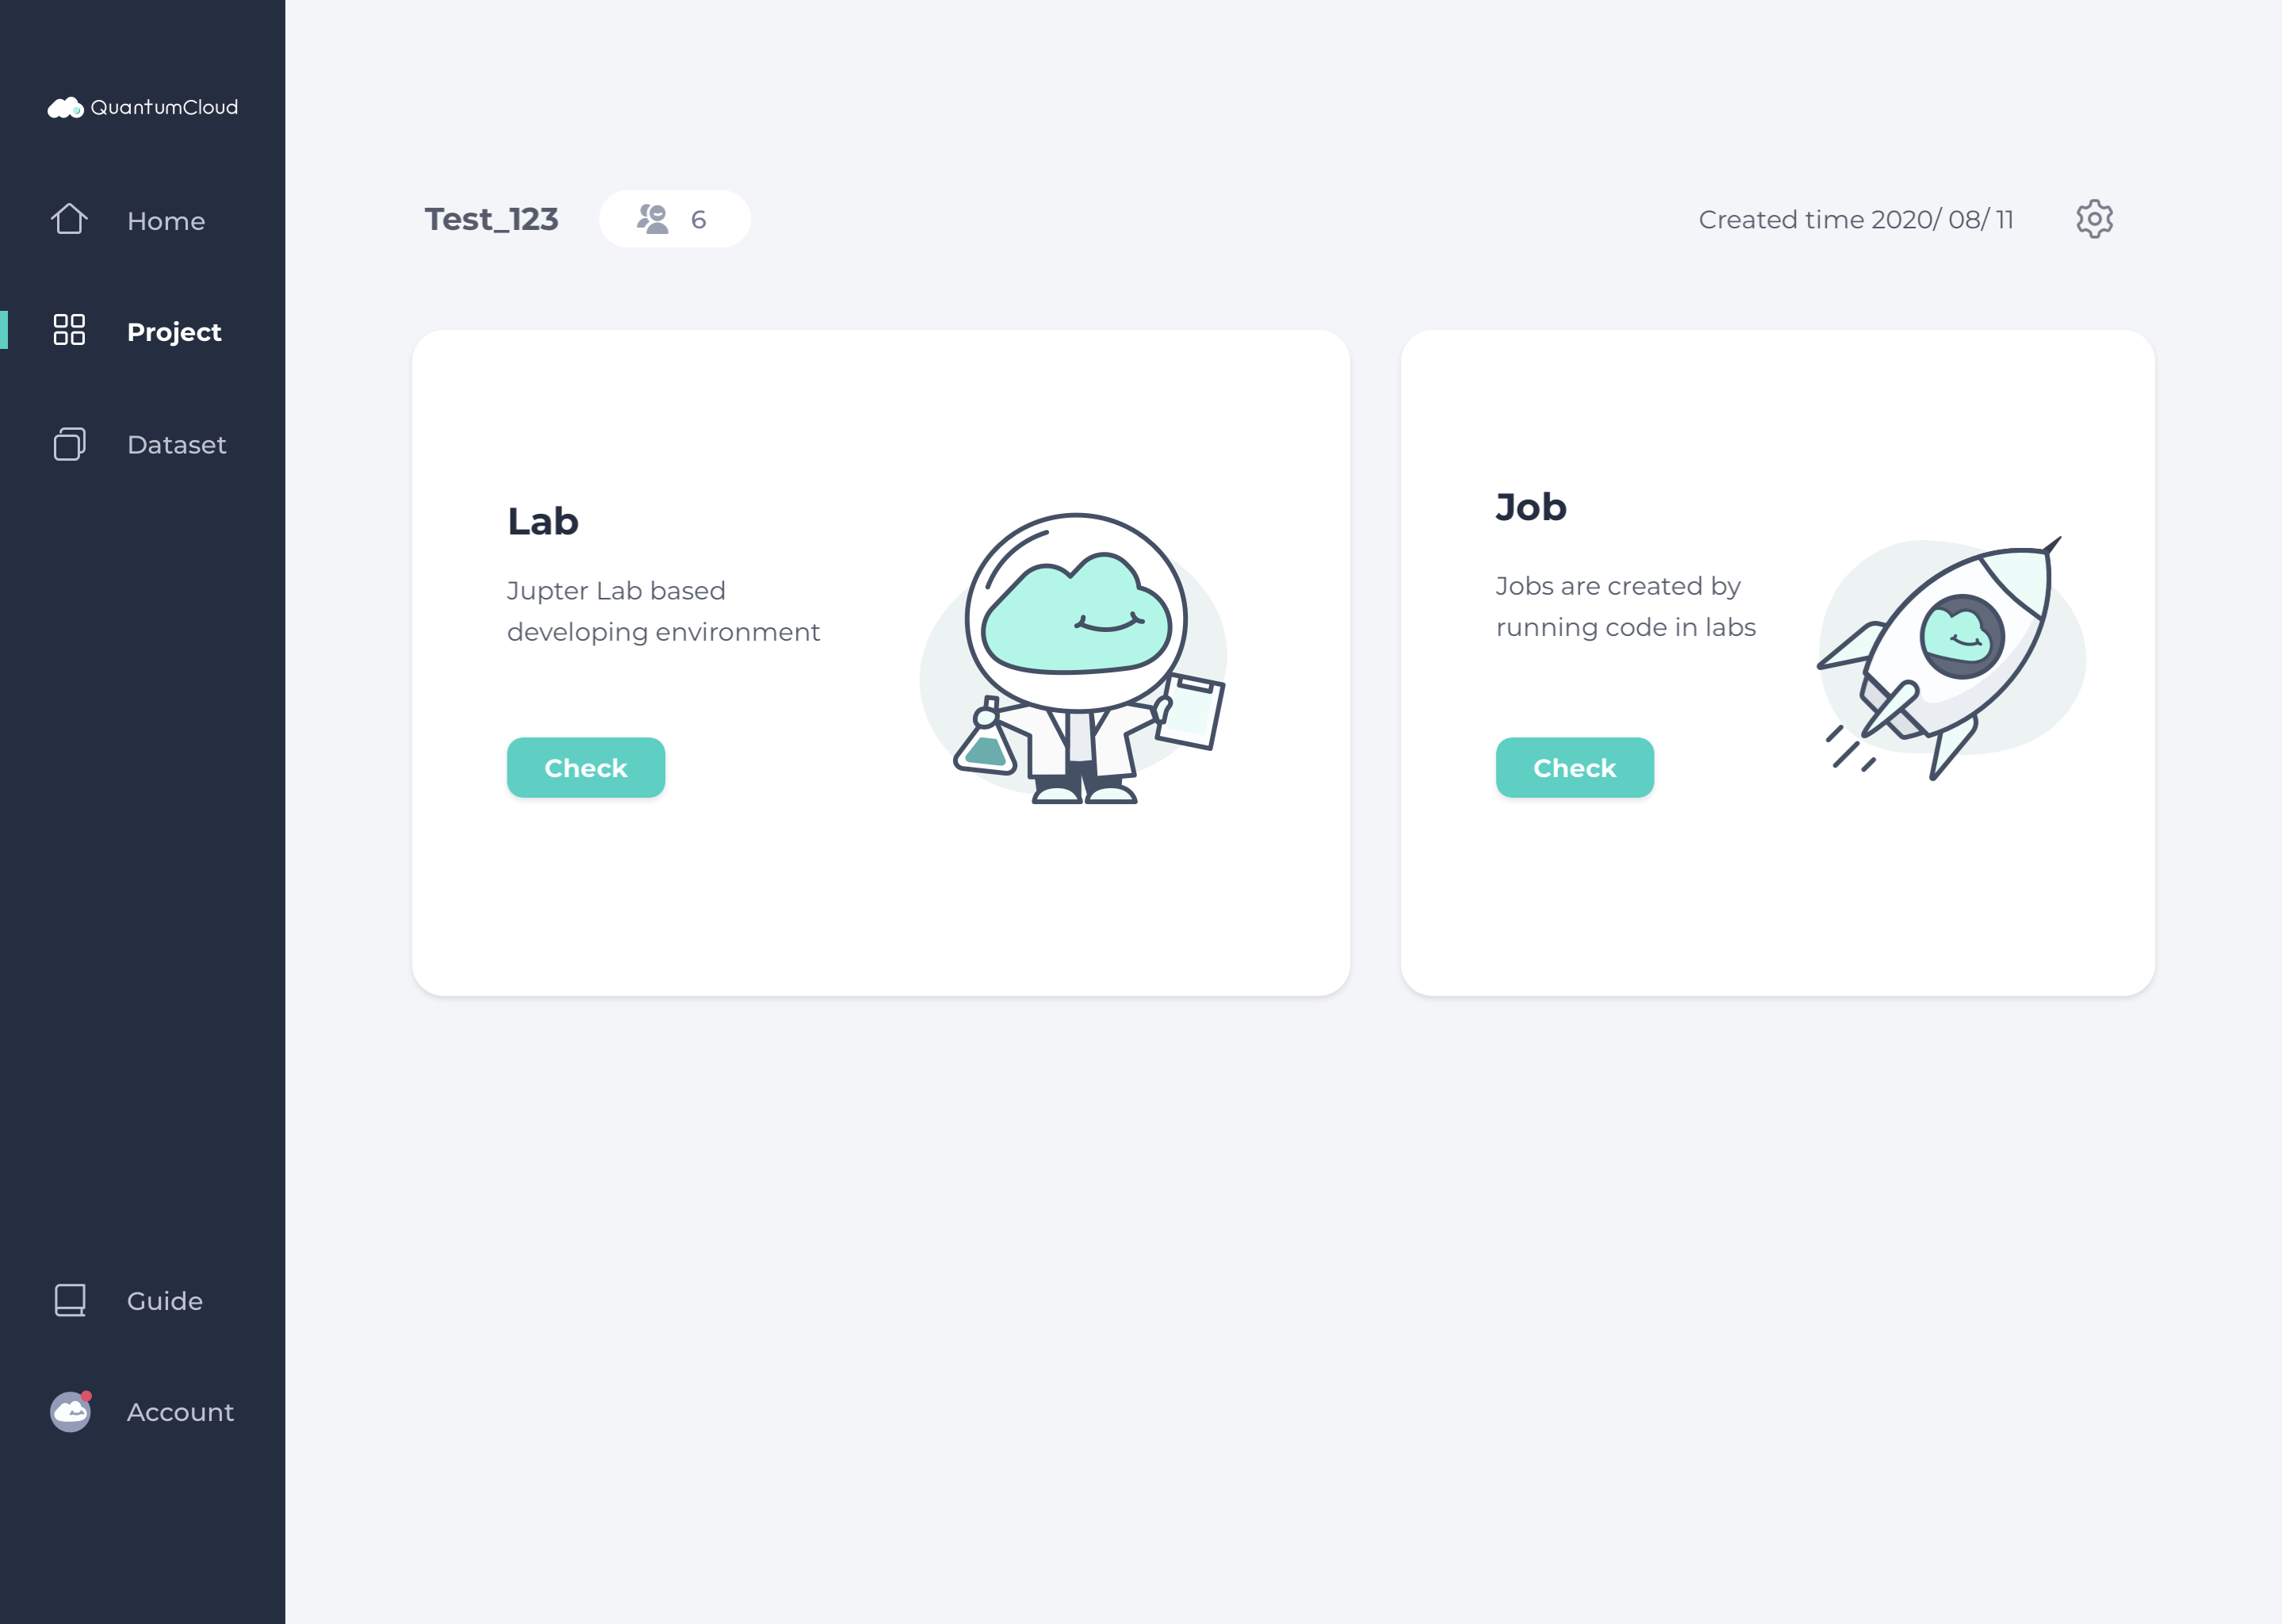
2. You can Check the status of your labs or jobs.
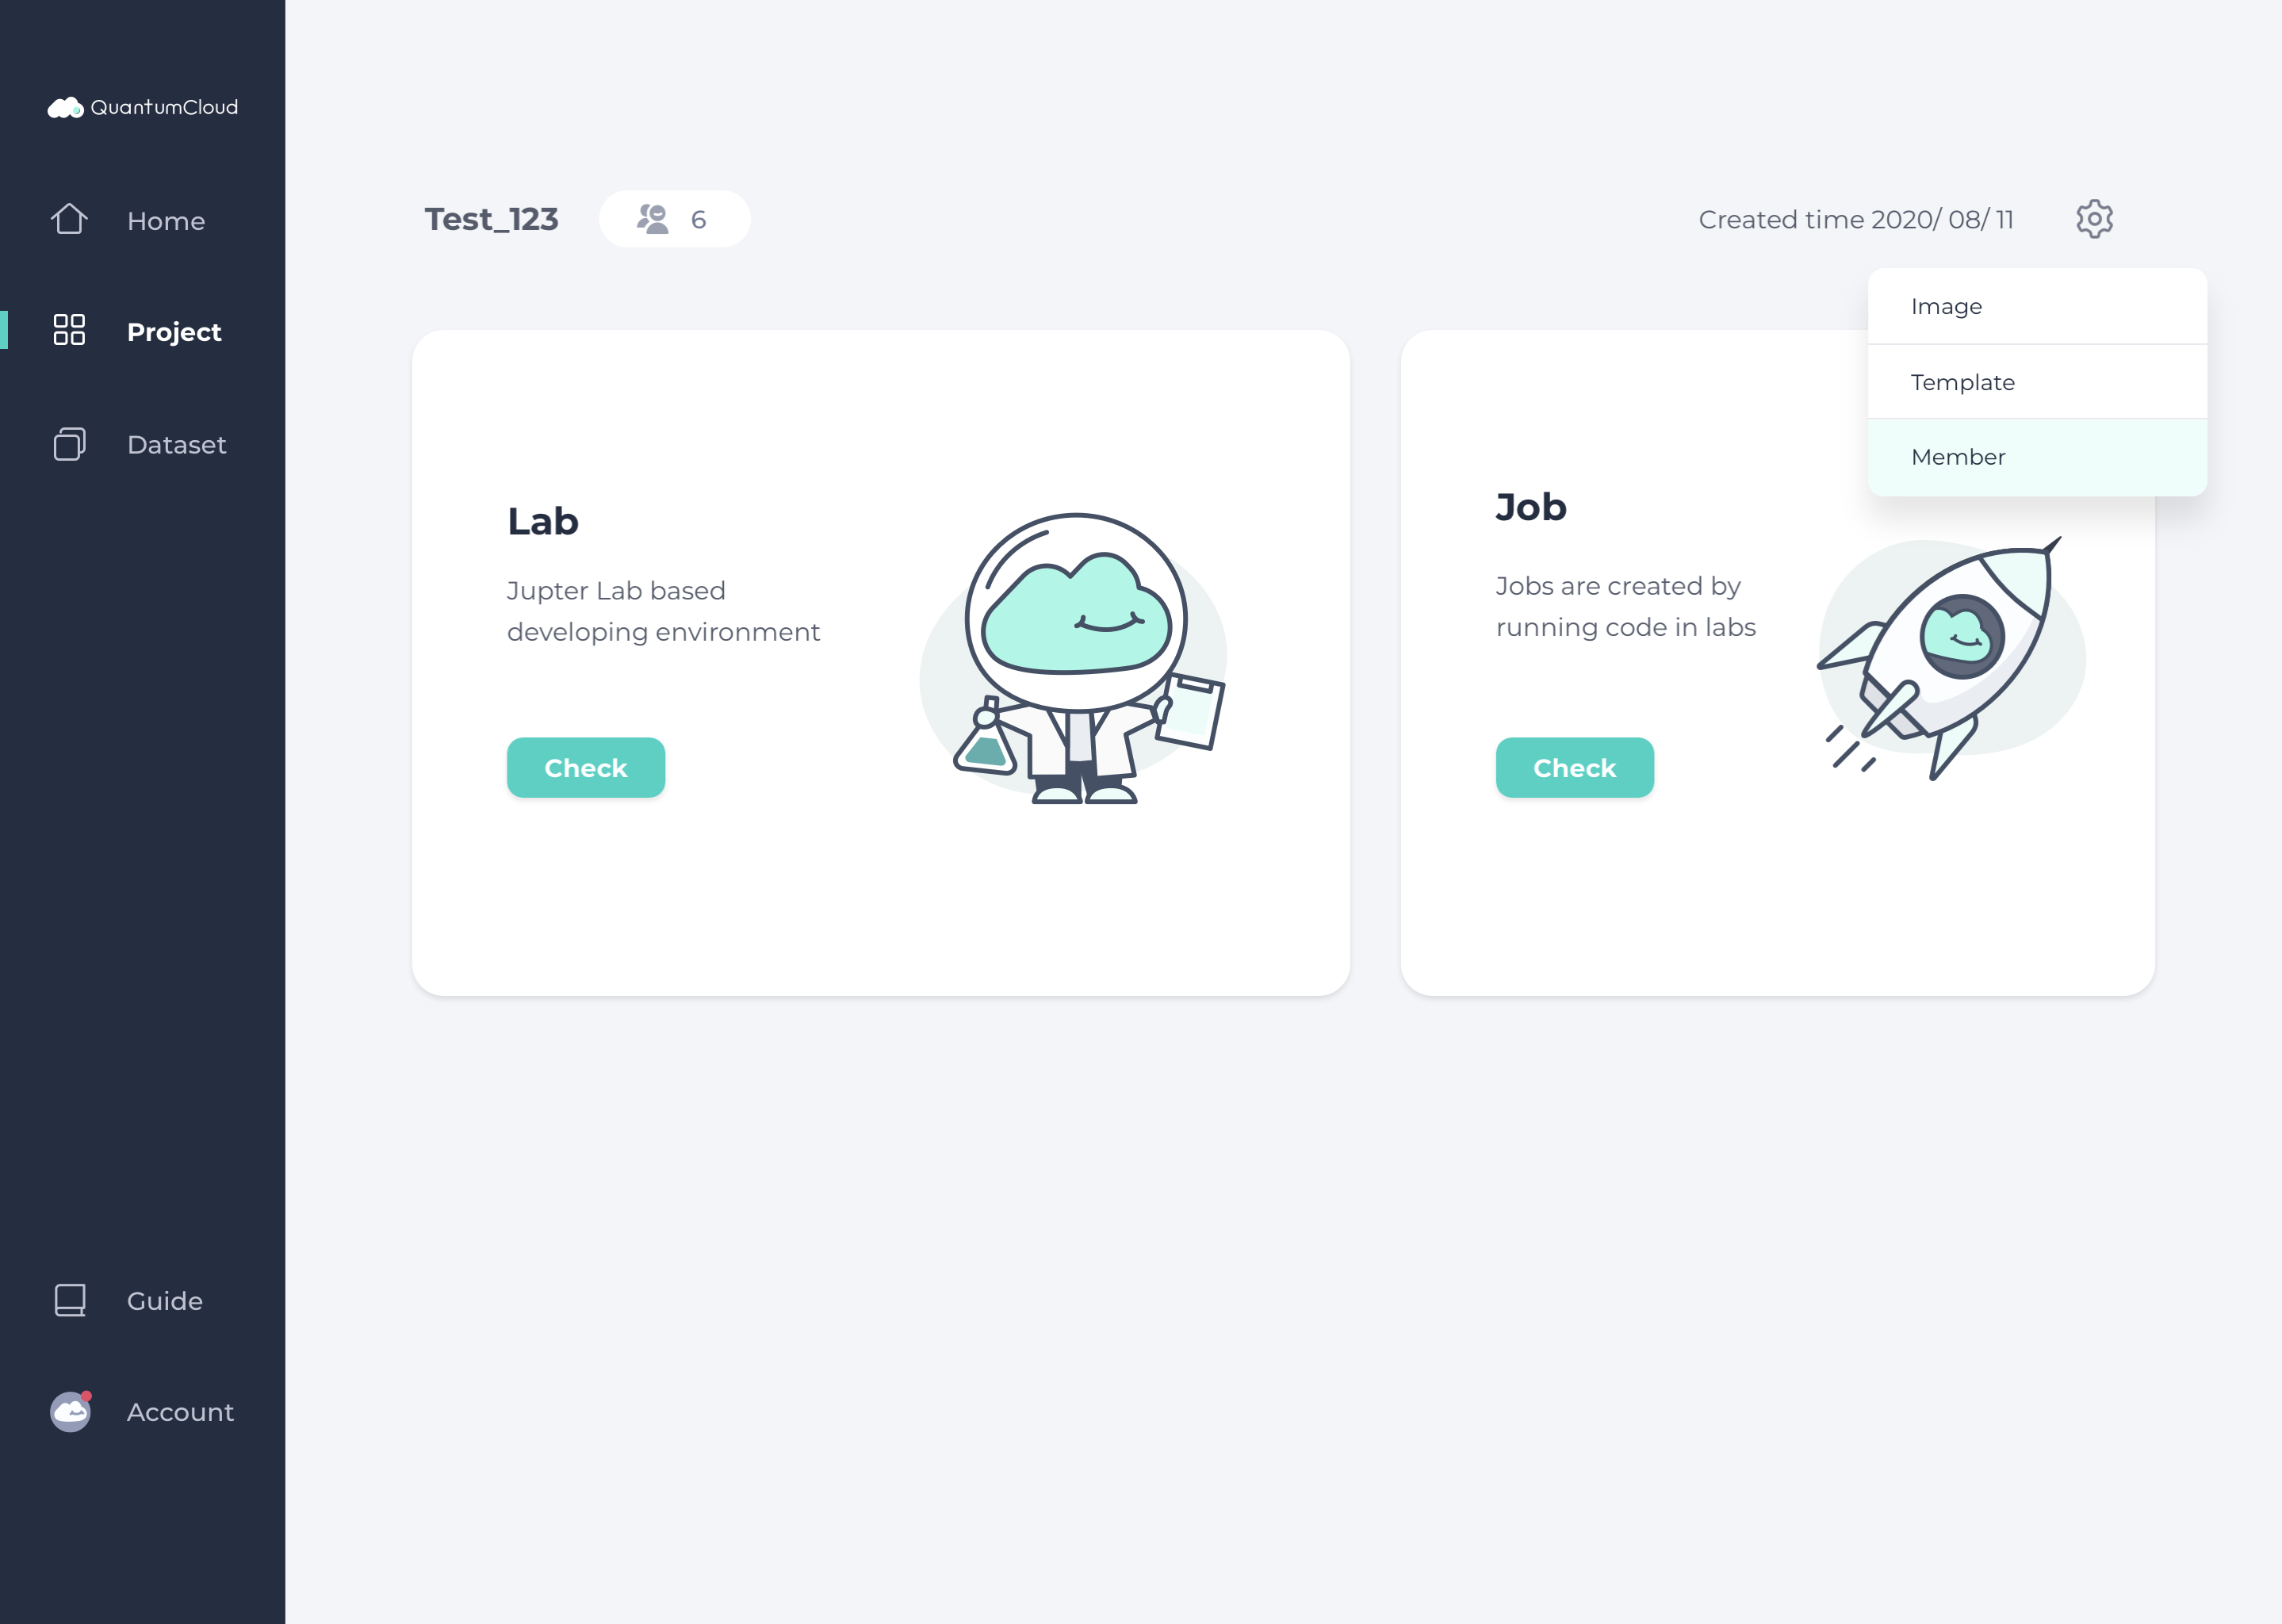
1. You can click the top right Settings button to add Member or view Image associated with this project.
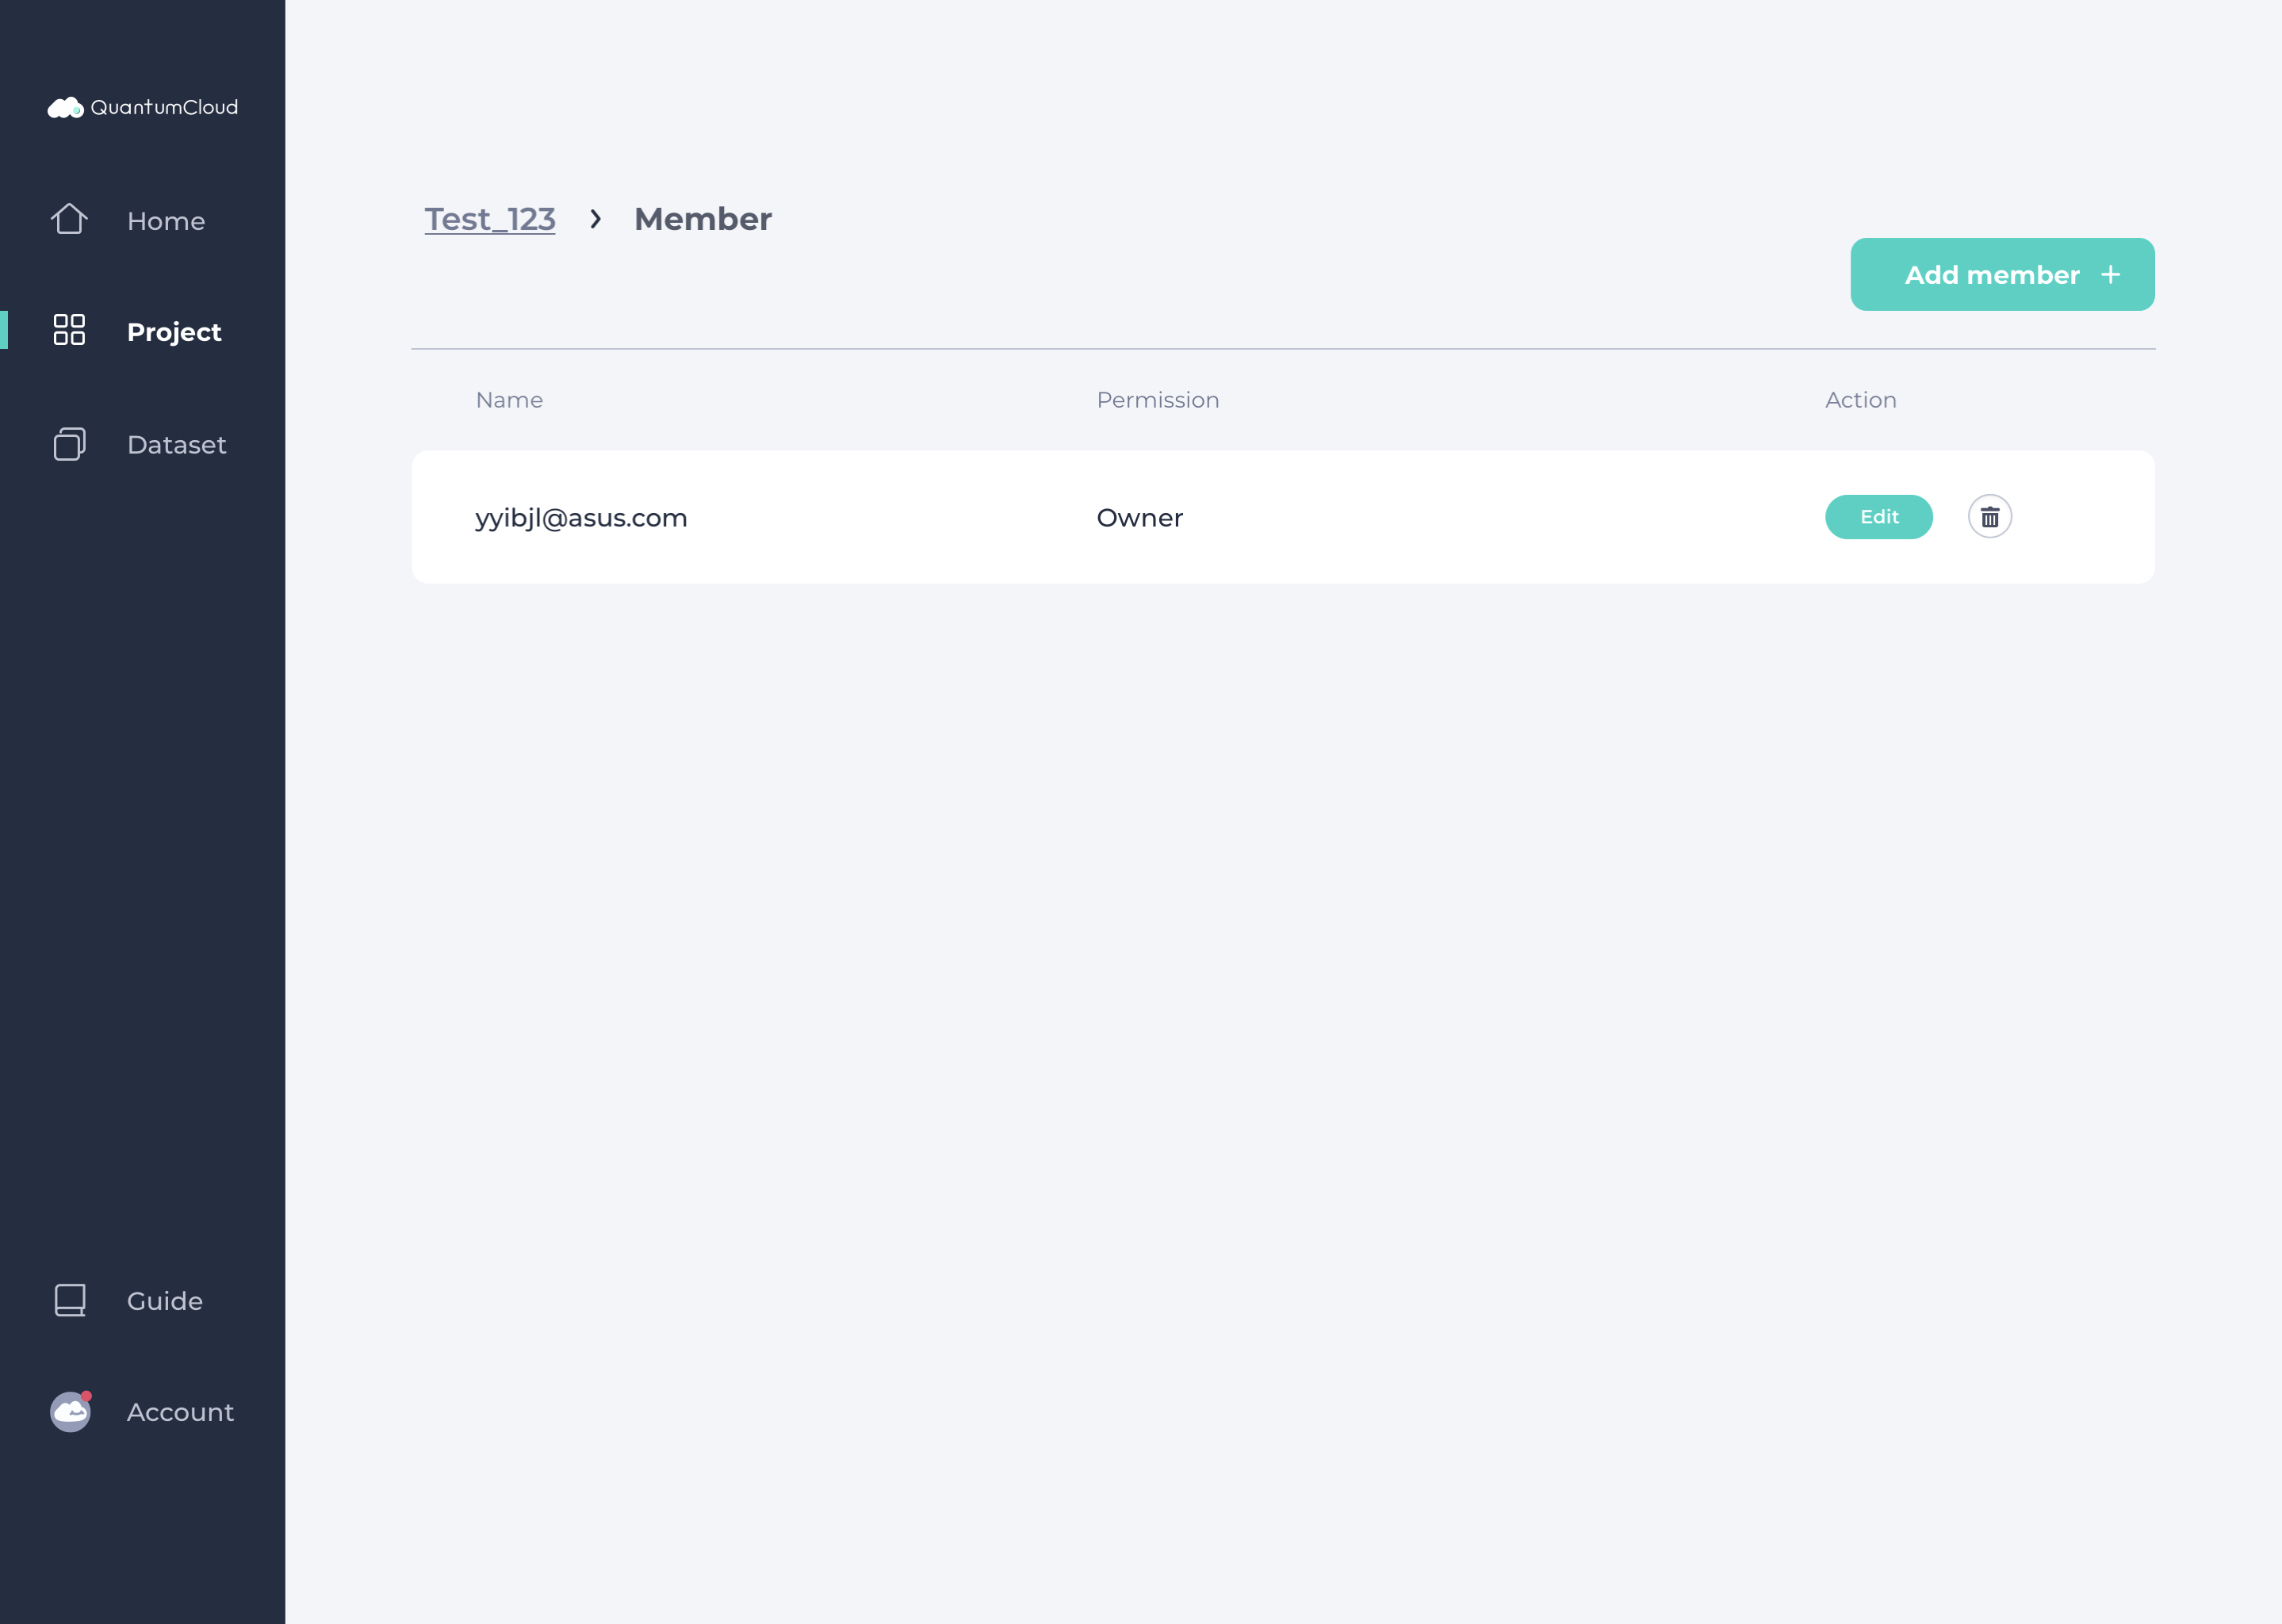
2. Click Add member + to add a new member to this project.

3. Enter the account email of the new member. You can set this member as a Writer (can edit) or Reader (view only) at Permission.
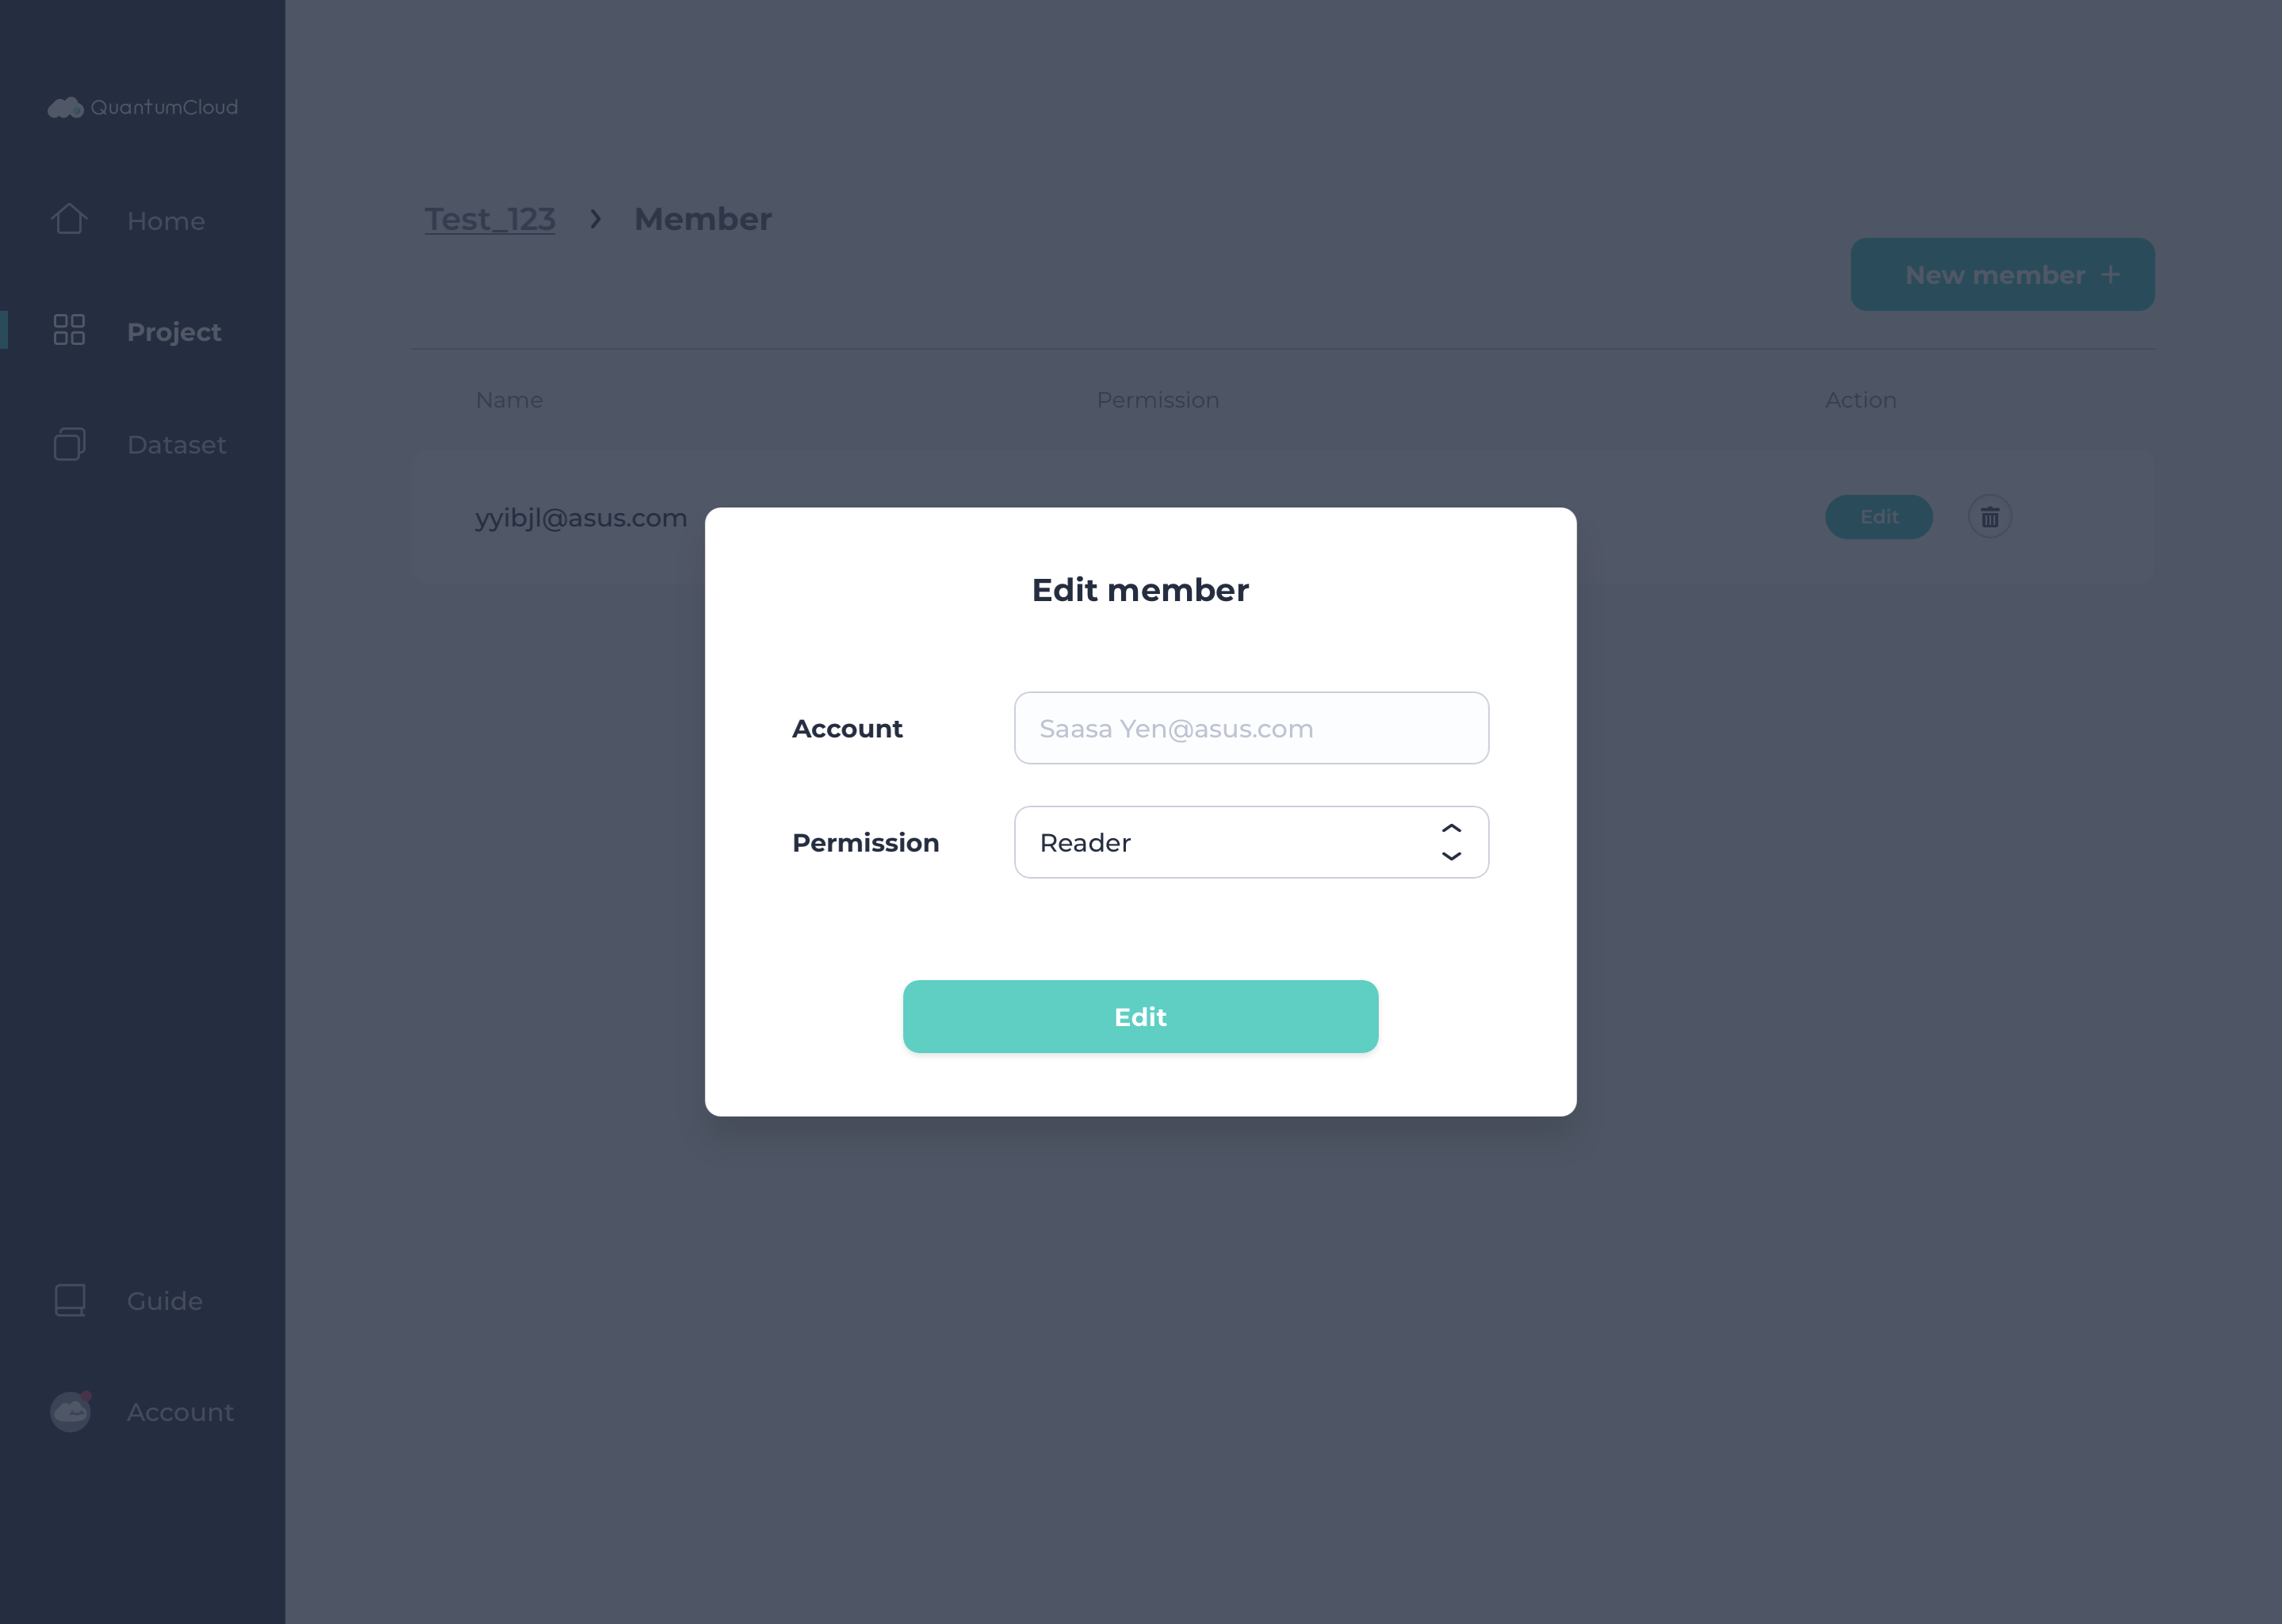
4. Step 2 > Click Edit to edit the permission level of selected member. Choose the desired Permission setting.
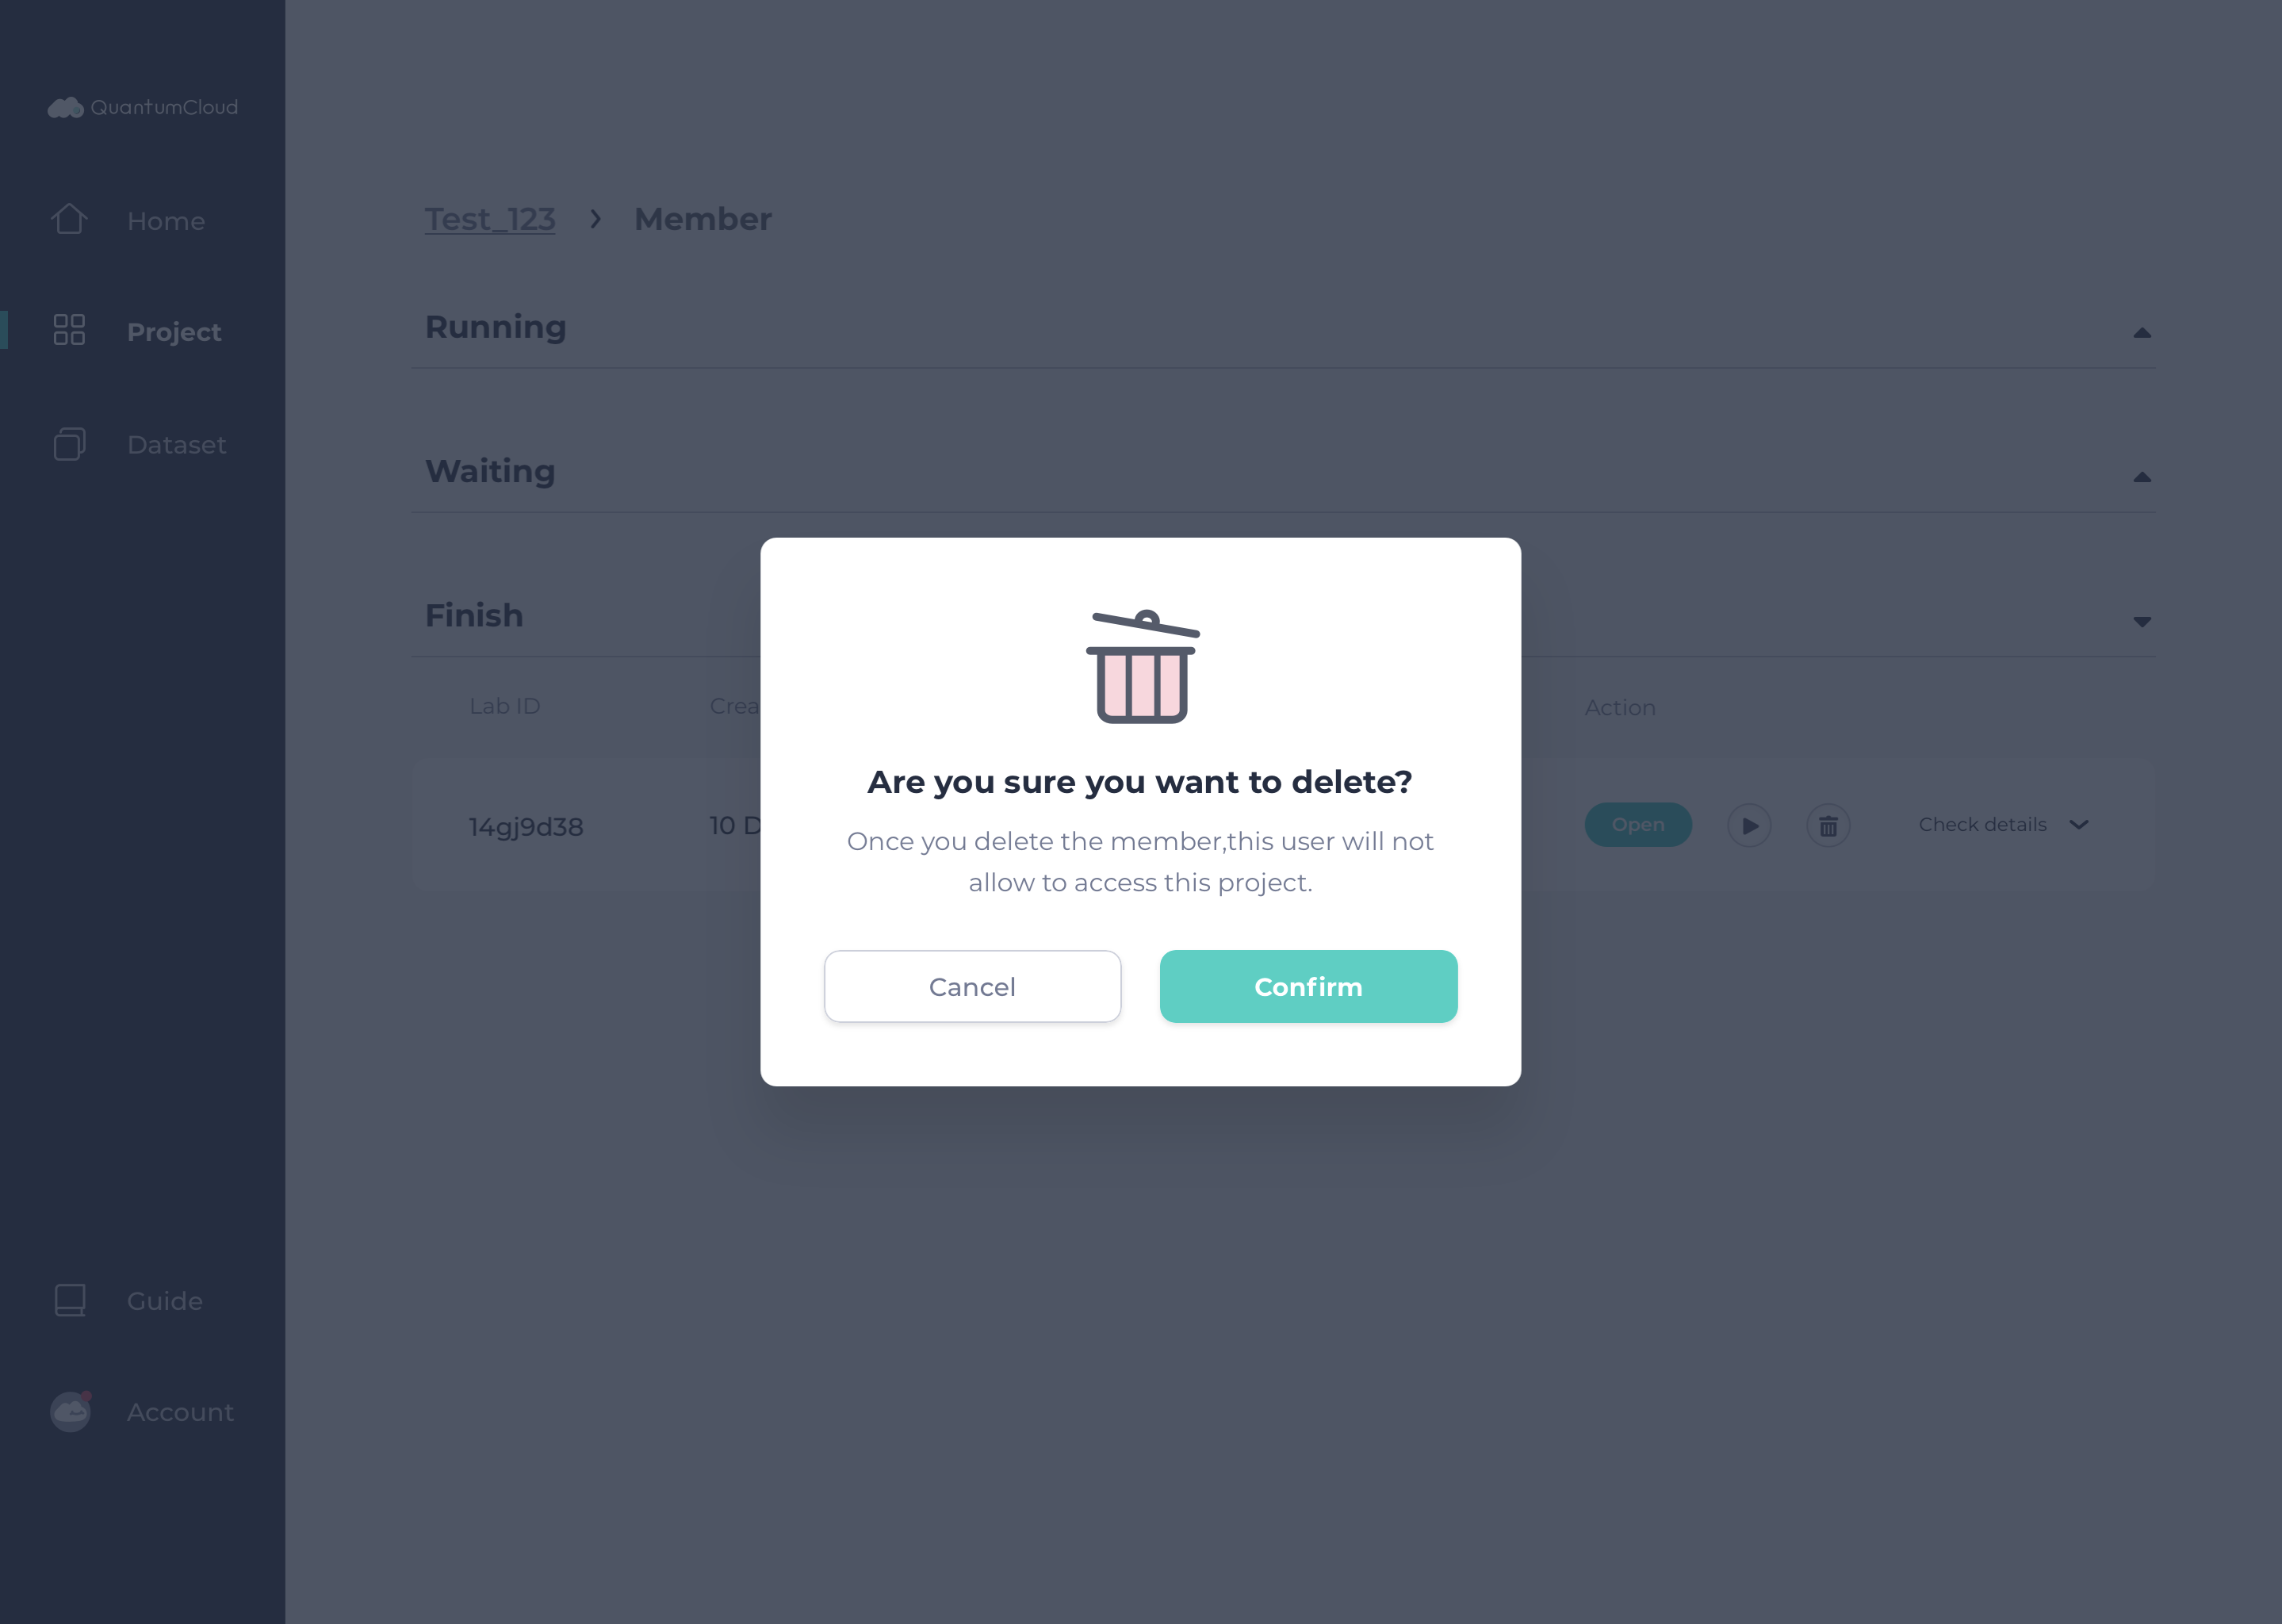
5. Step 2 > Click Trash icon to delete the selected member. Click Confirm to delete.
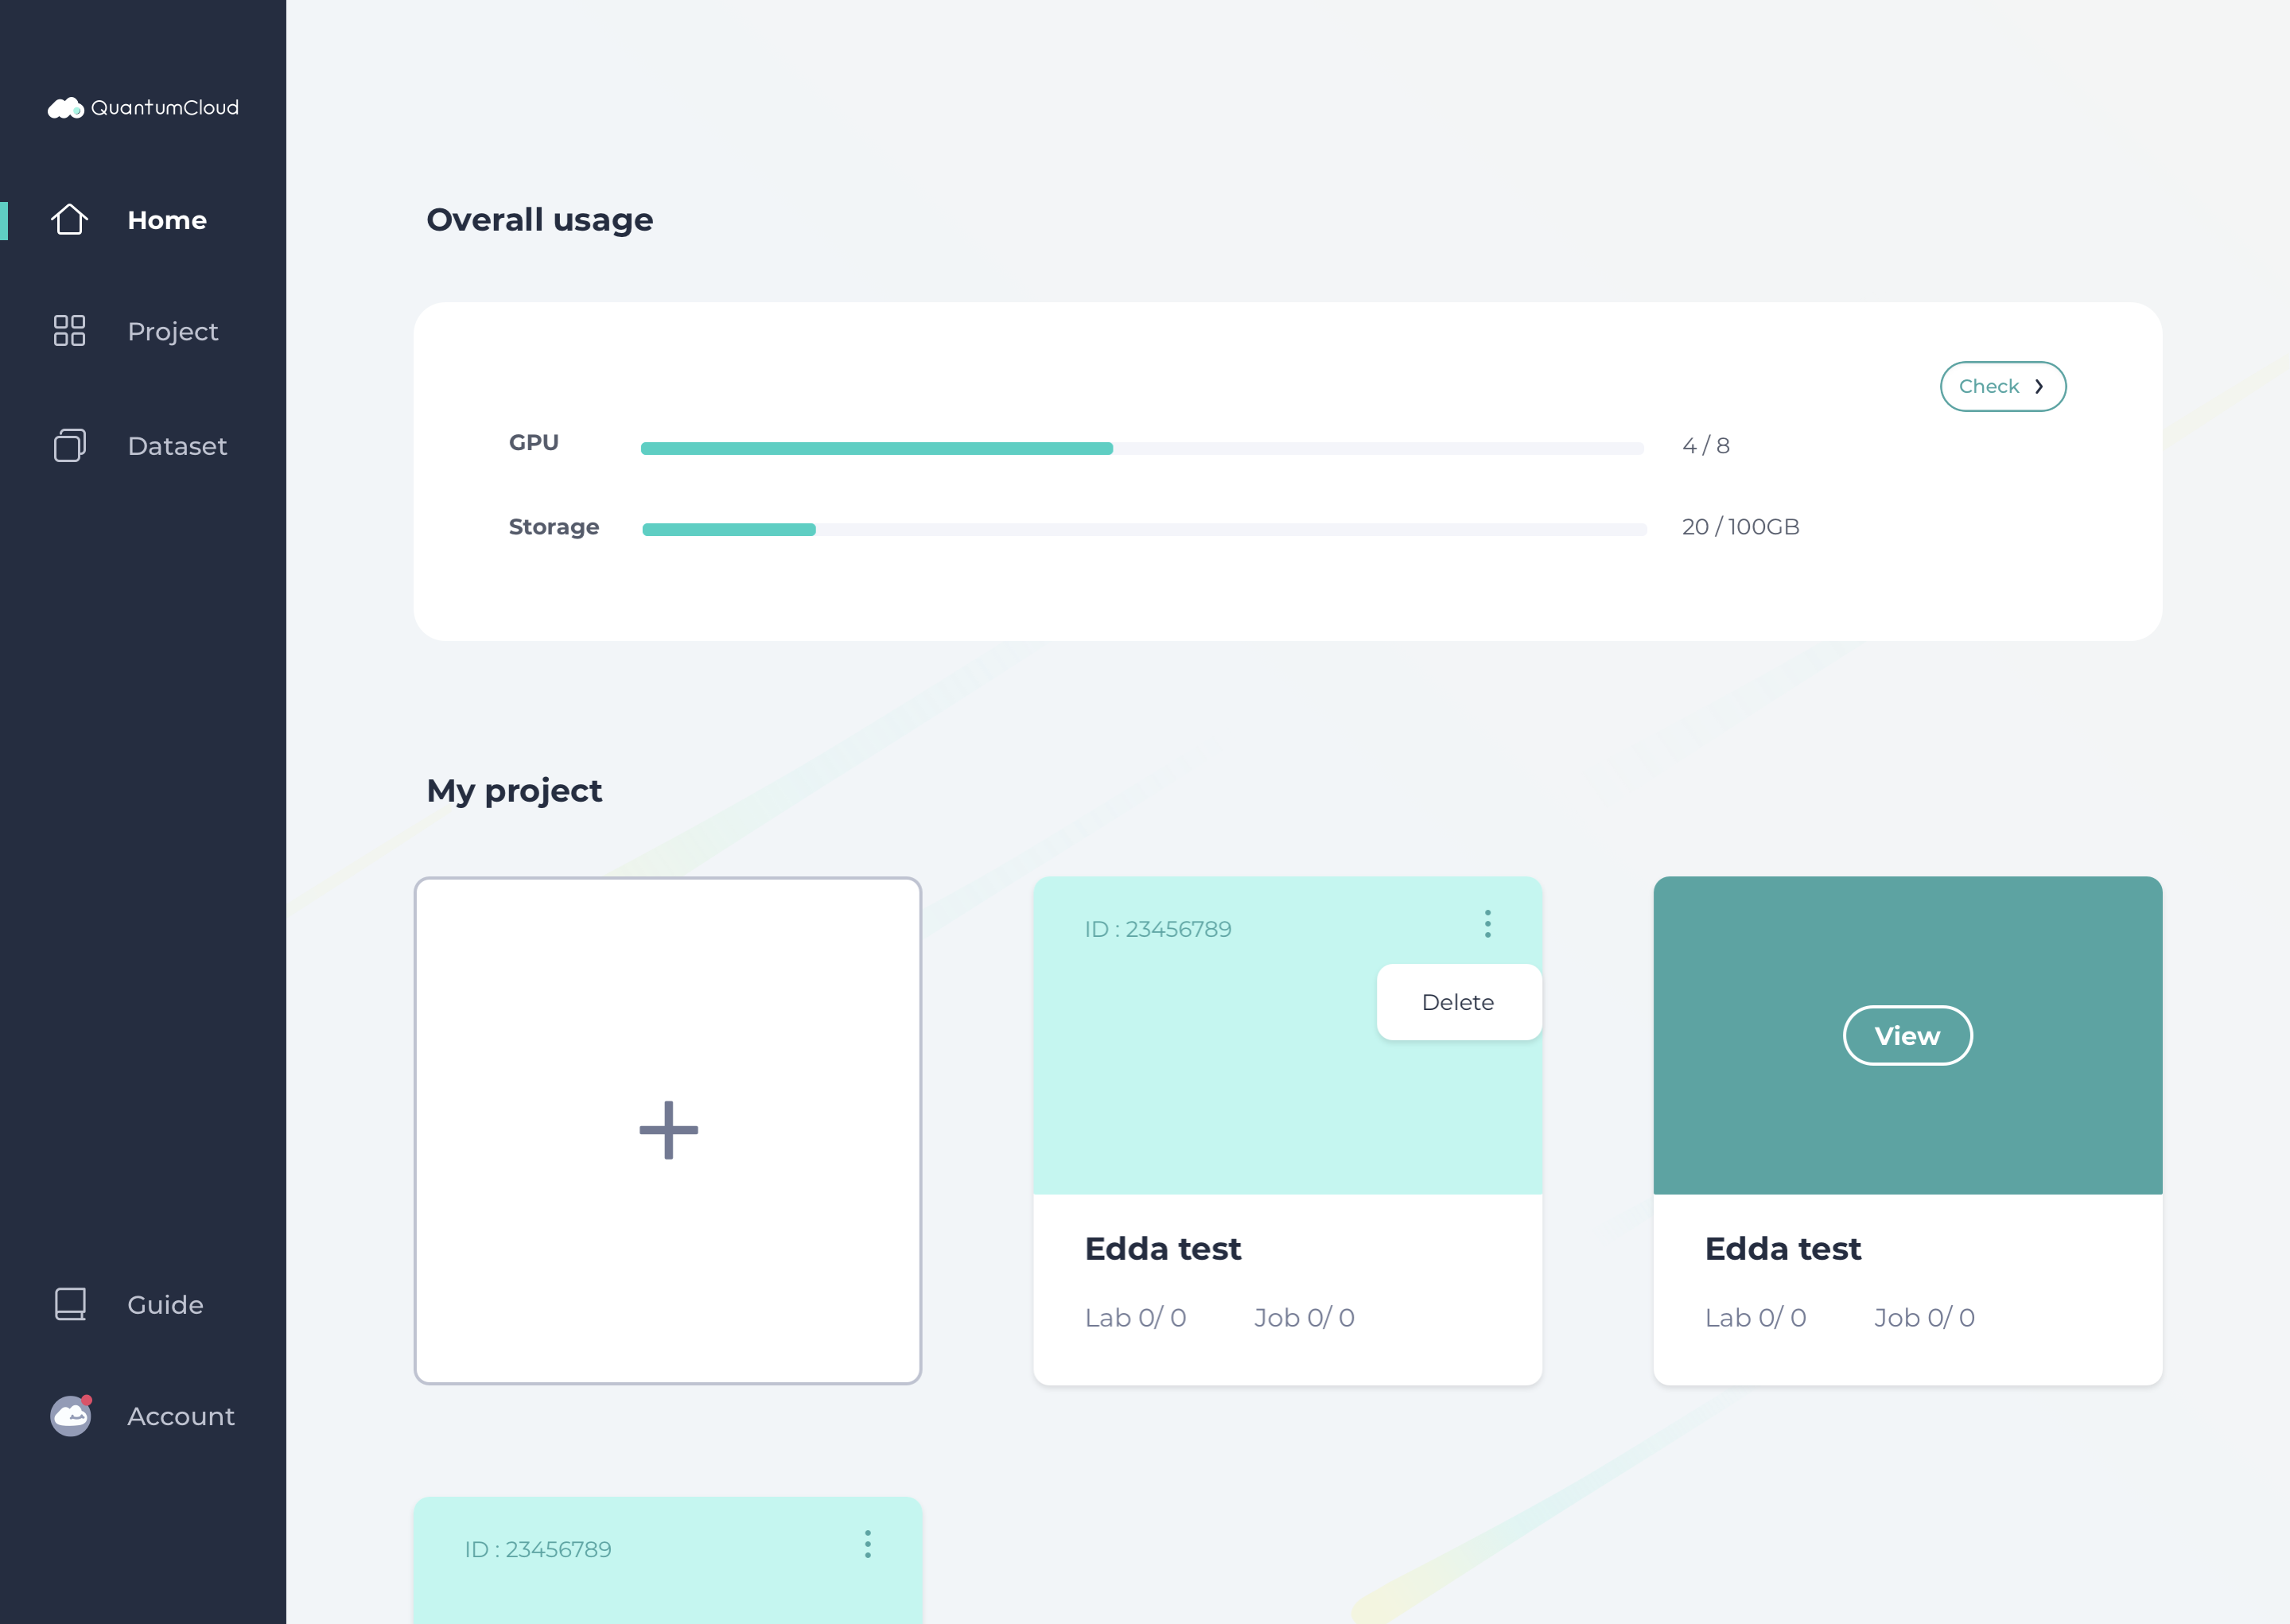
Click Delete to delete selected project.
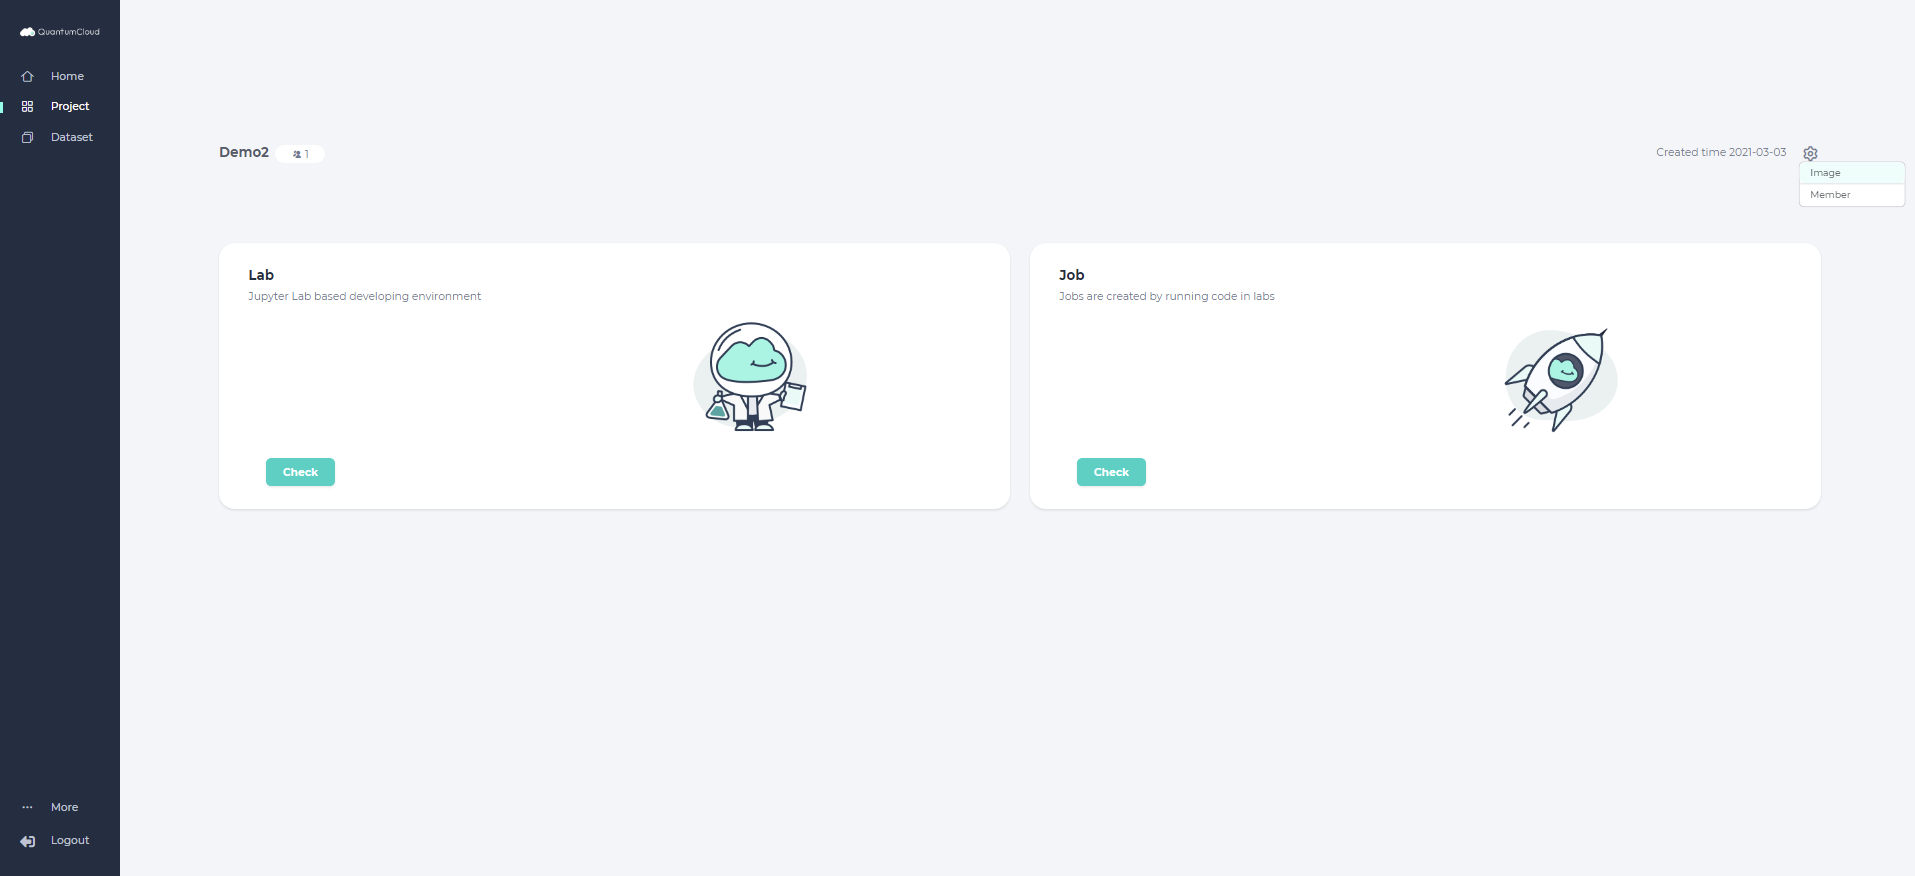
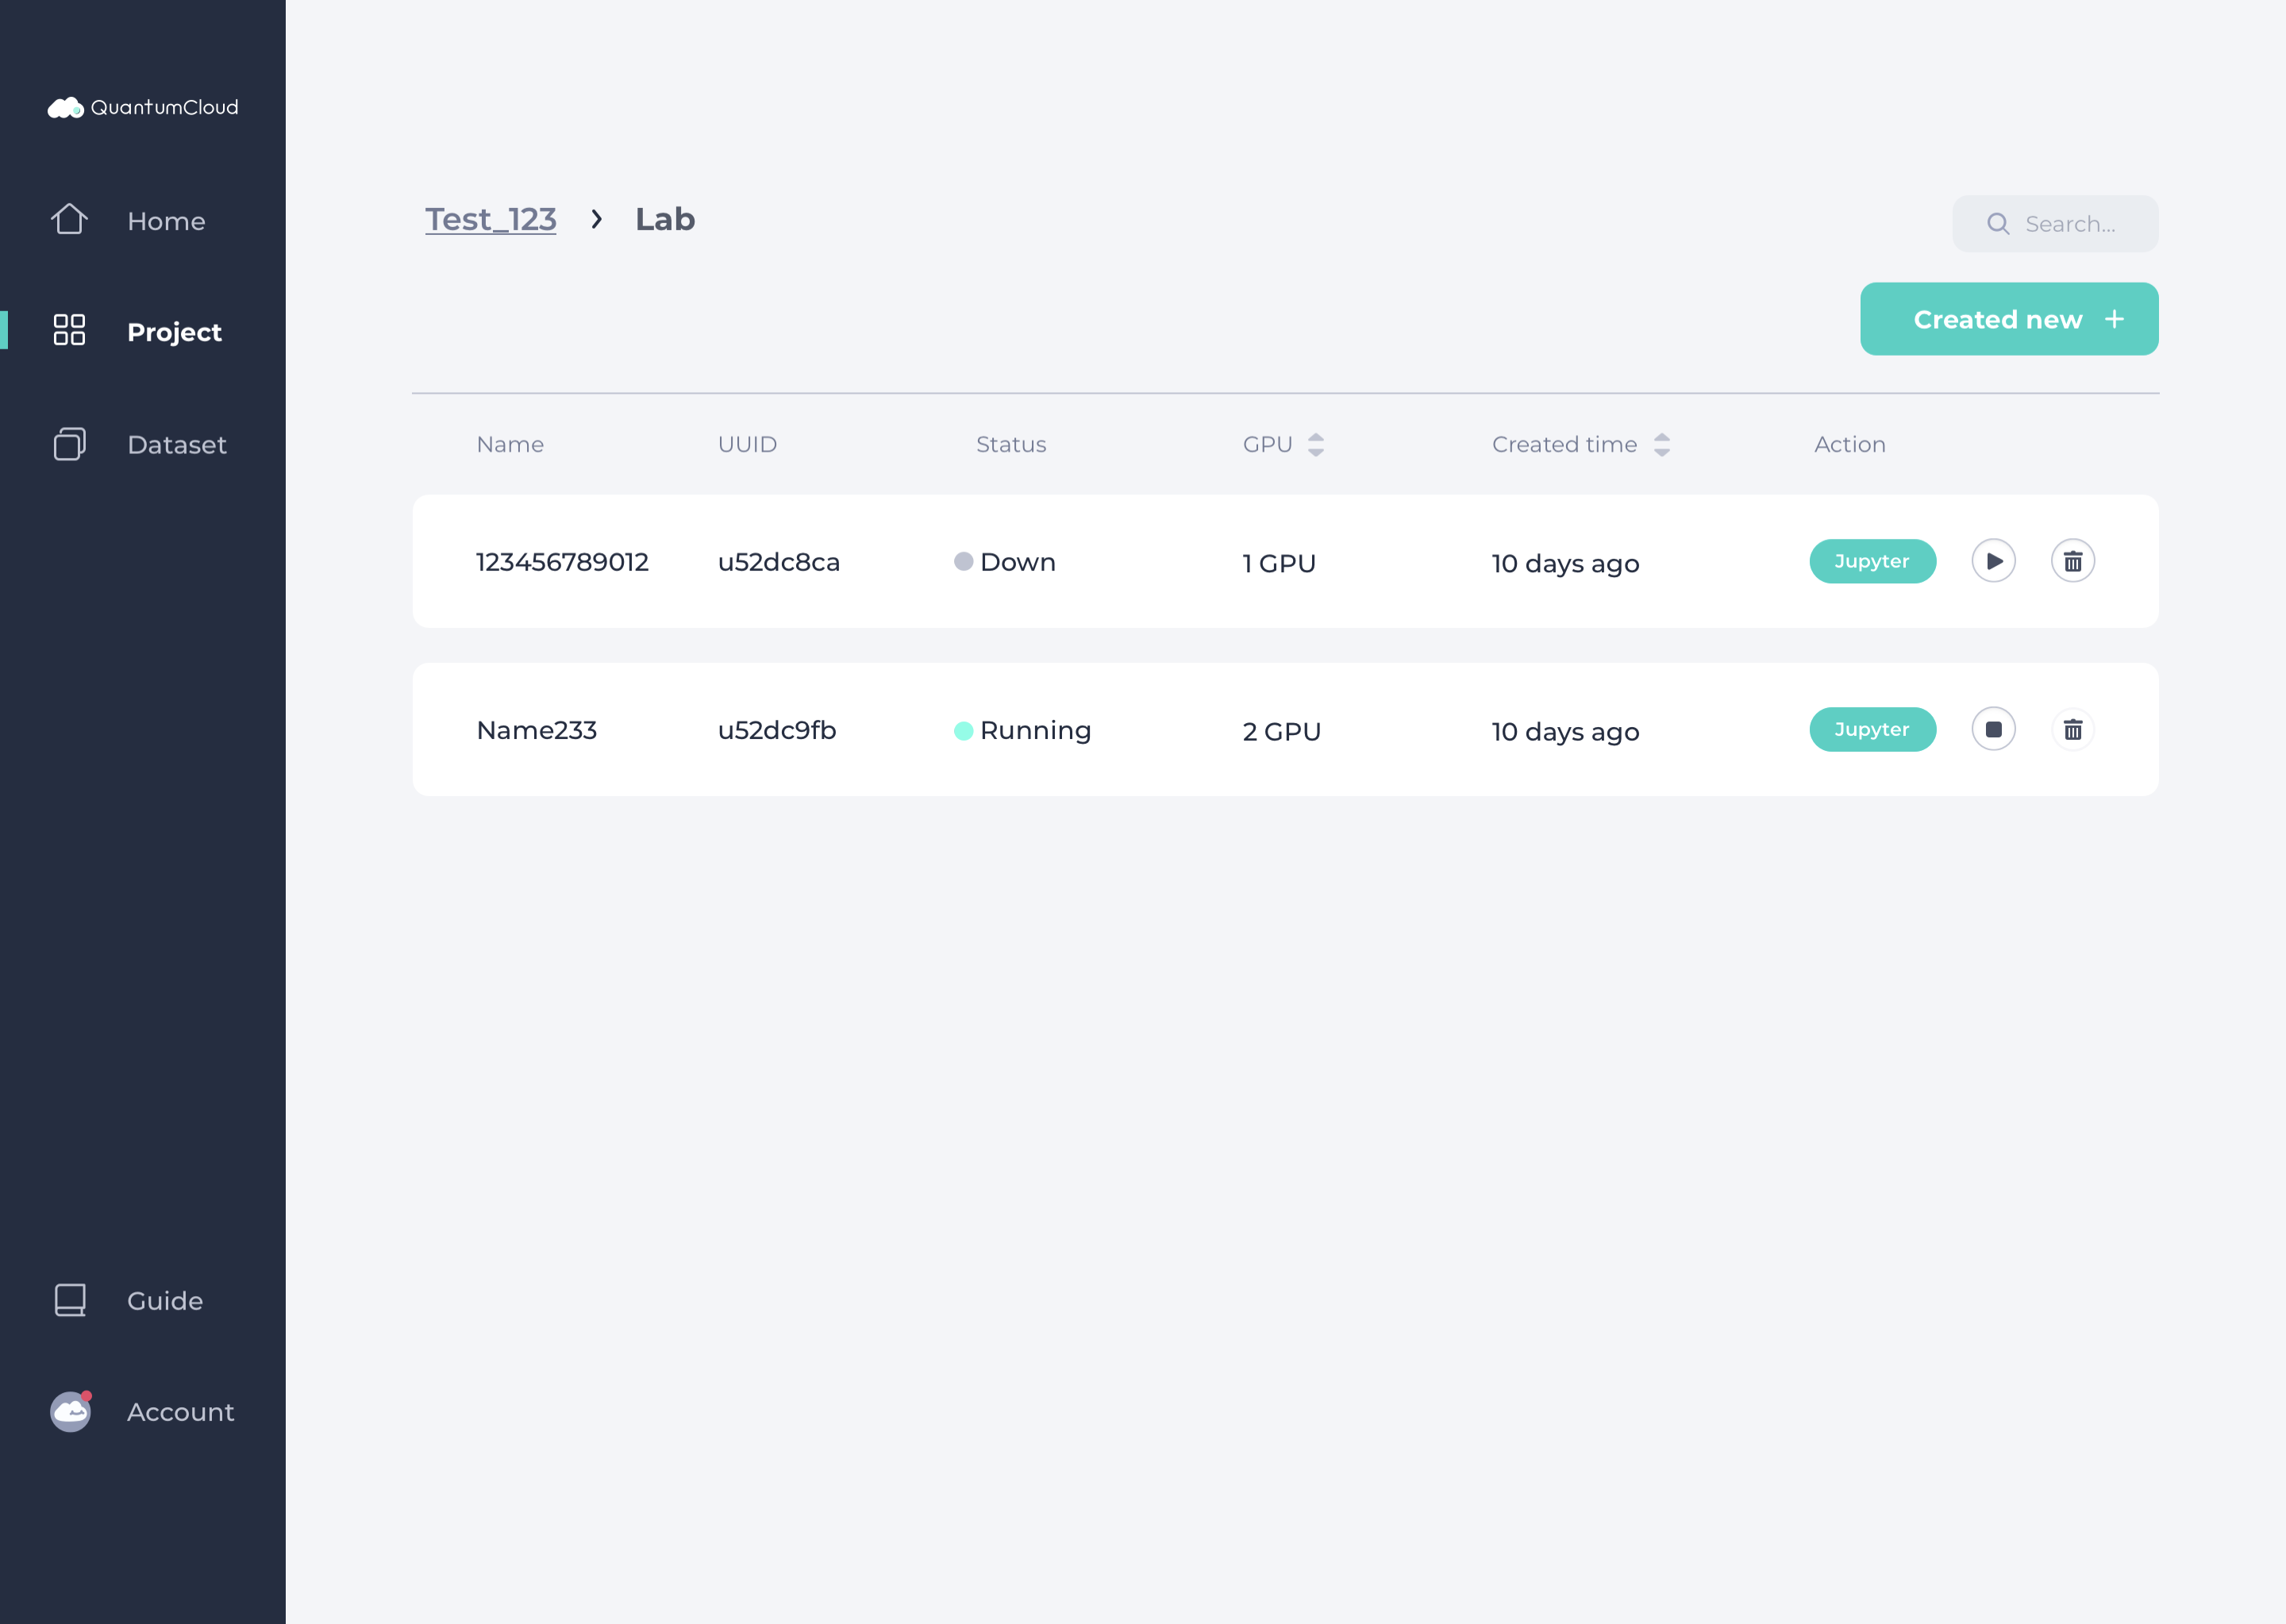
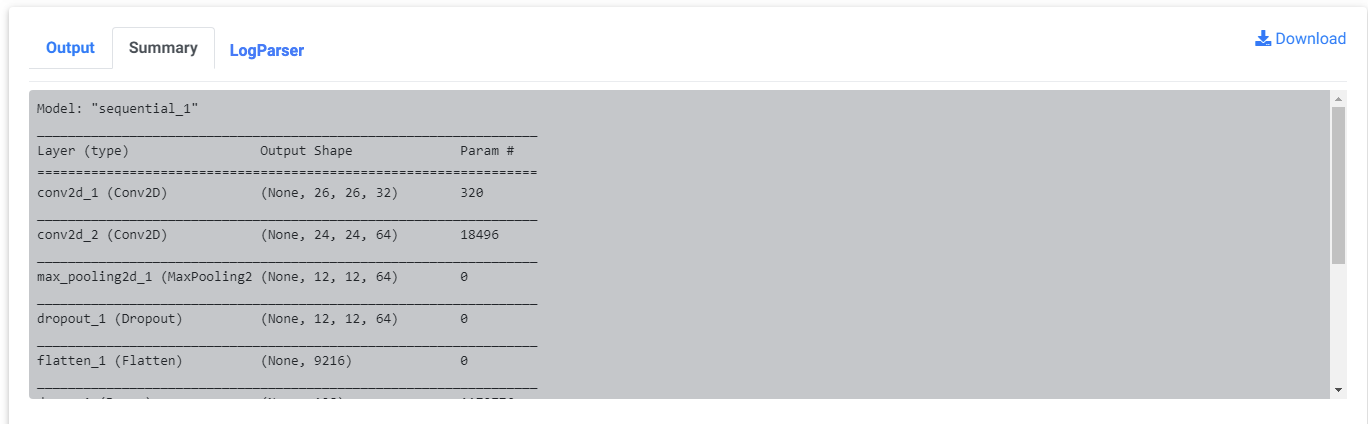
1. On Project page, click Settings button > Image
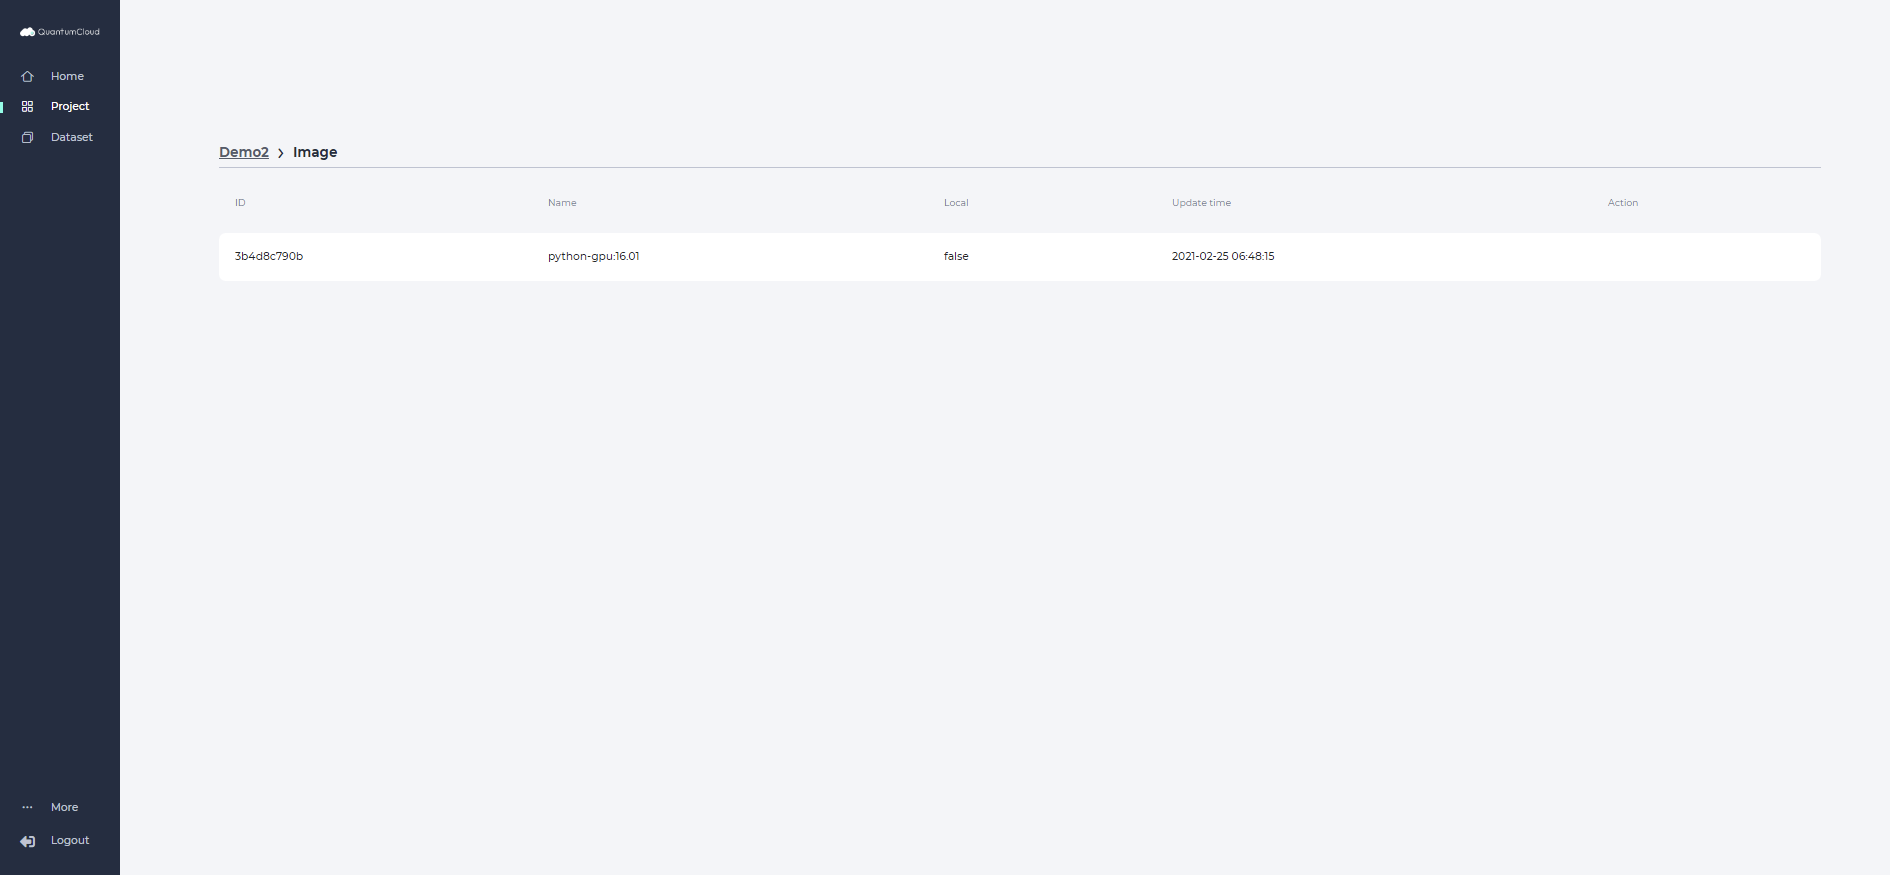
2. You can see information about the list of images saved in this project.
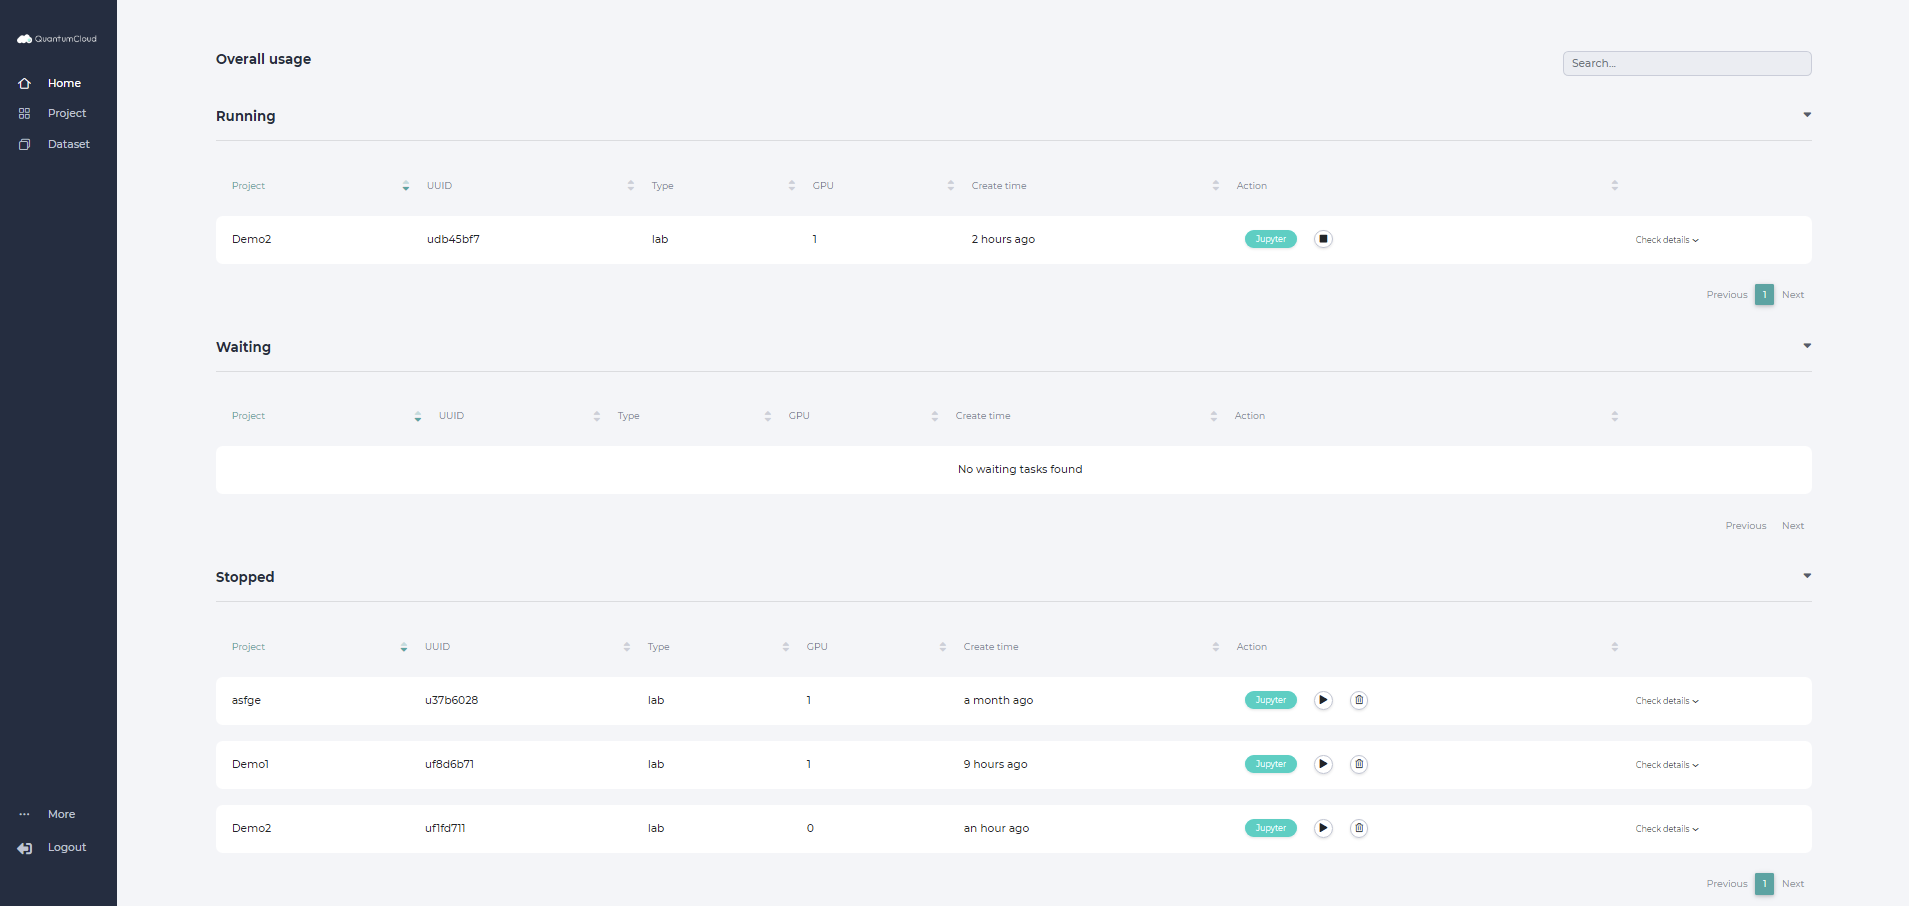
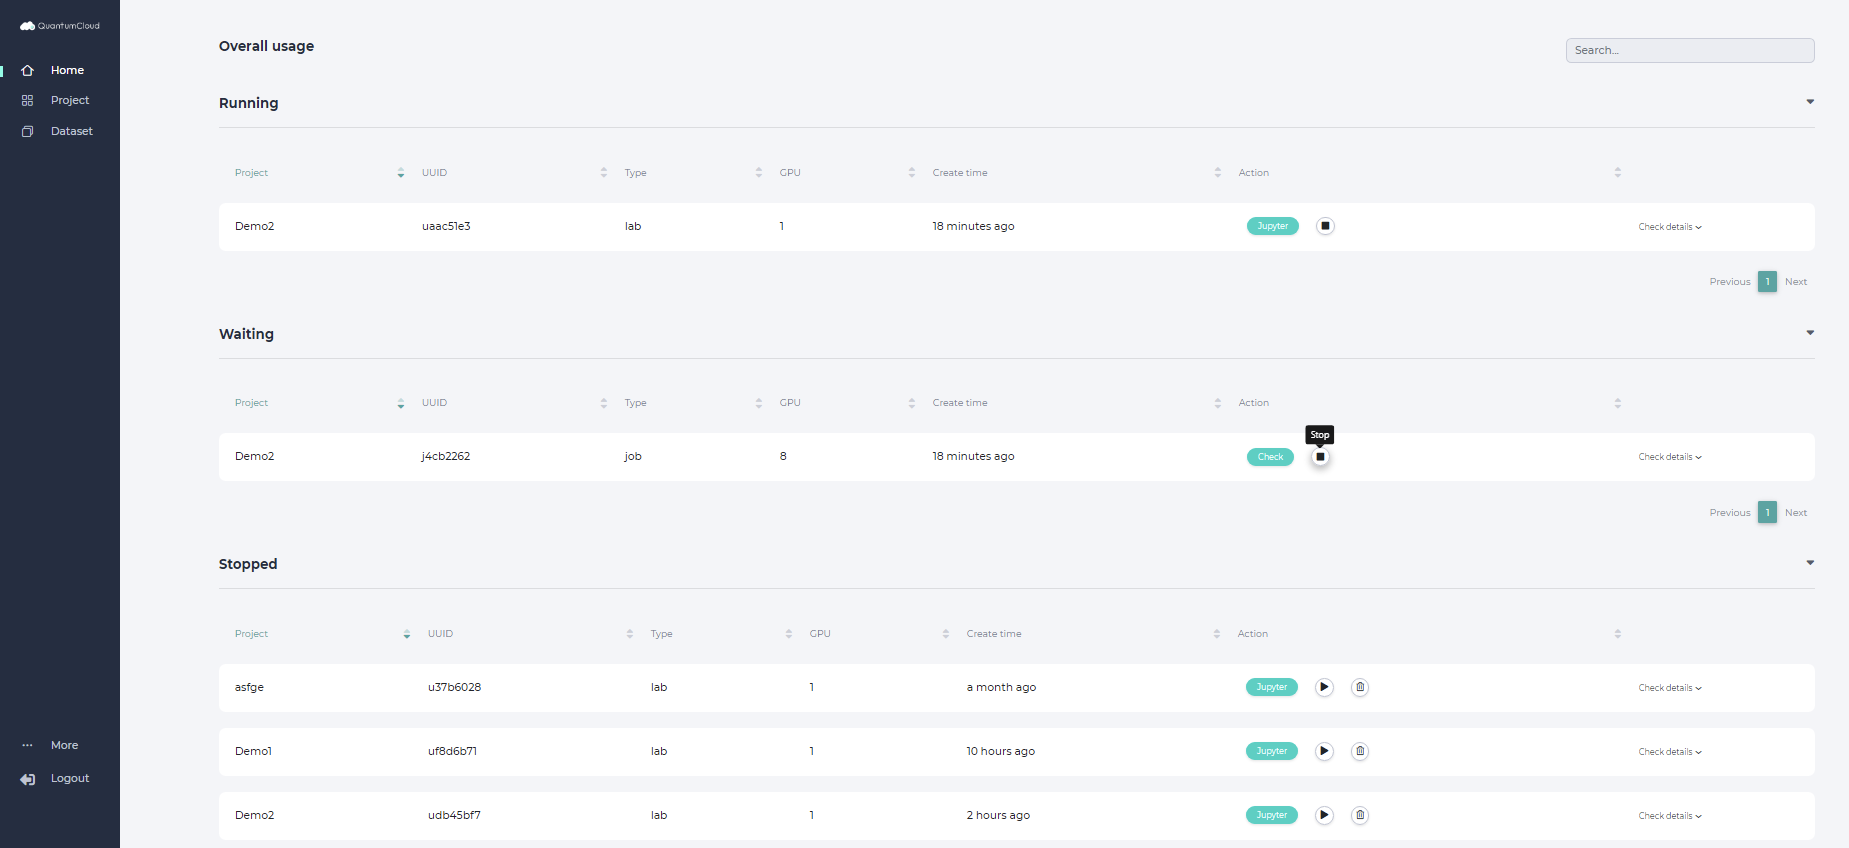
1. Home > Click Check under Overall usage
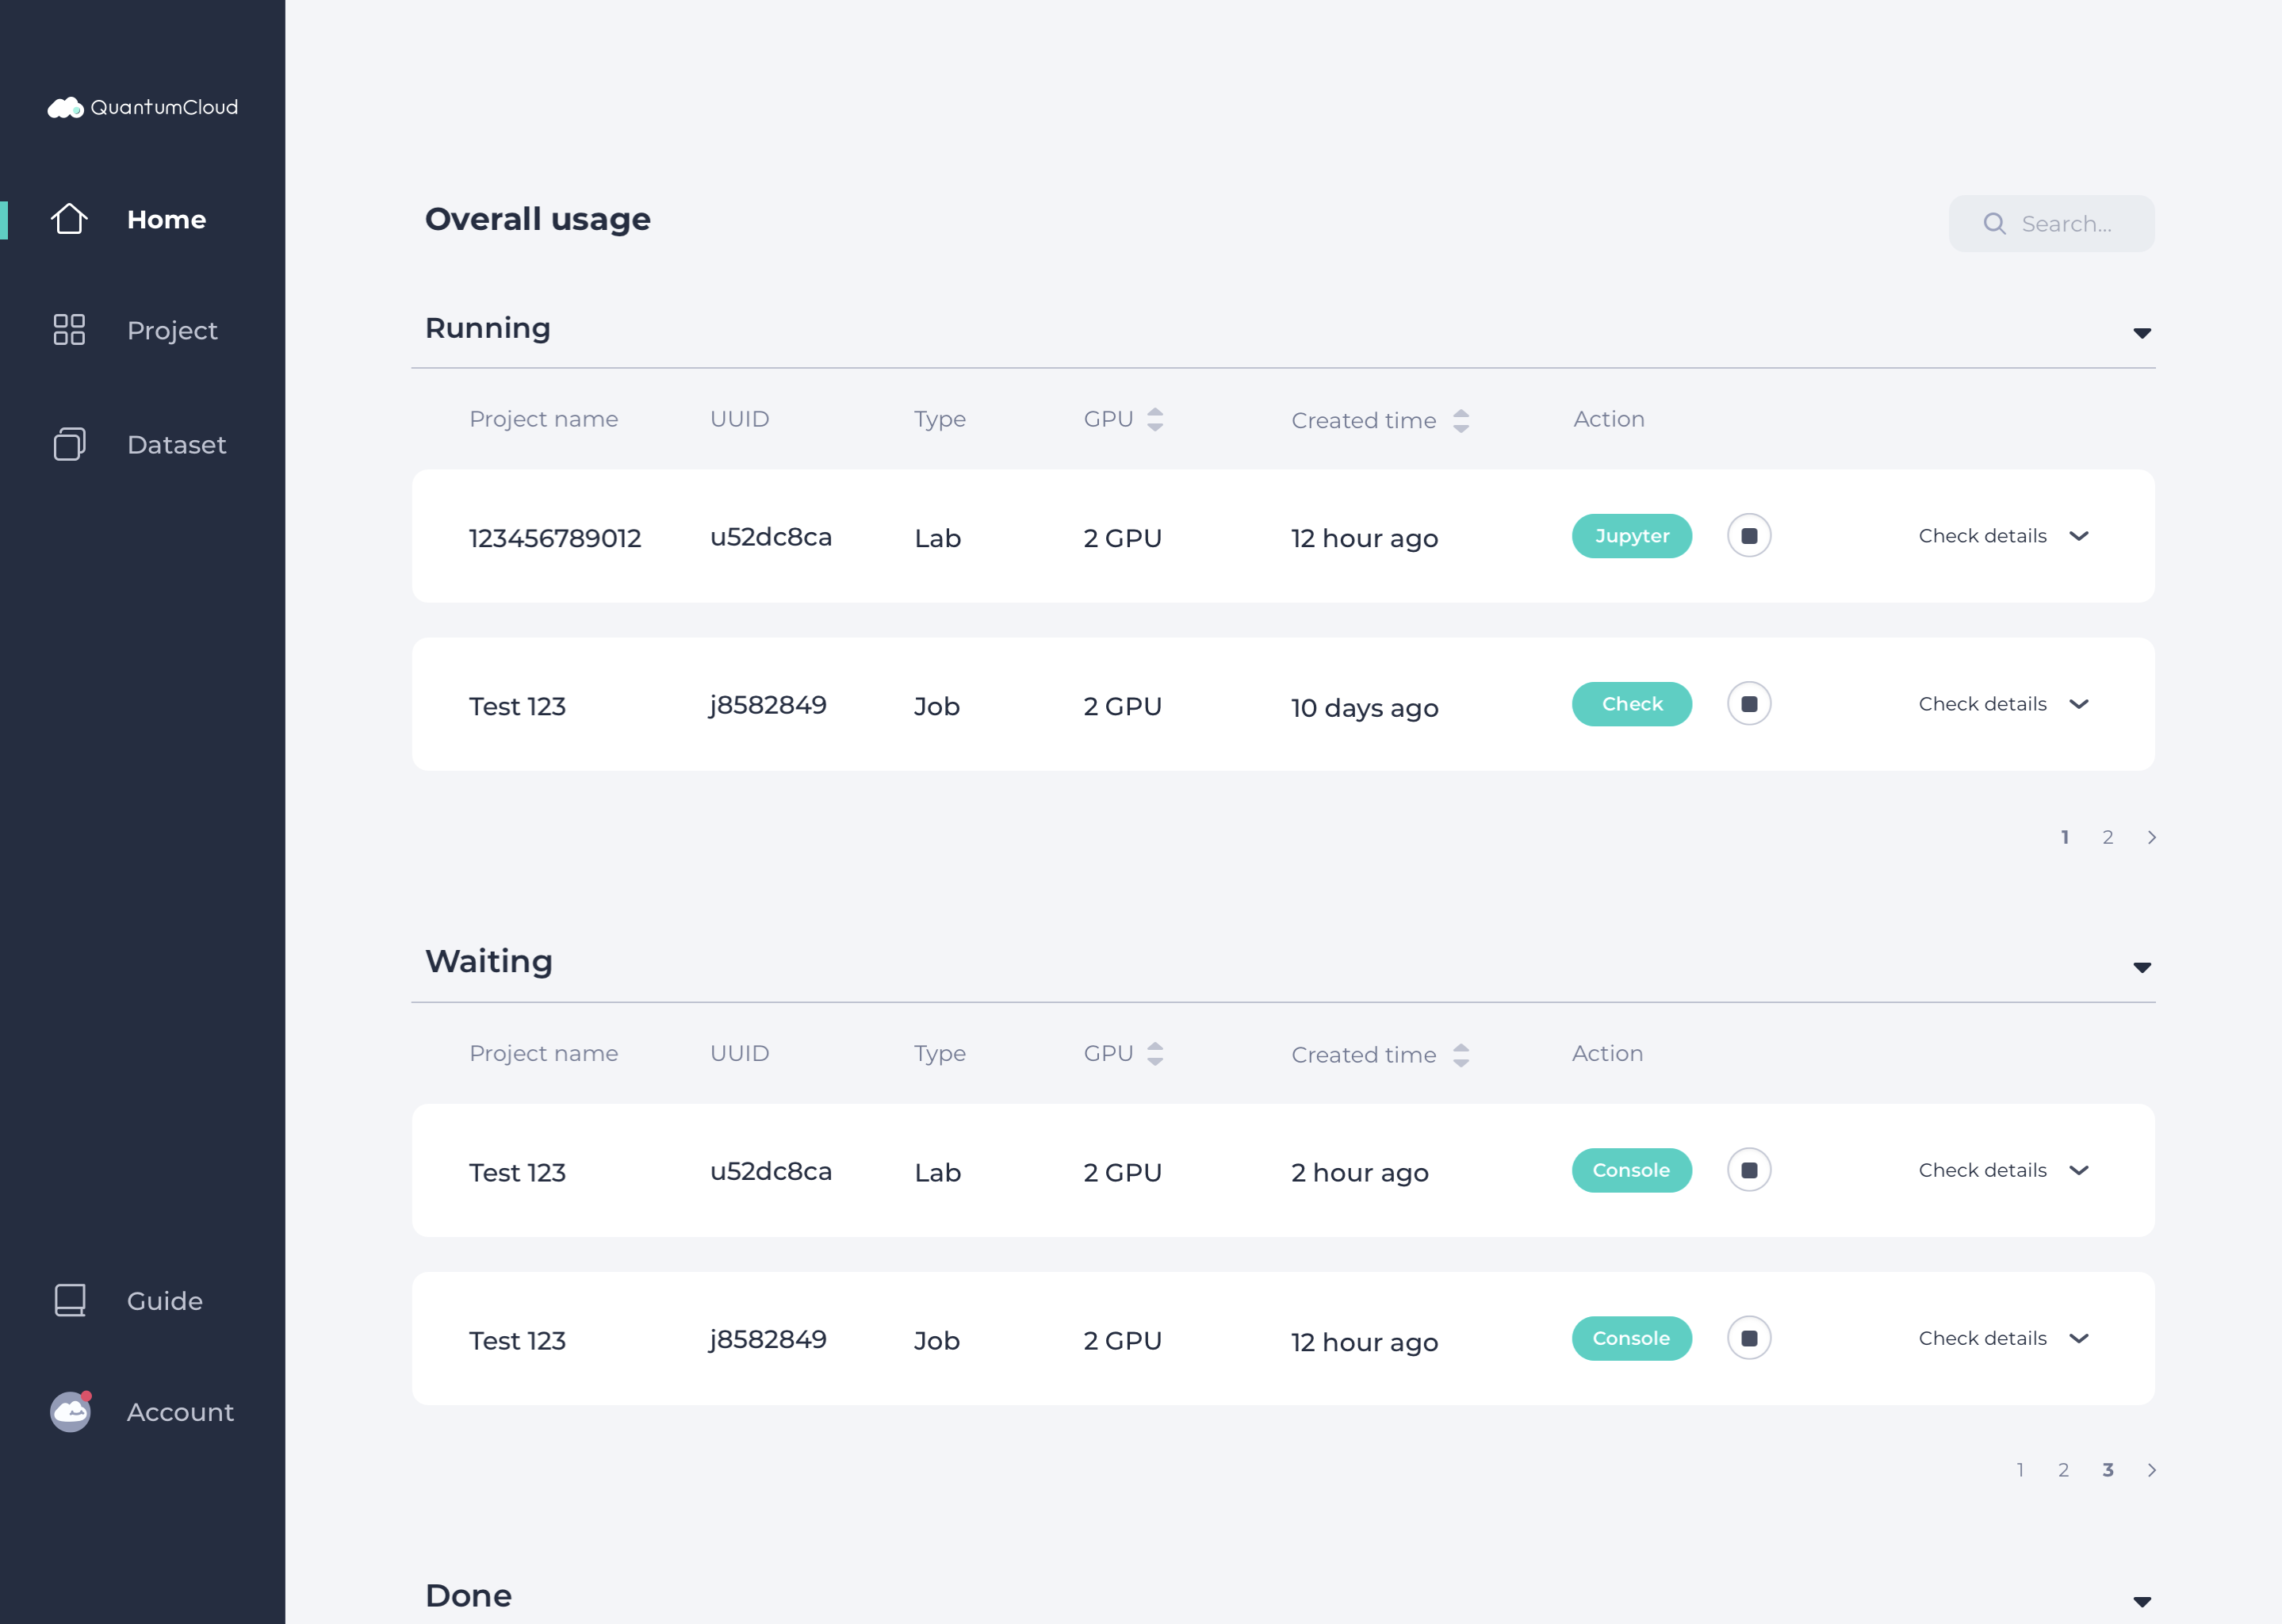
2) You can browse all the labs or jobs that are running, waiting to run, or that are done.
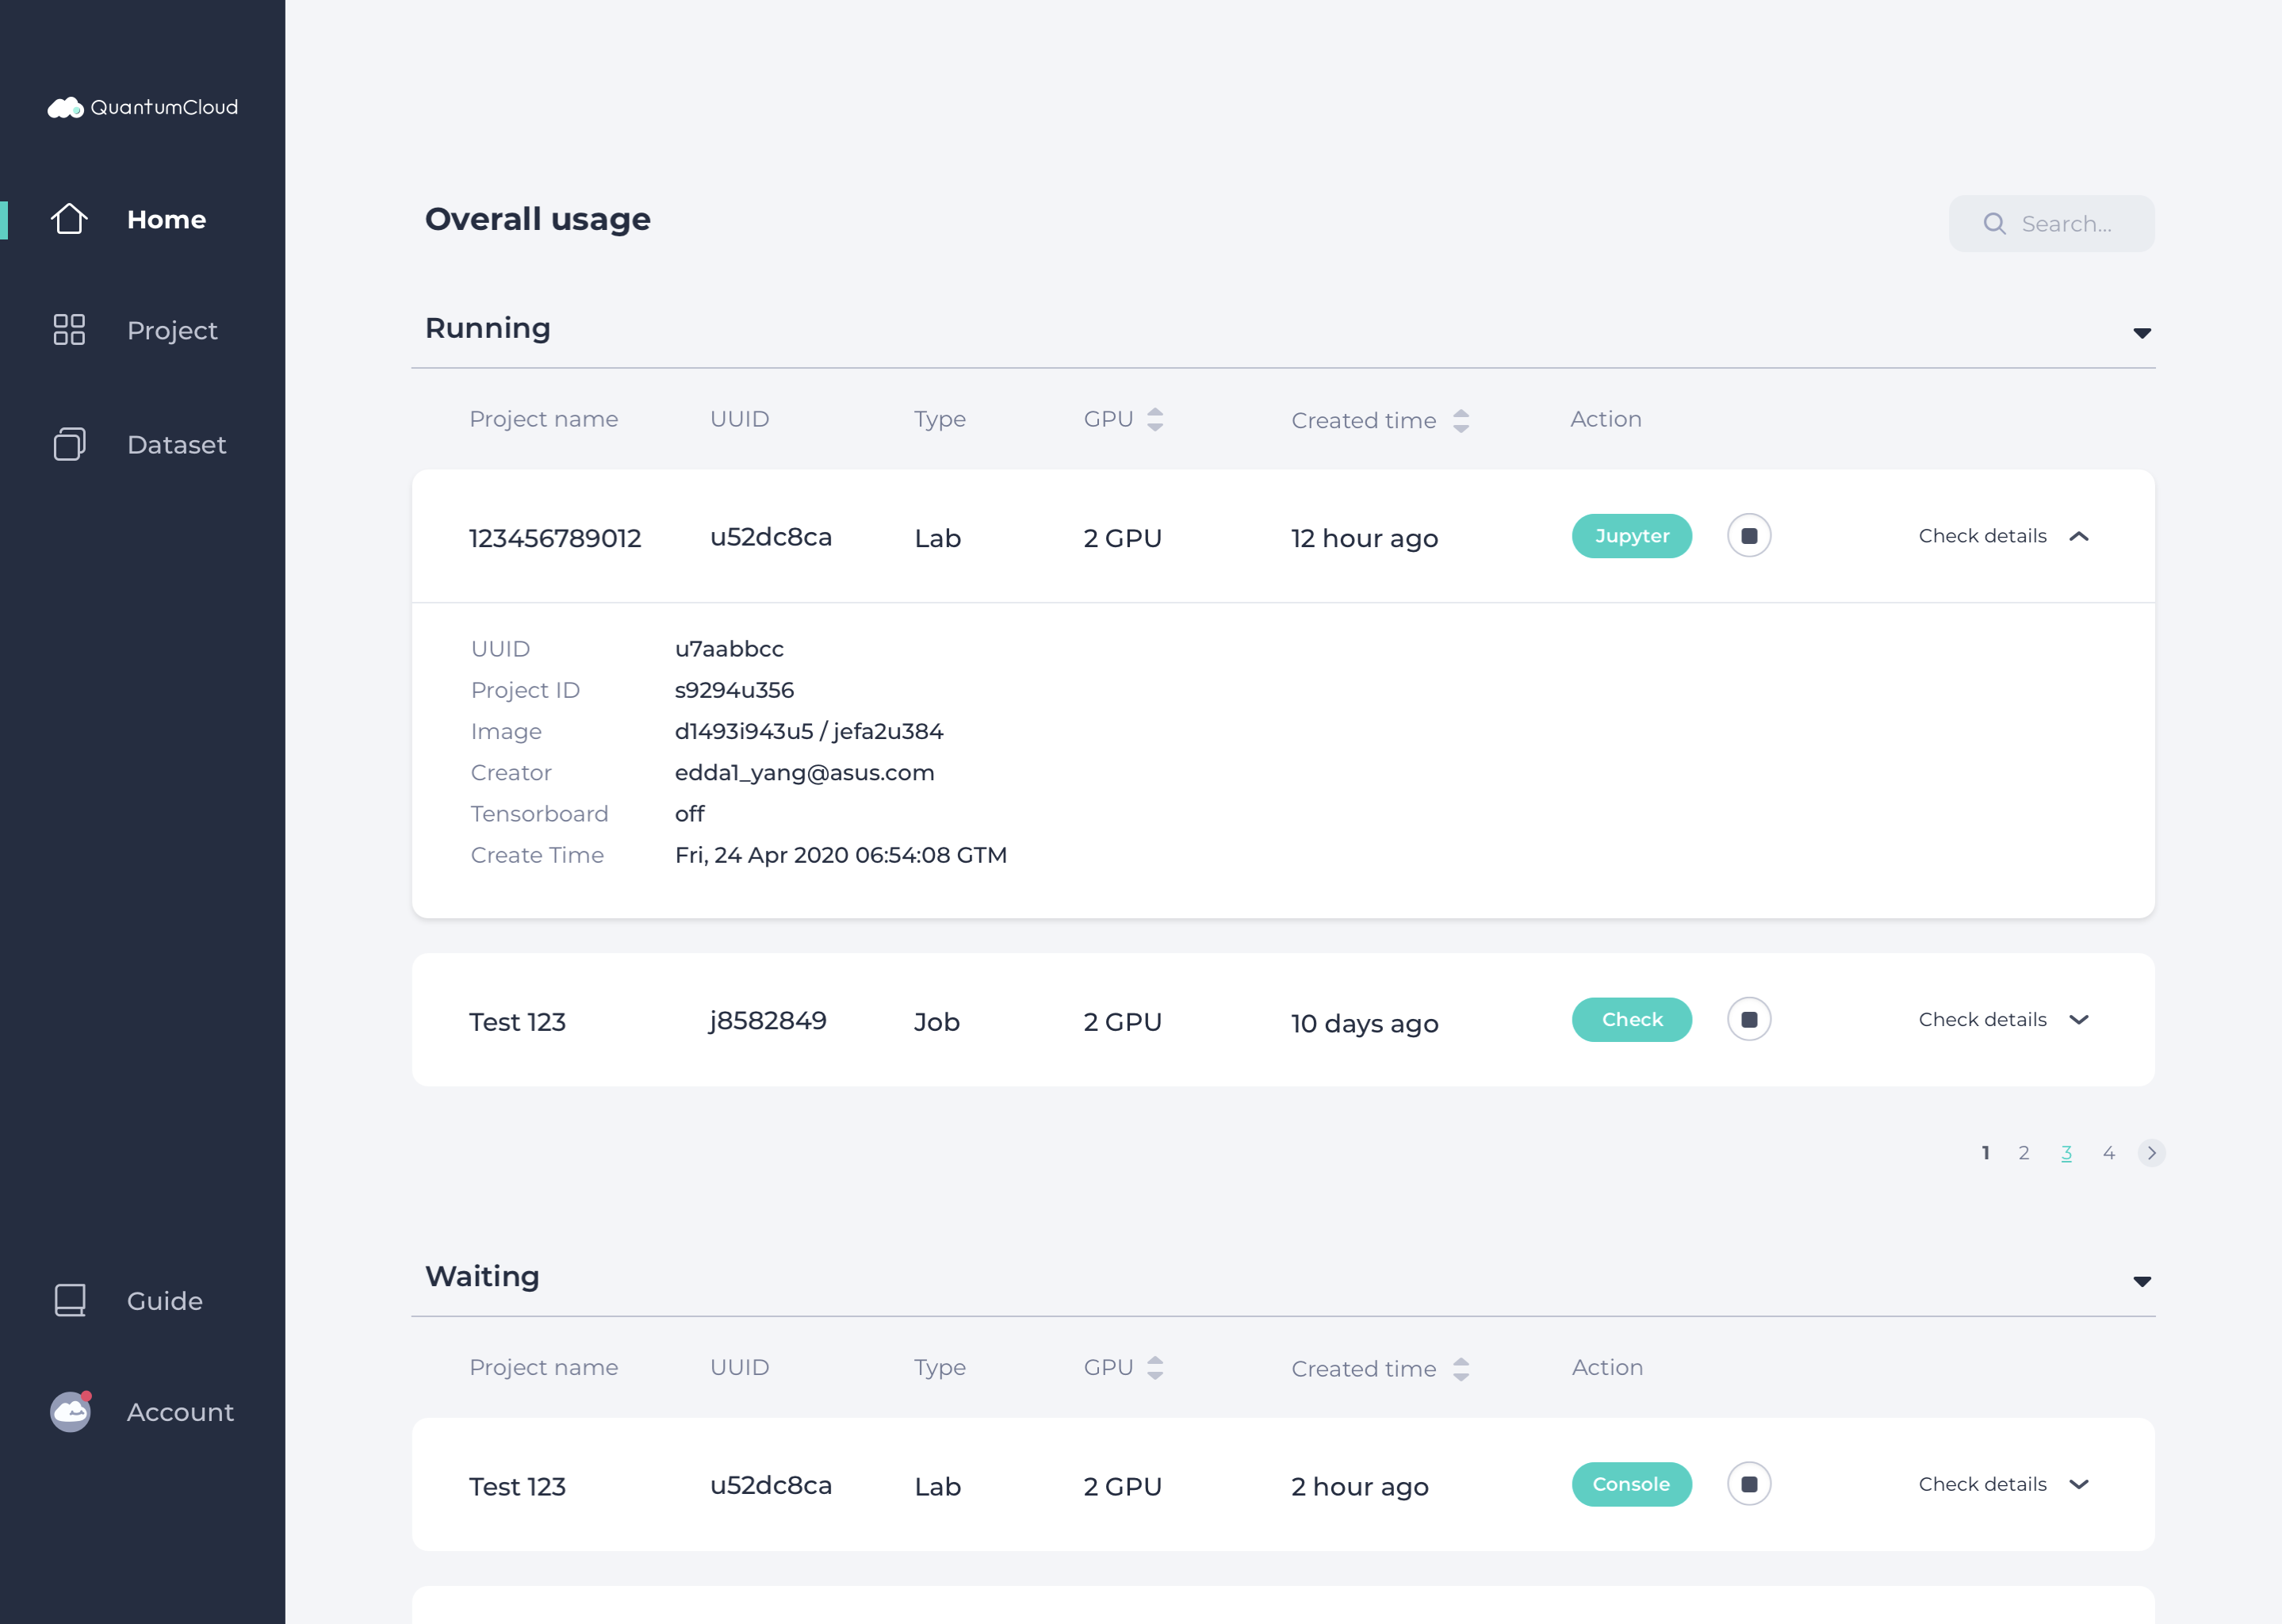
3) You can click Check details to view further information such as UUID, project name, time created, etc. about the lab.

1. Click Dataset on left menu > New dataset +
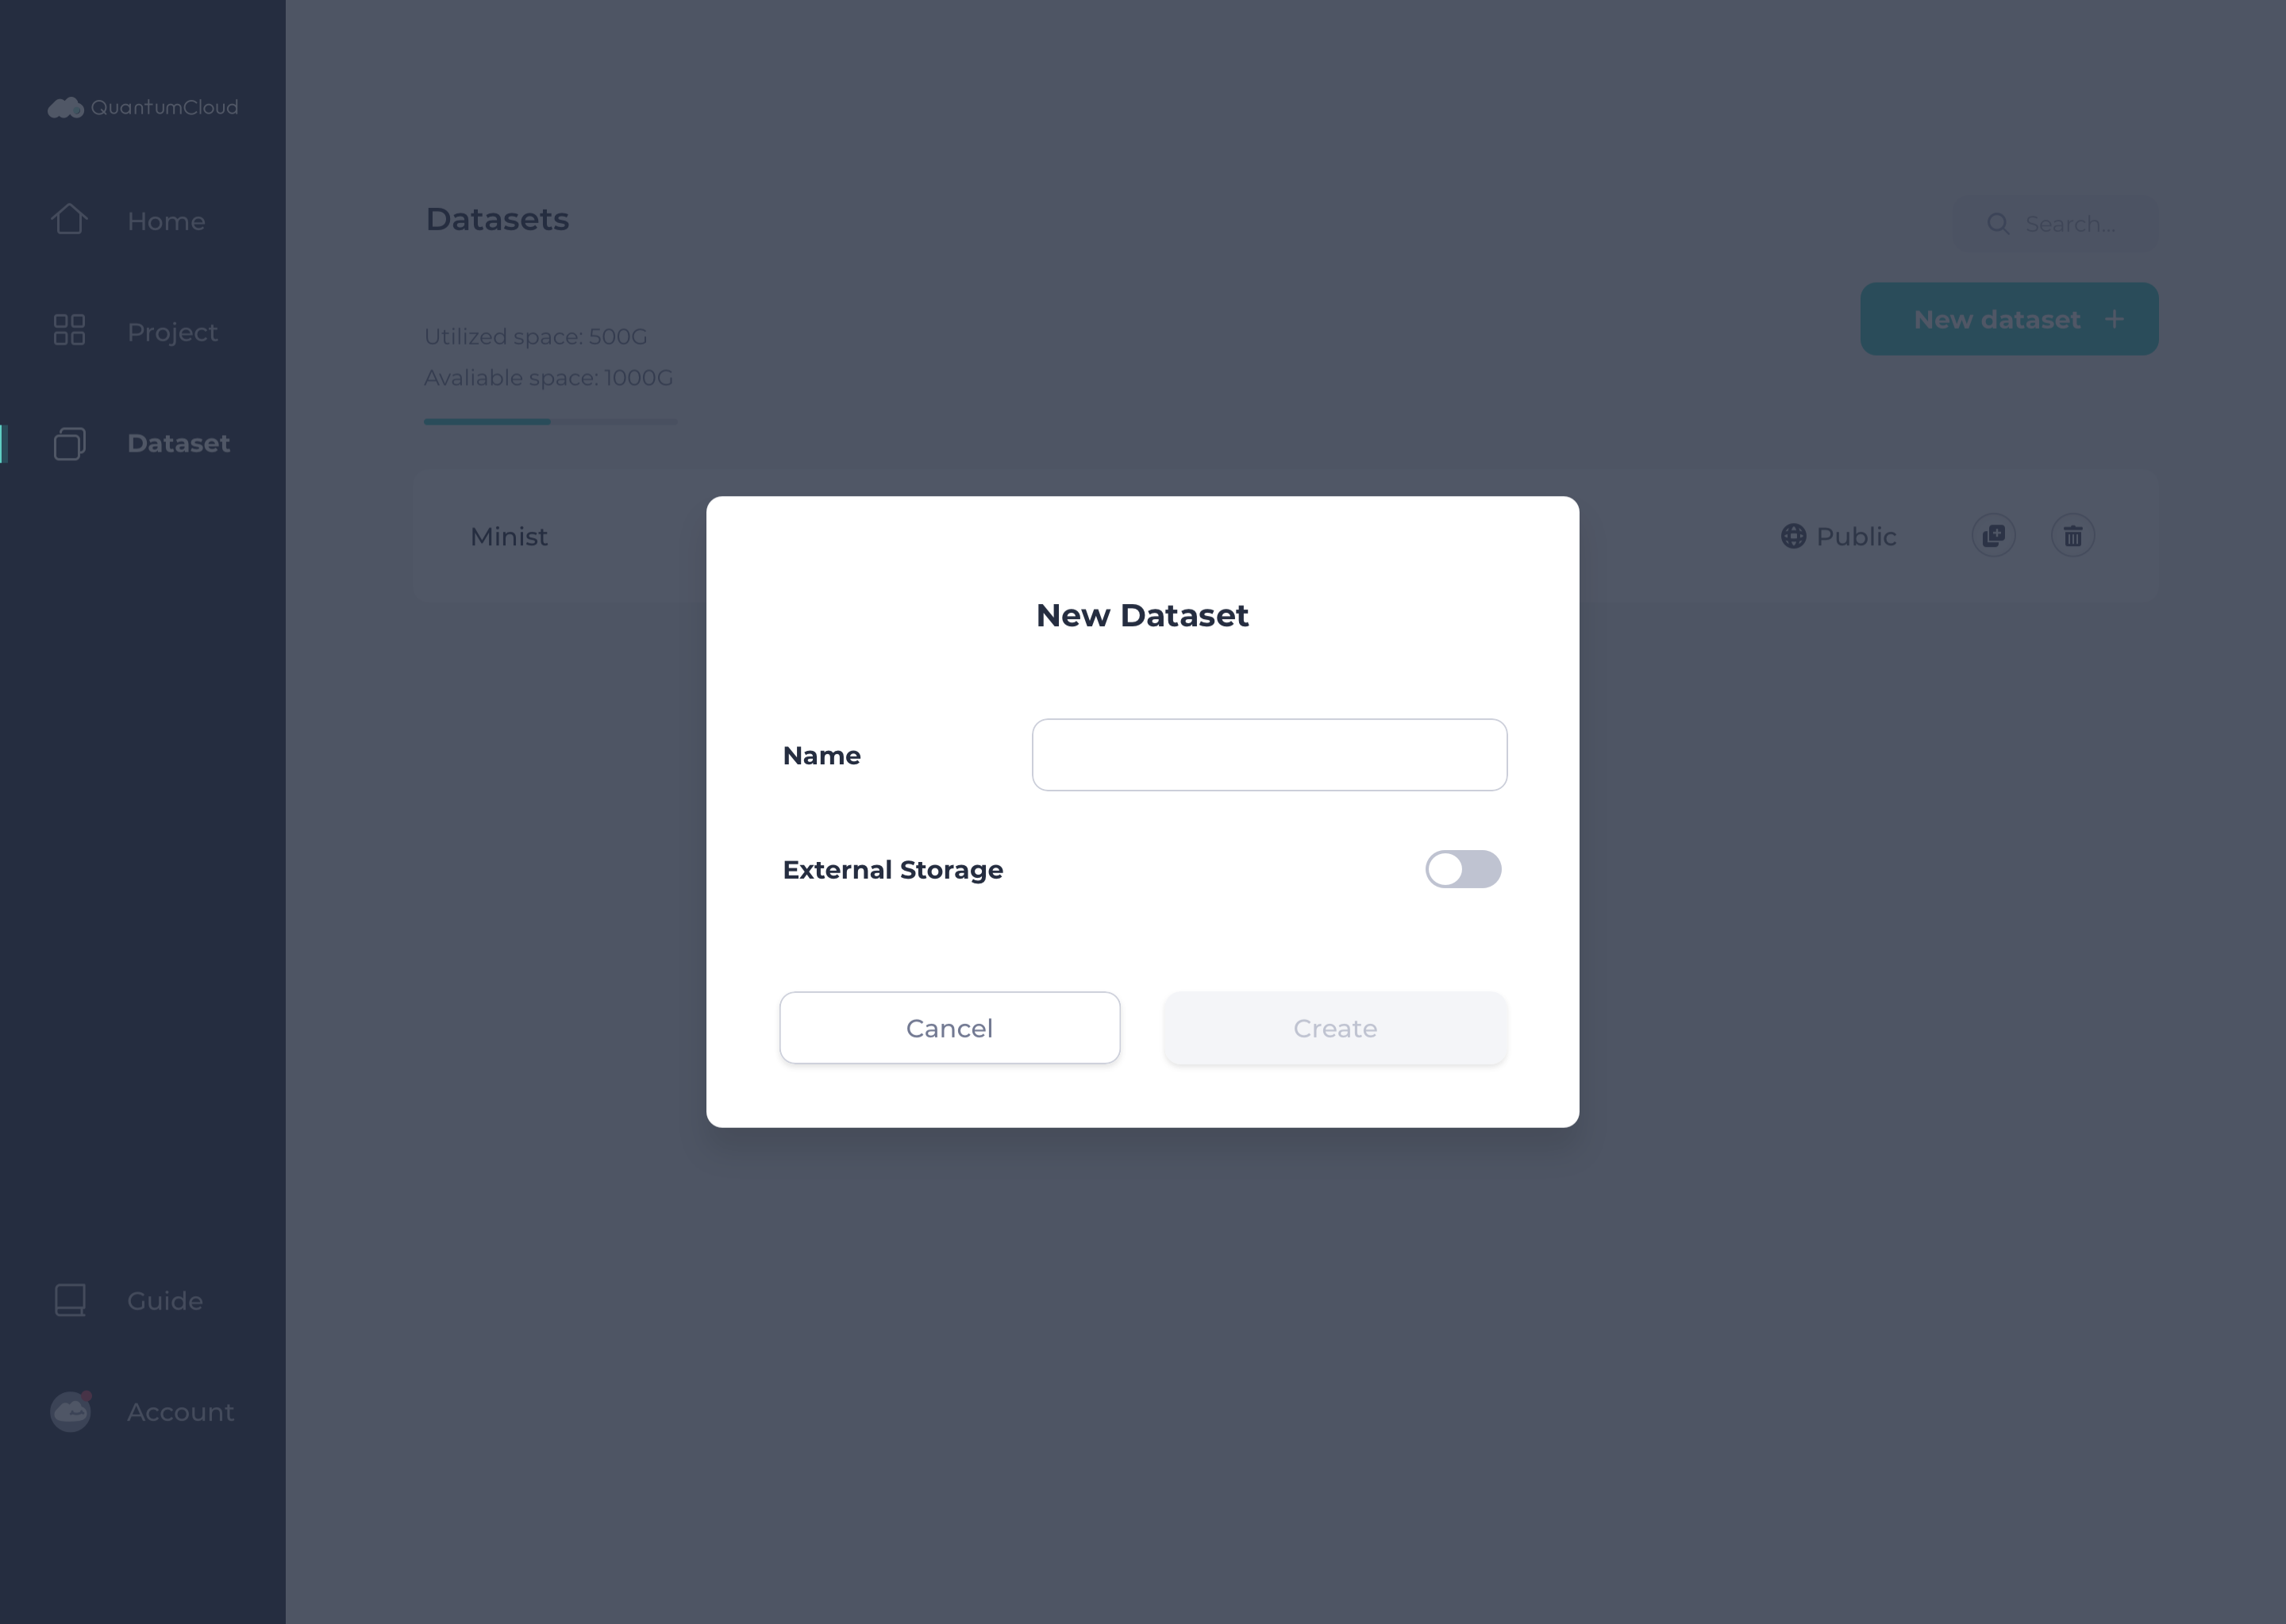
2. Enter Name for the new dataset folder and click Create.
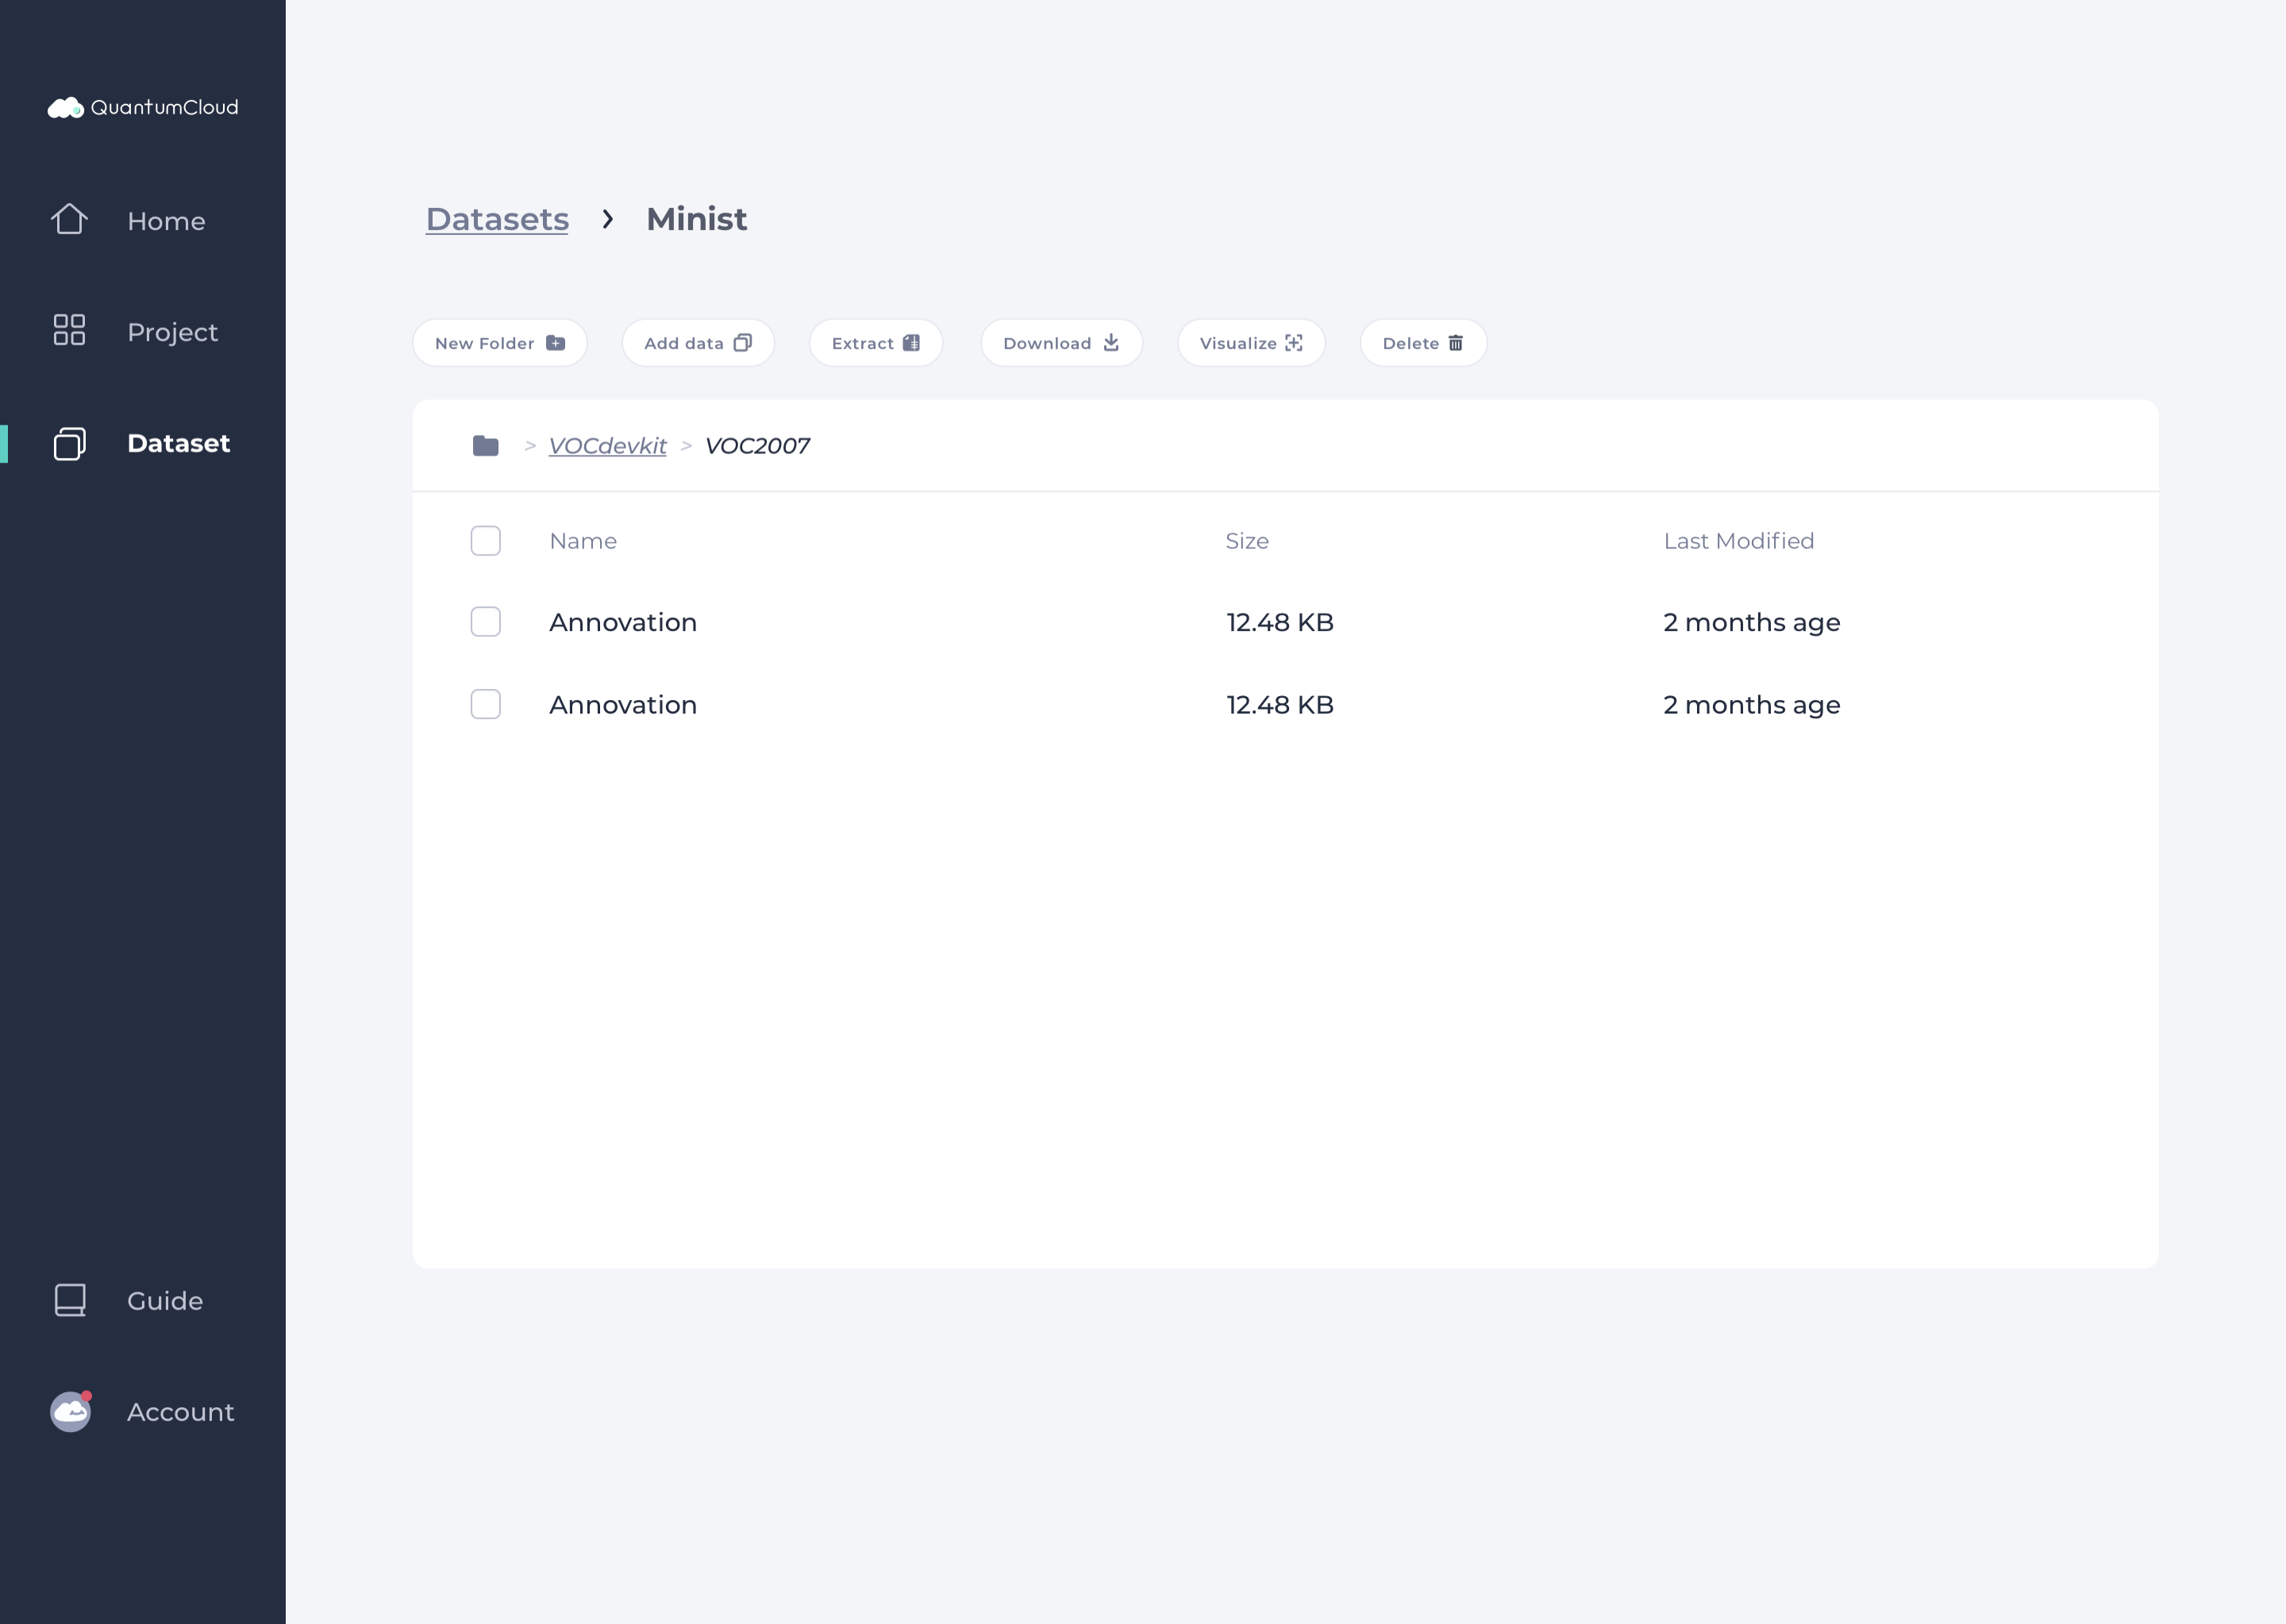
3. After creating your new dataset folder, click to enter the folder.Click Add data to upload your files.
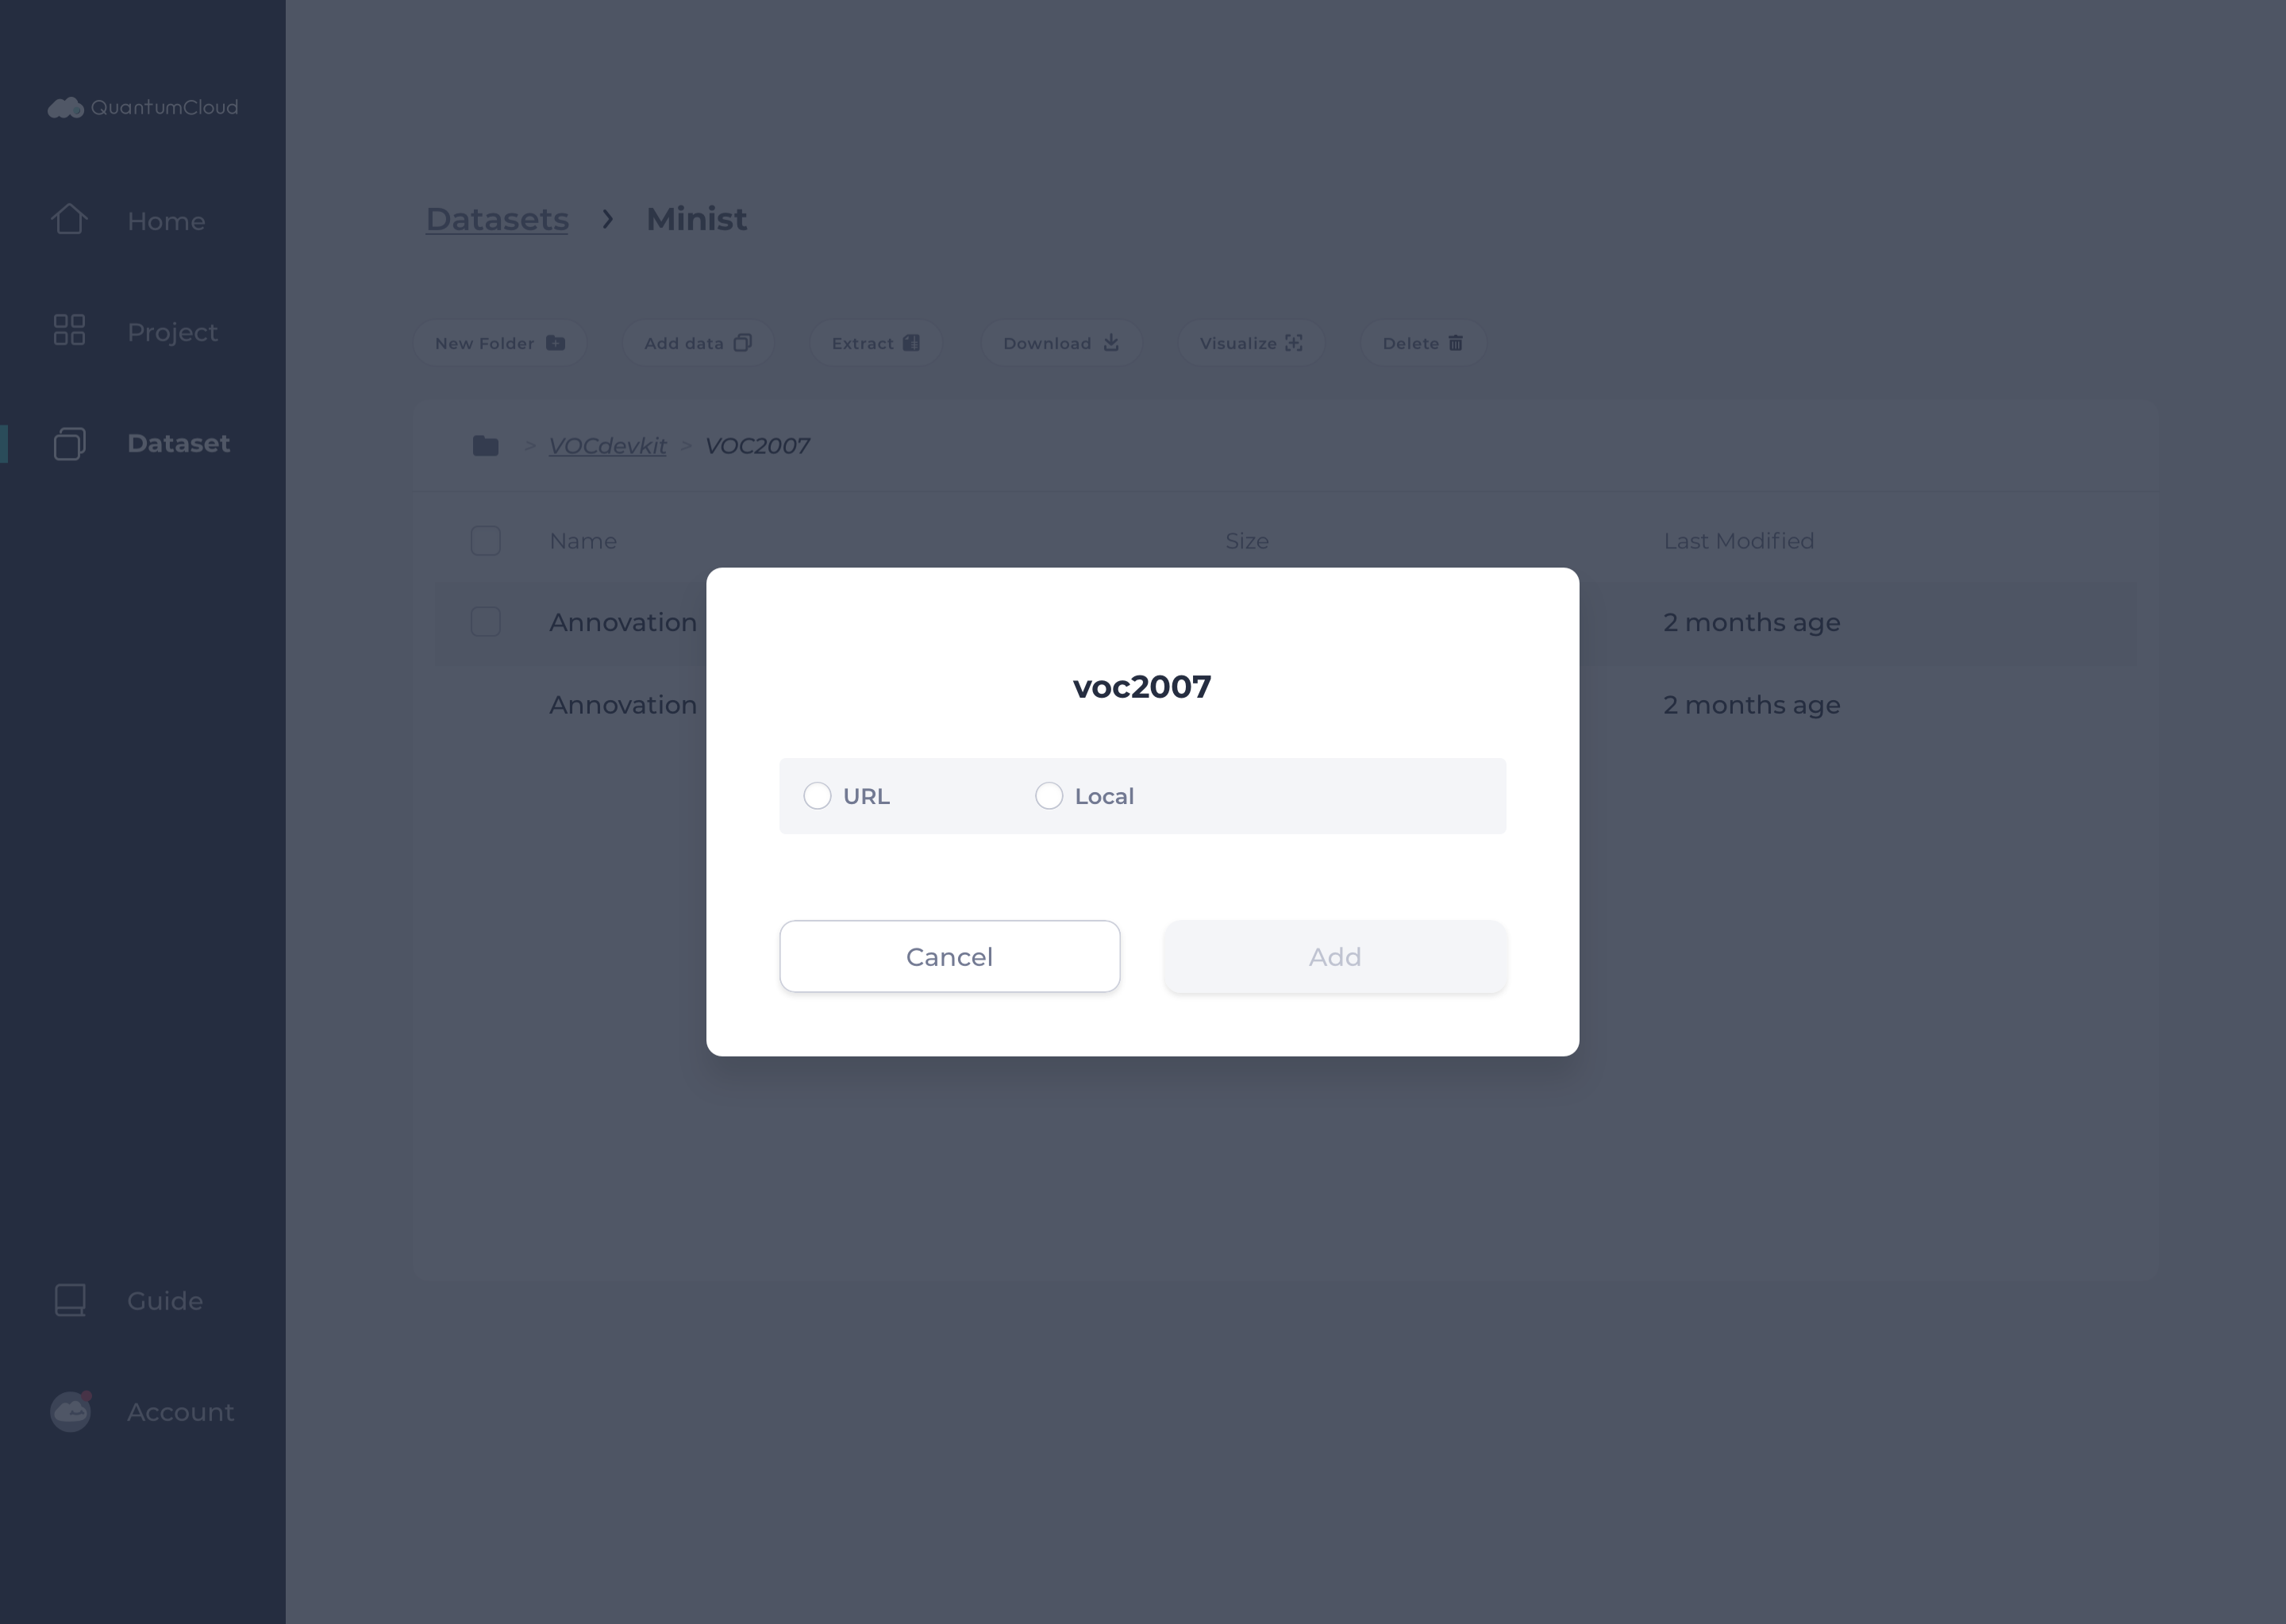
4. An add data file popup appears. Select the desired method to upload your files.
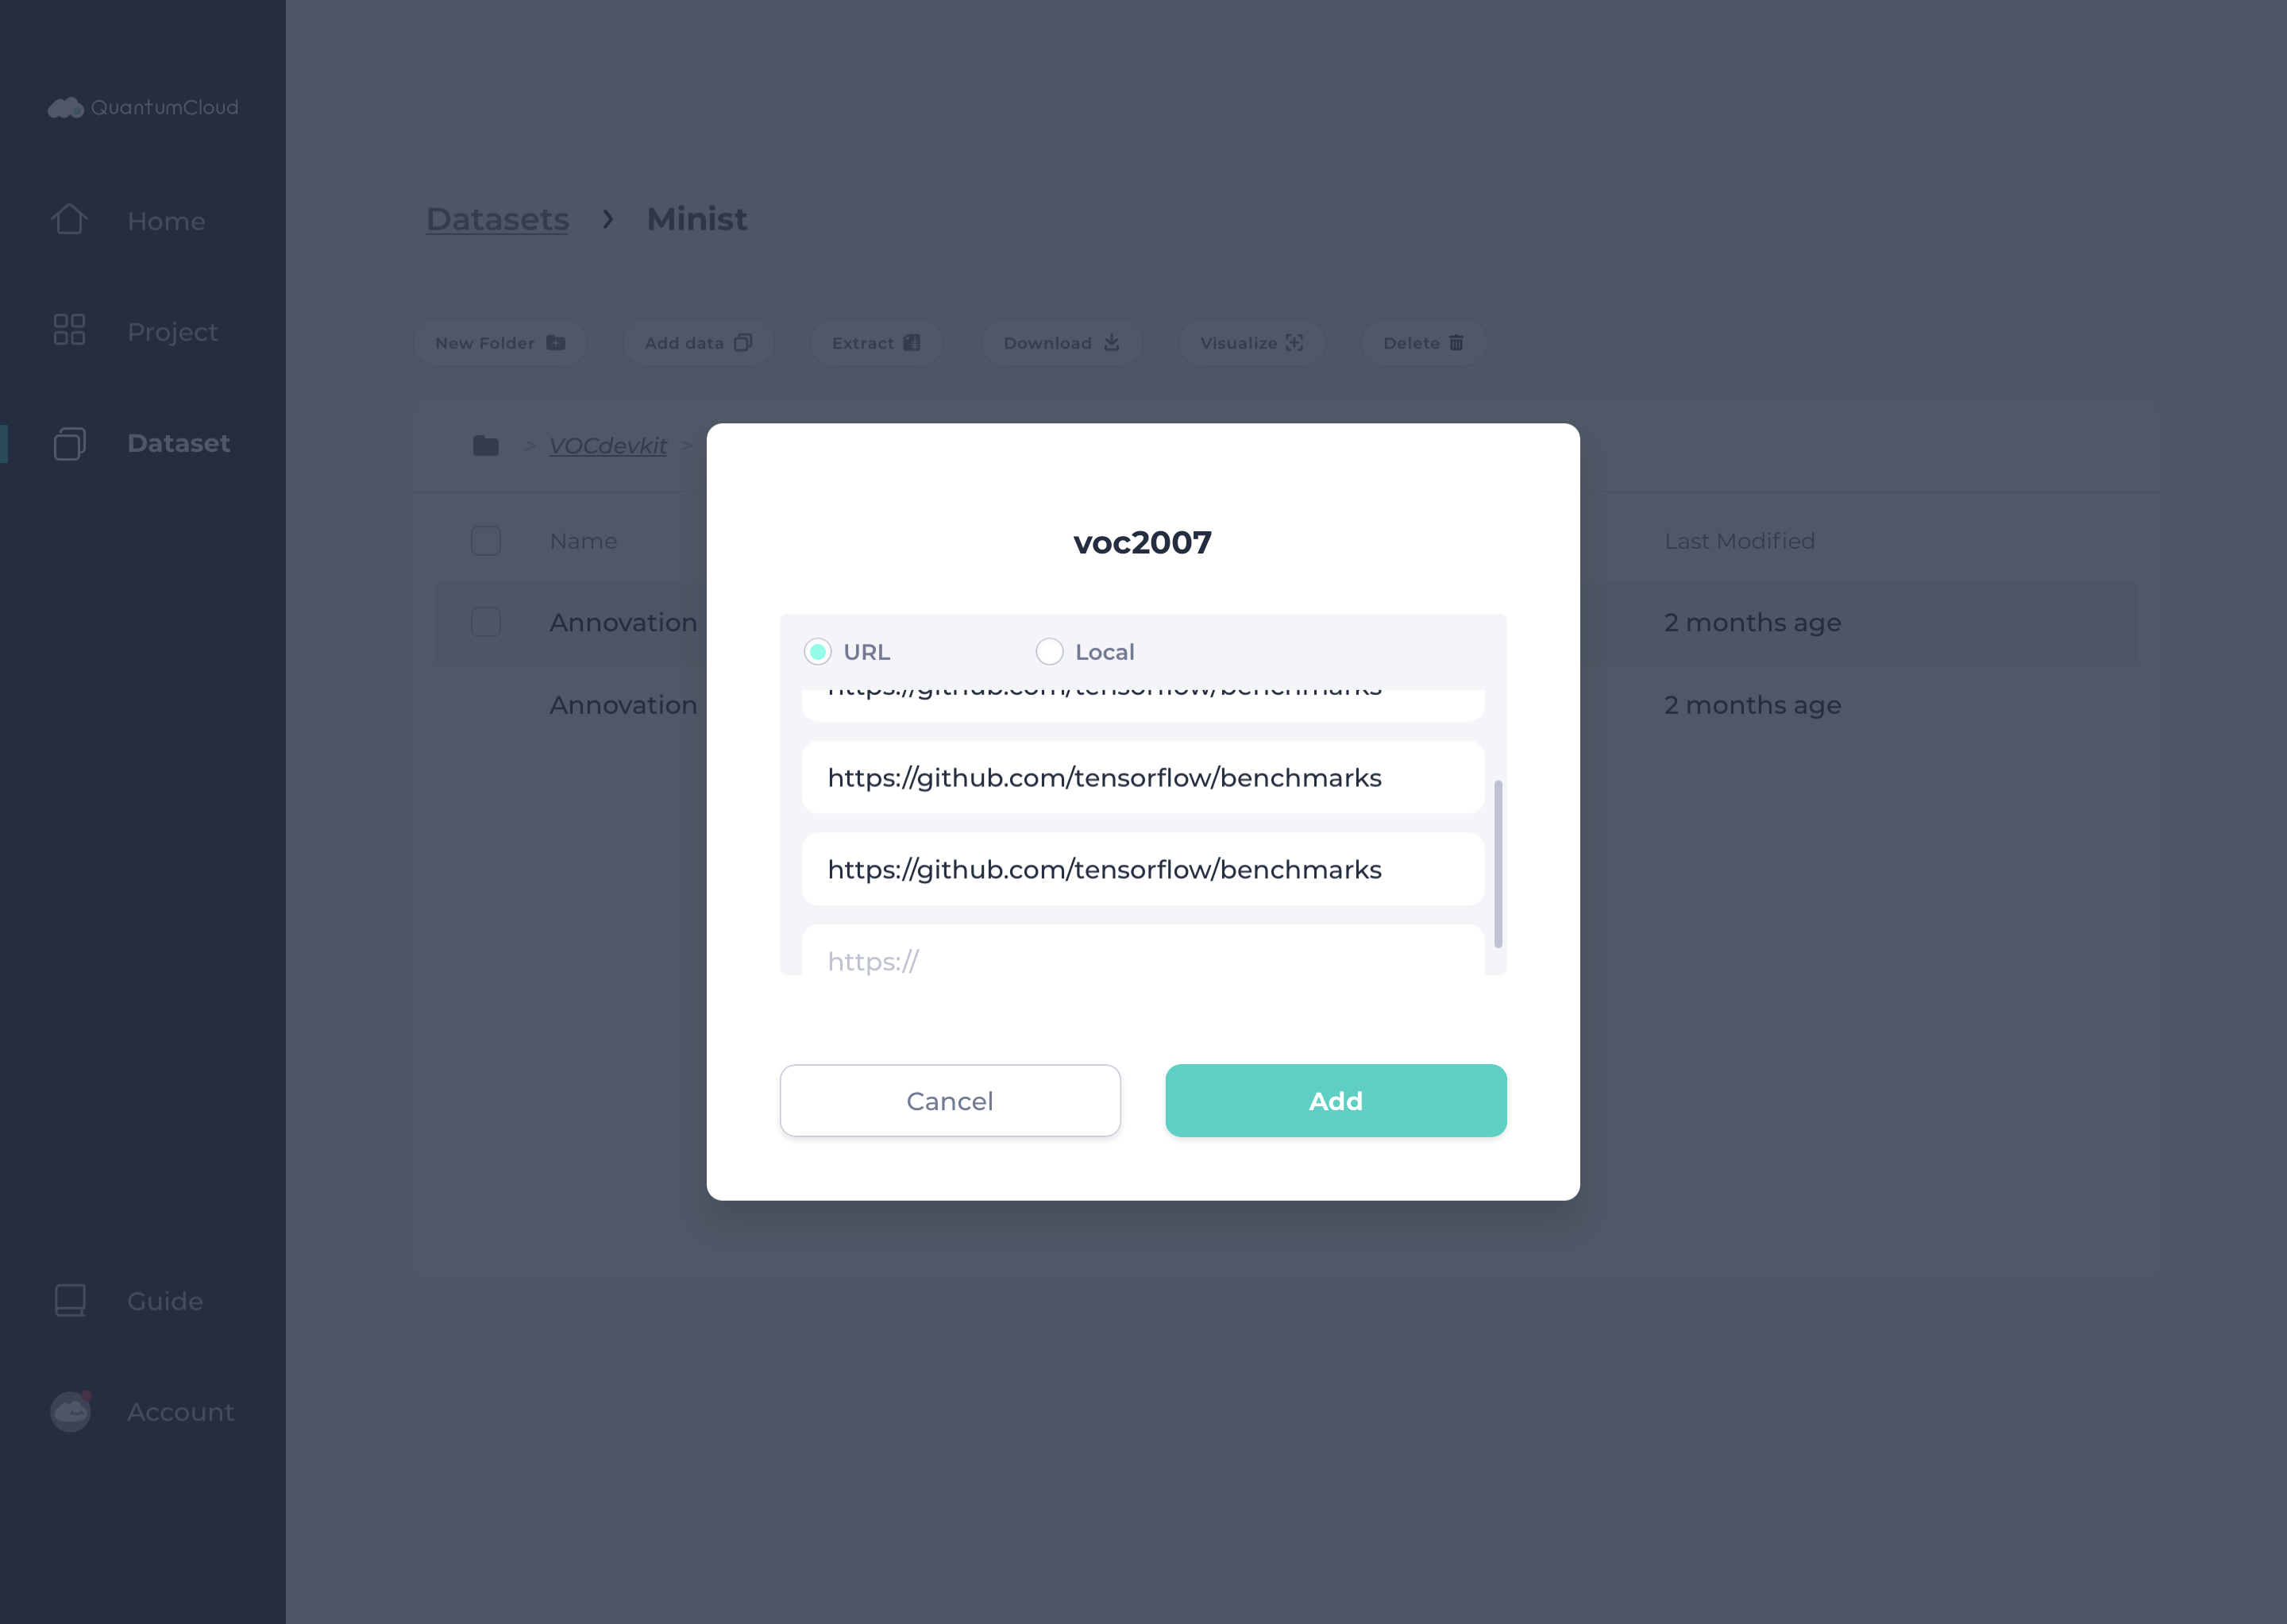
5. Enter the URLs of the files. Click Add to add desired files all at once.
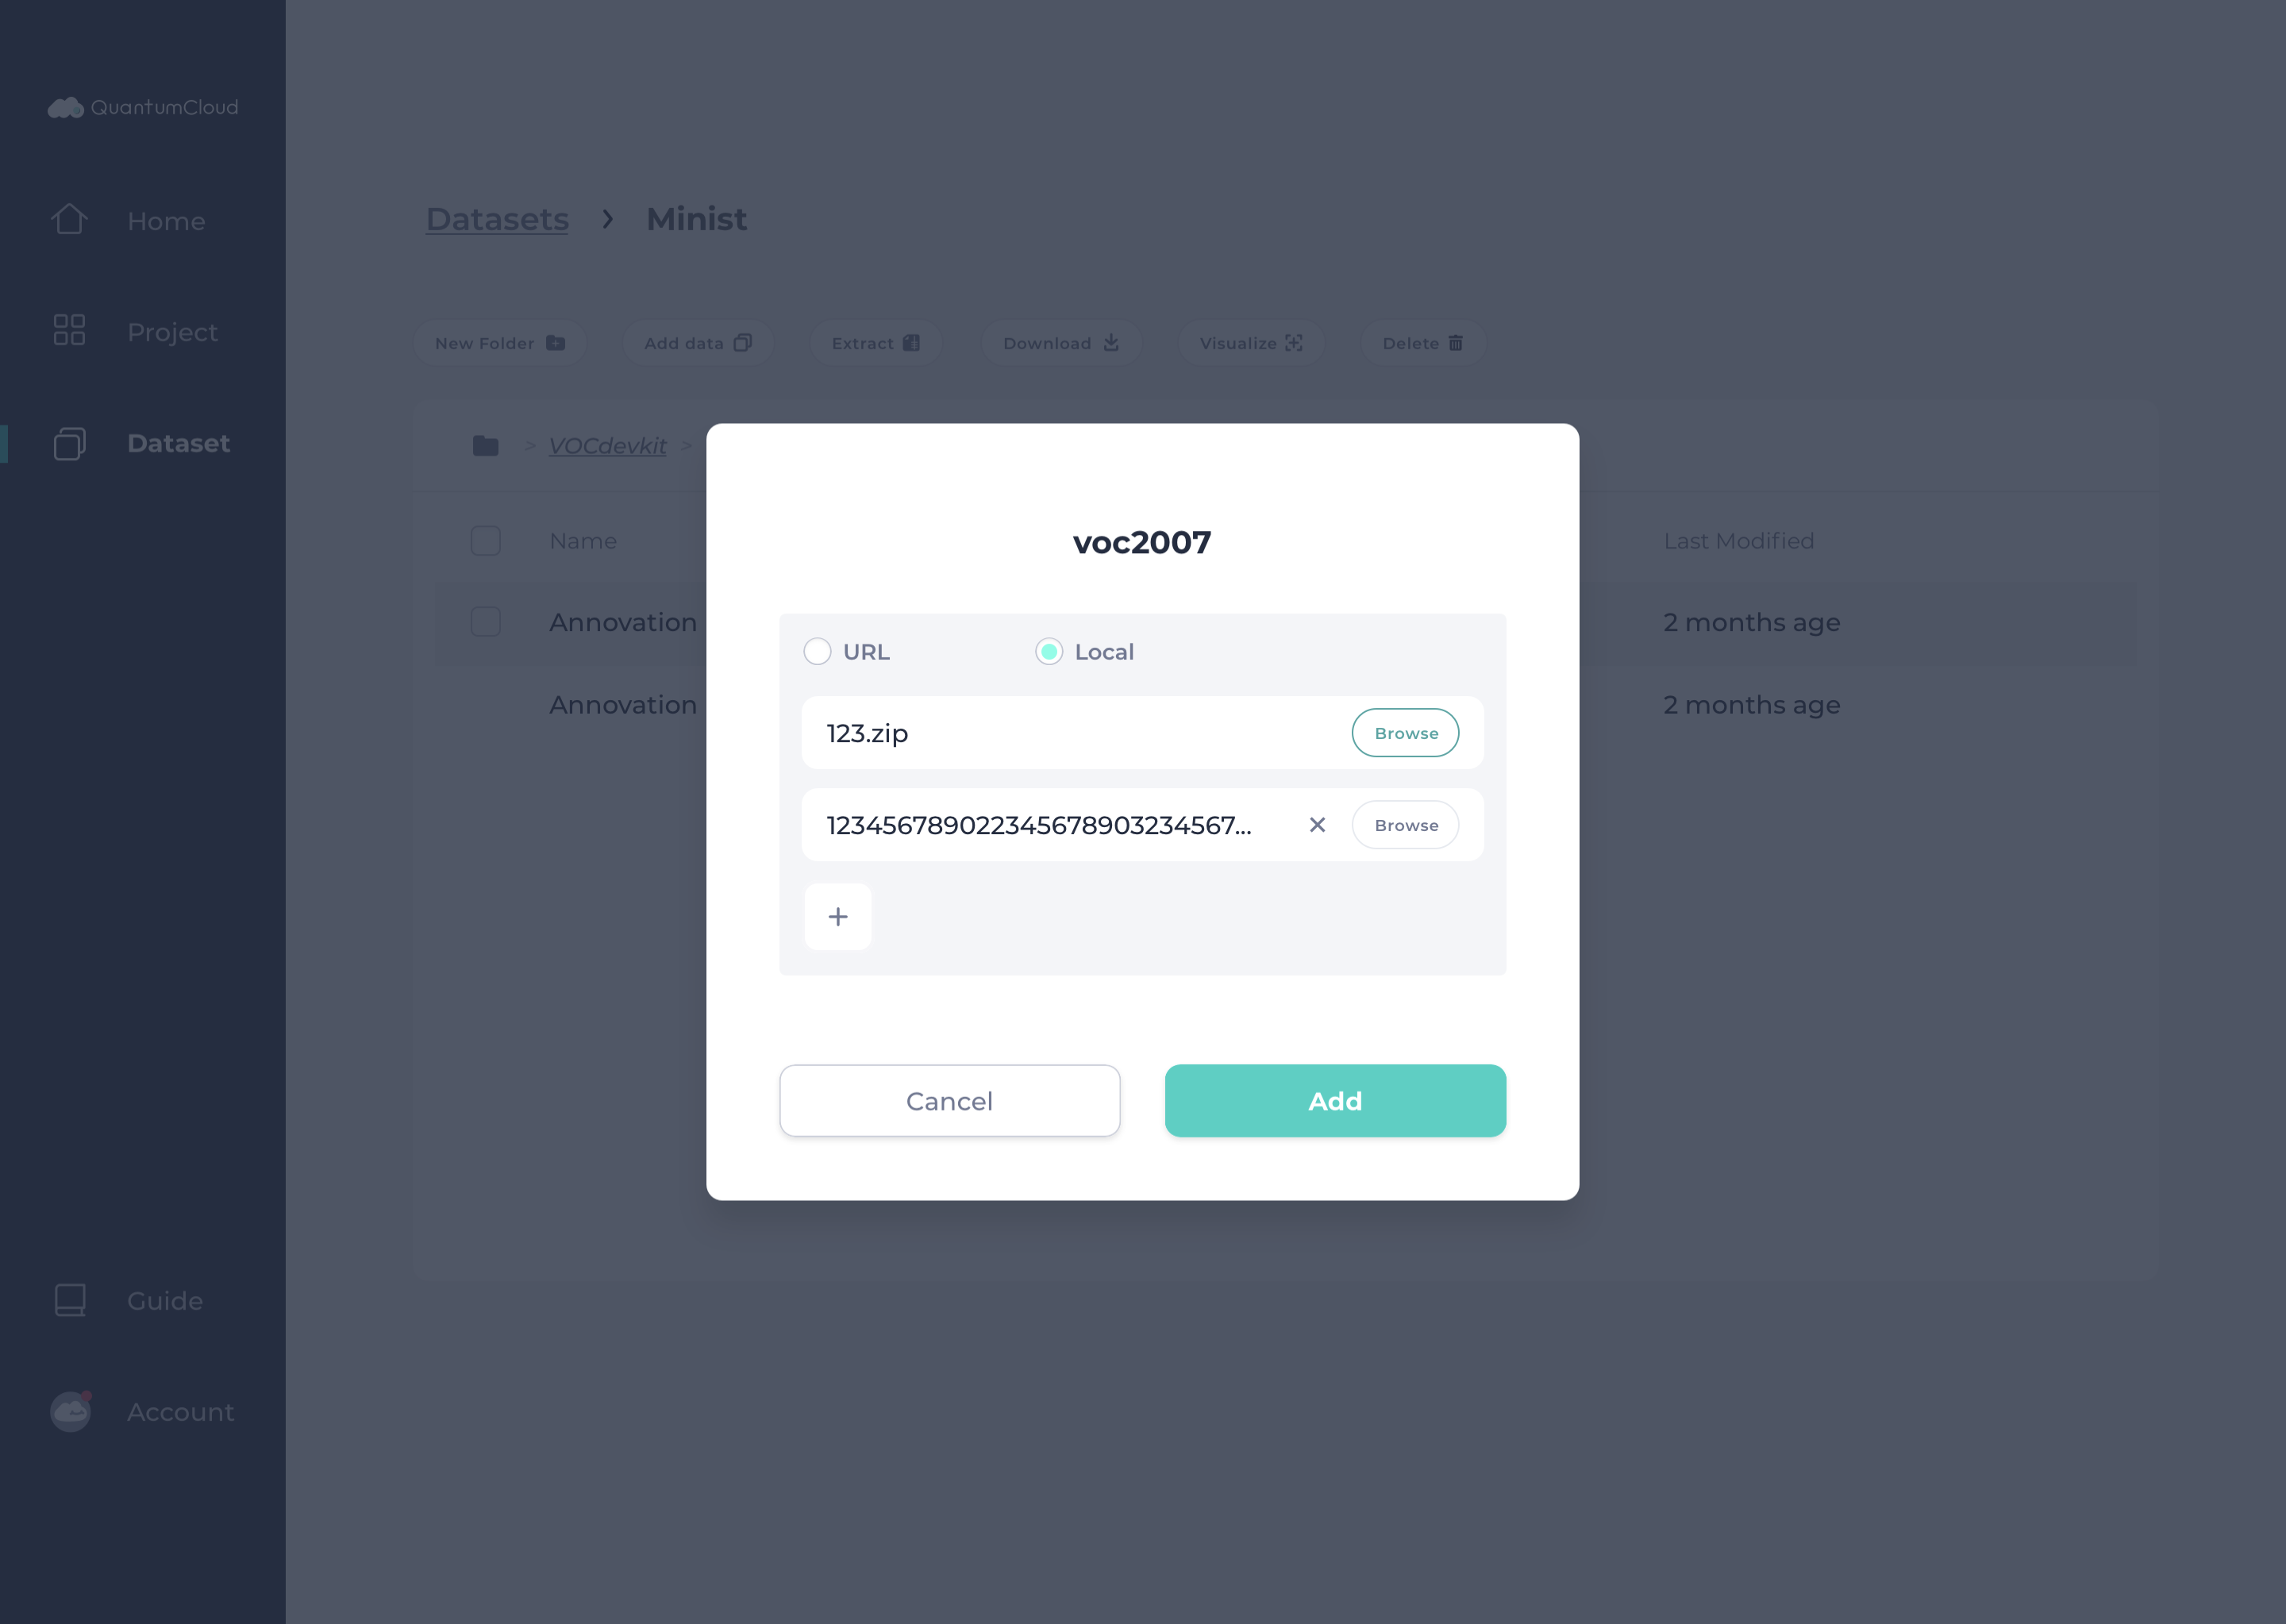
6. Browse and select Local files to upload. Click + to add more files or ✕ to remove selected file. Click Add to upload.
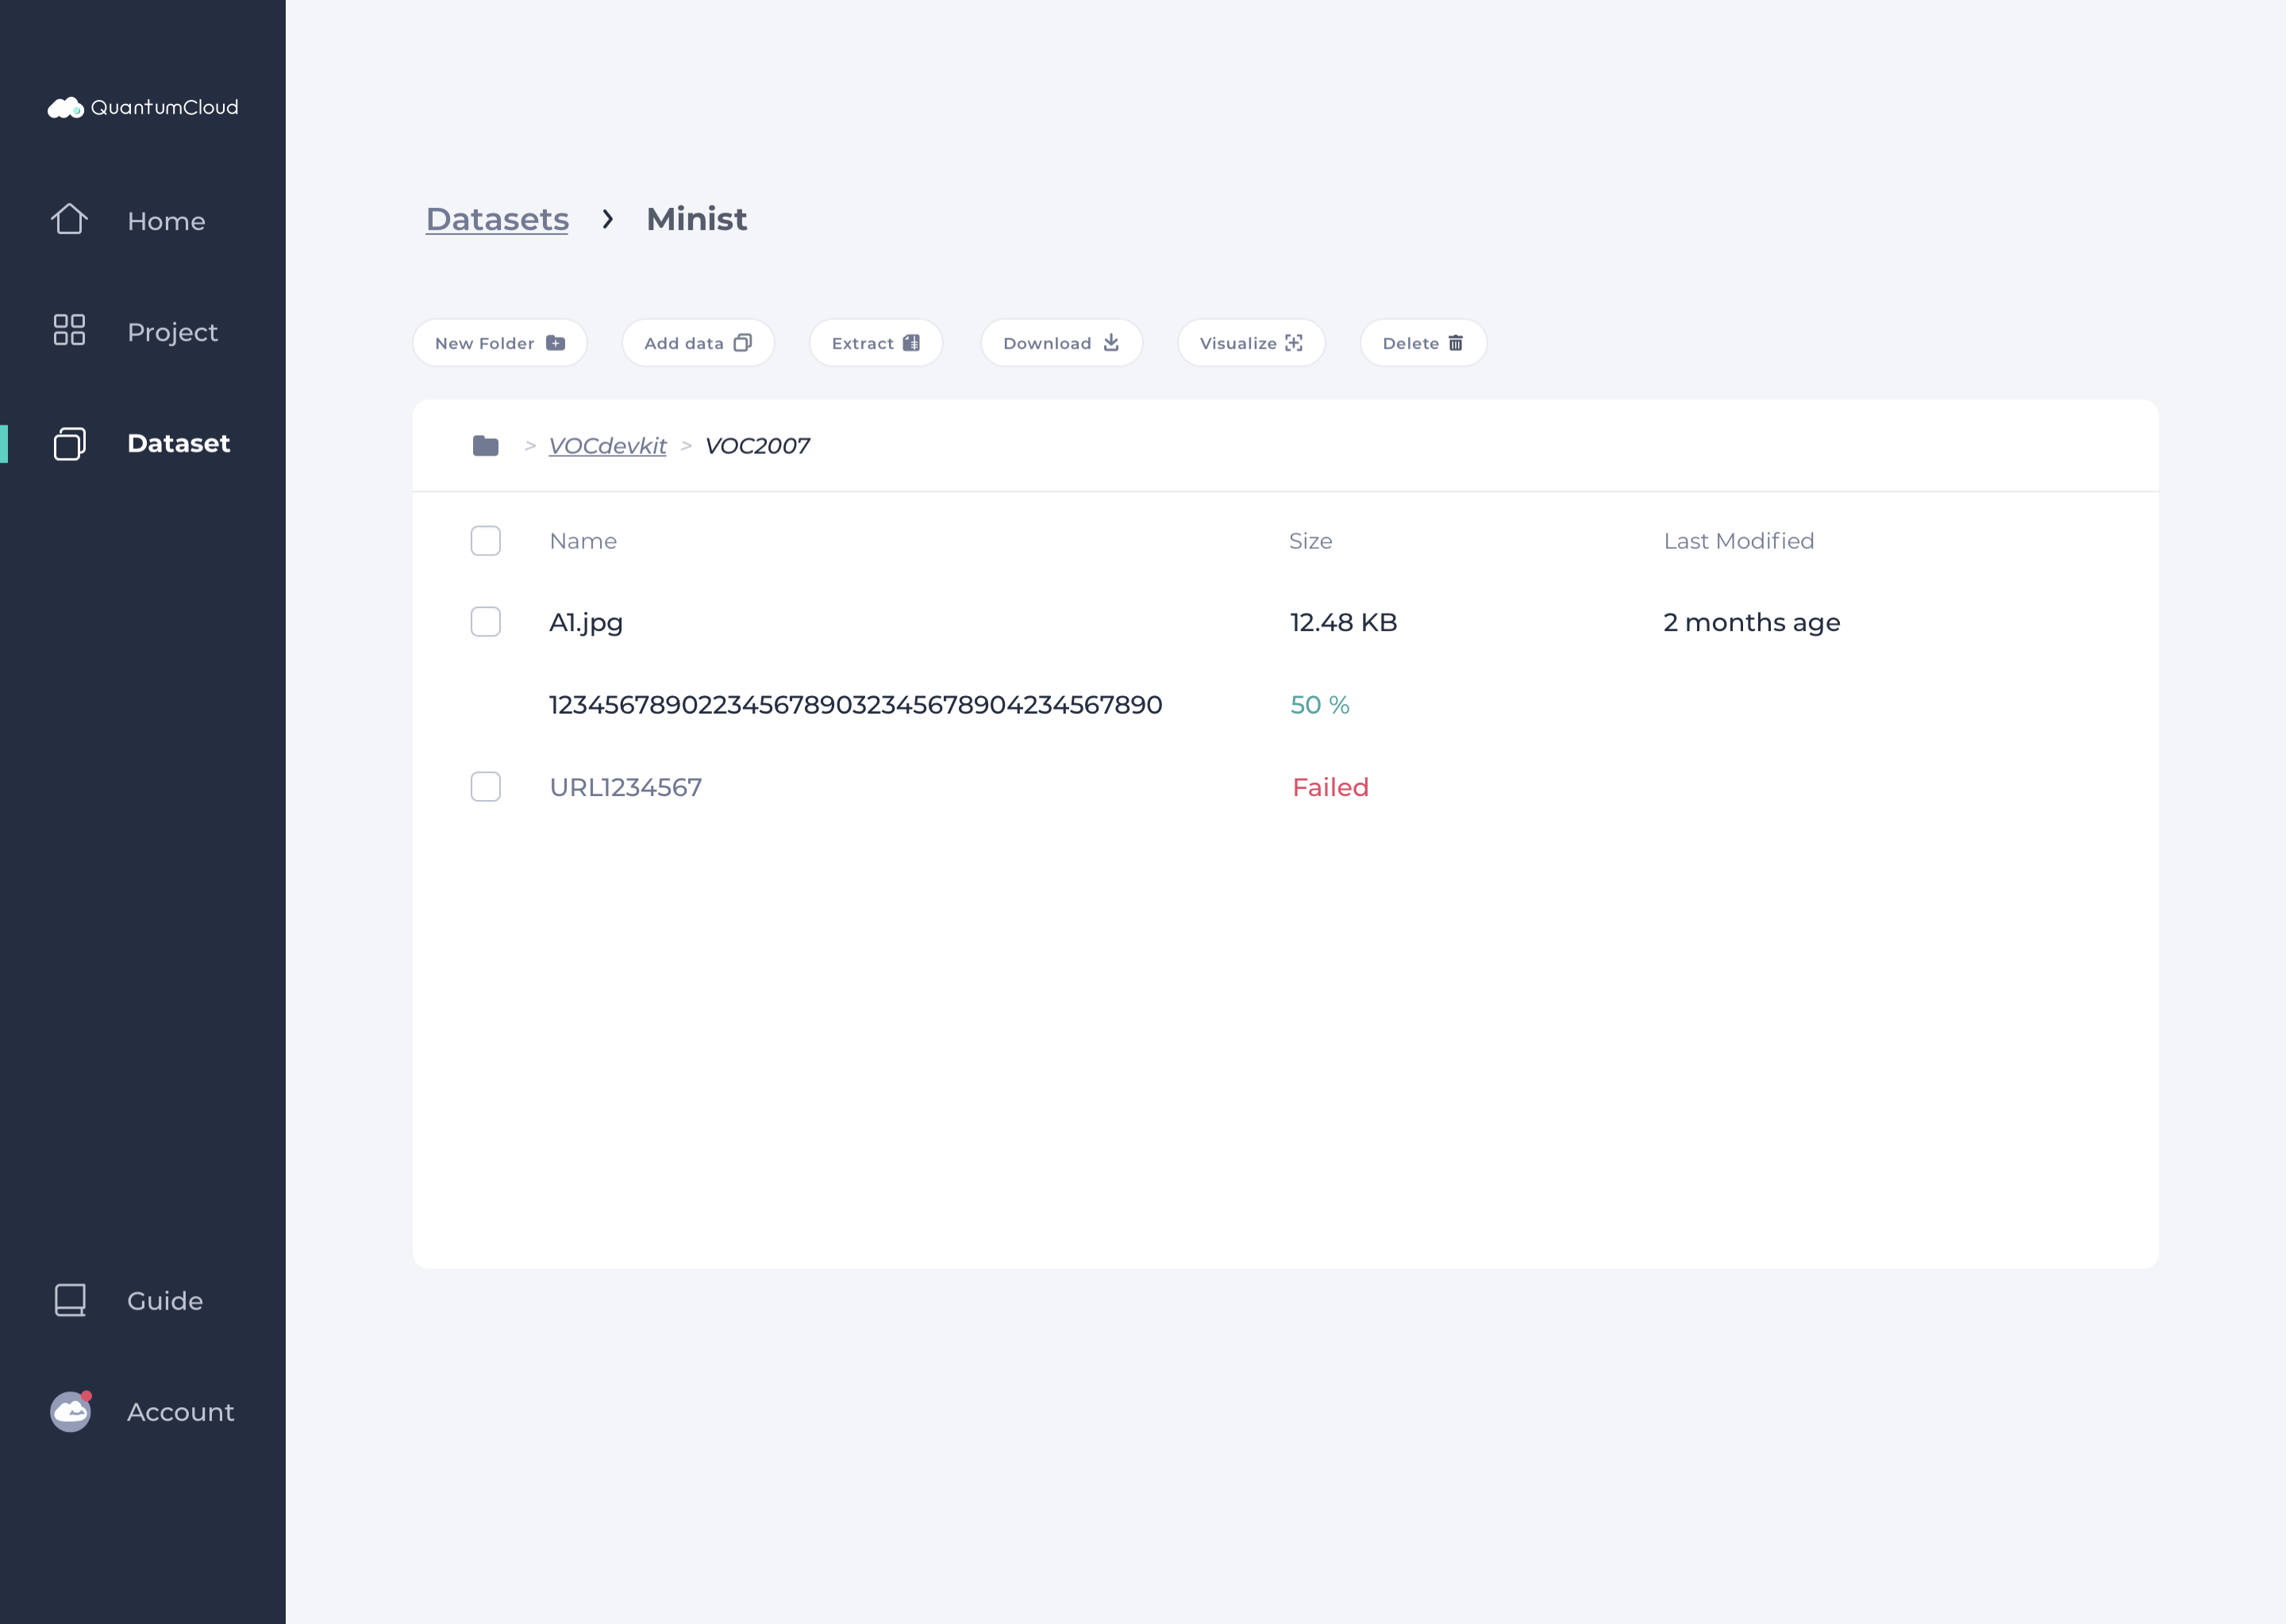
7. File upload progress is displayed under Size. If the file has failed to upload, the status Failed is displayed, and try uploading it again.
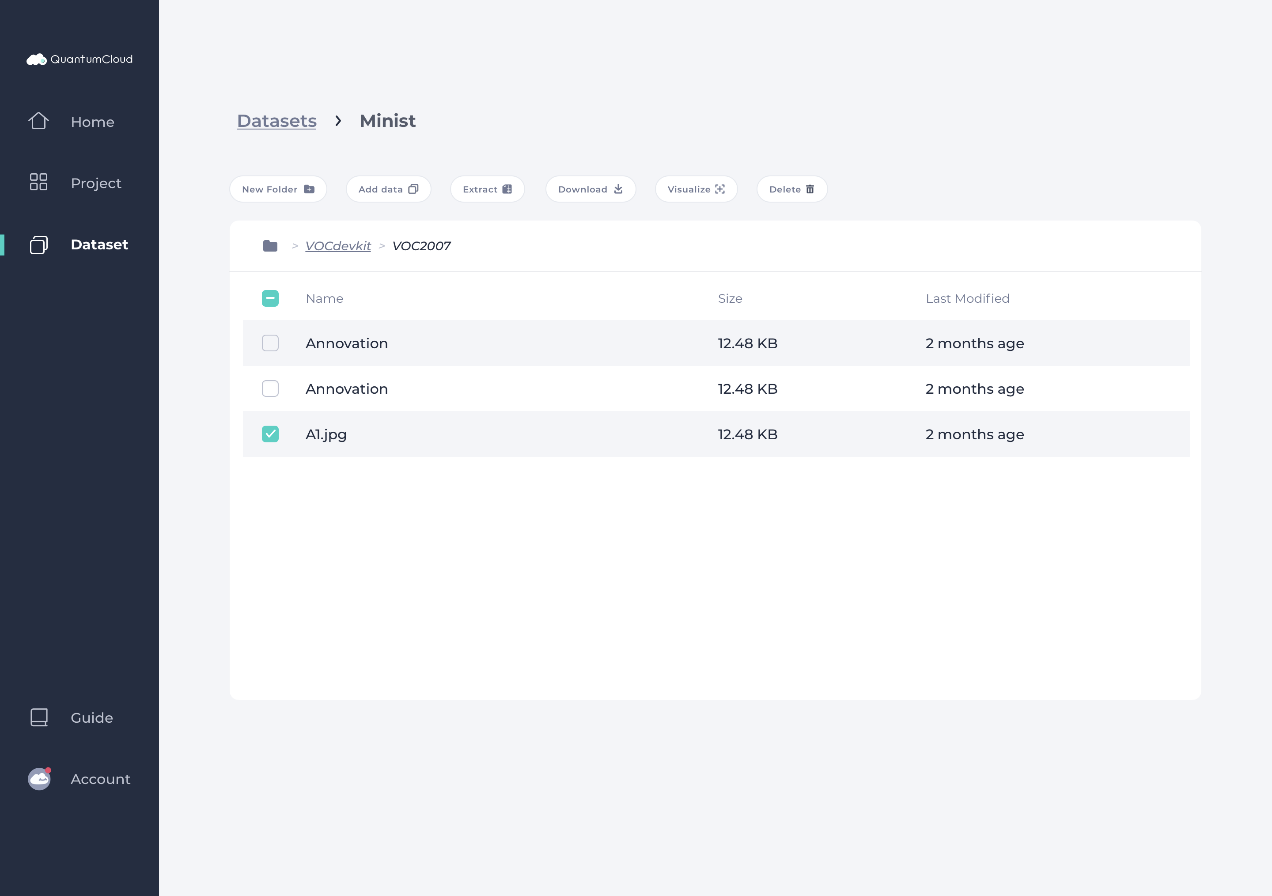
Click on one or several data files and Delete to remove the selected files.
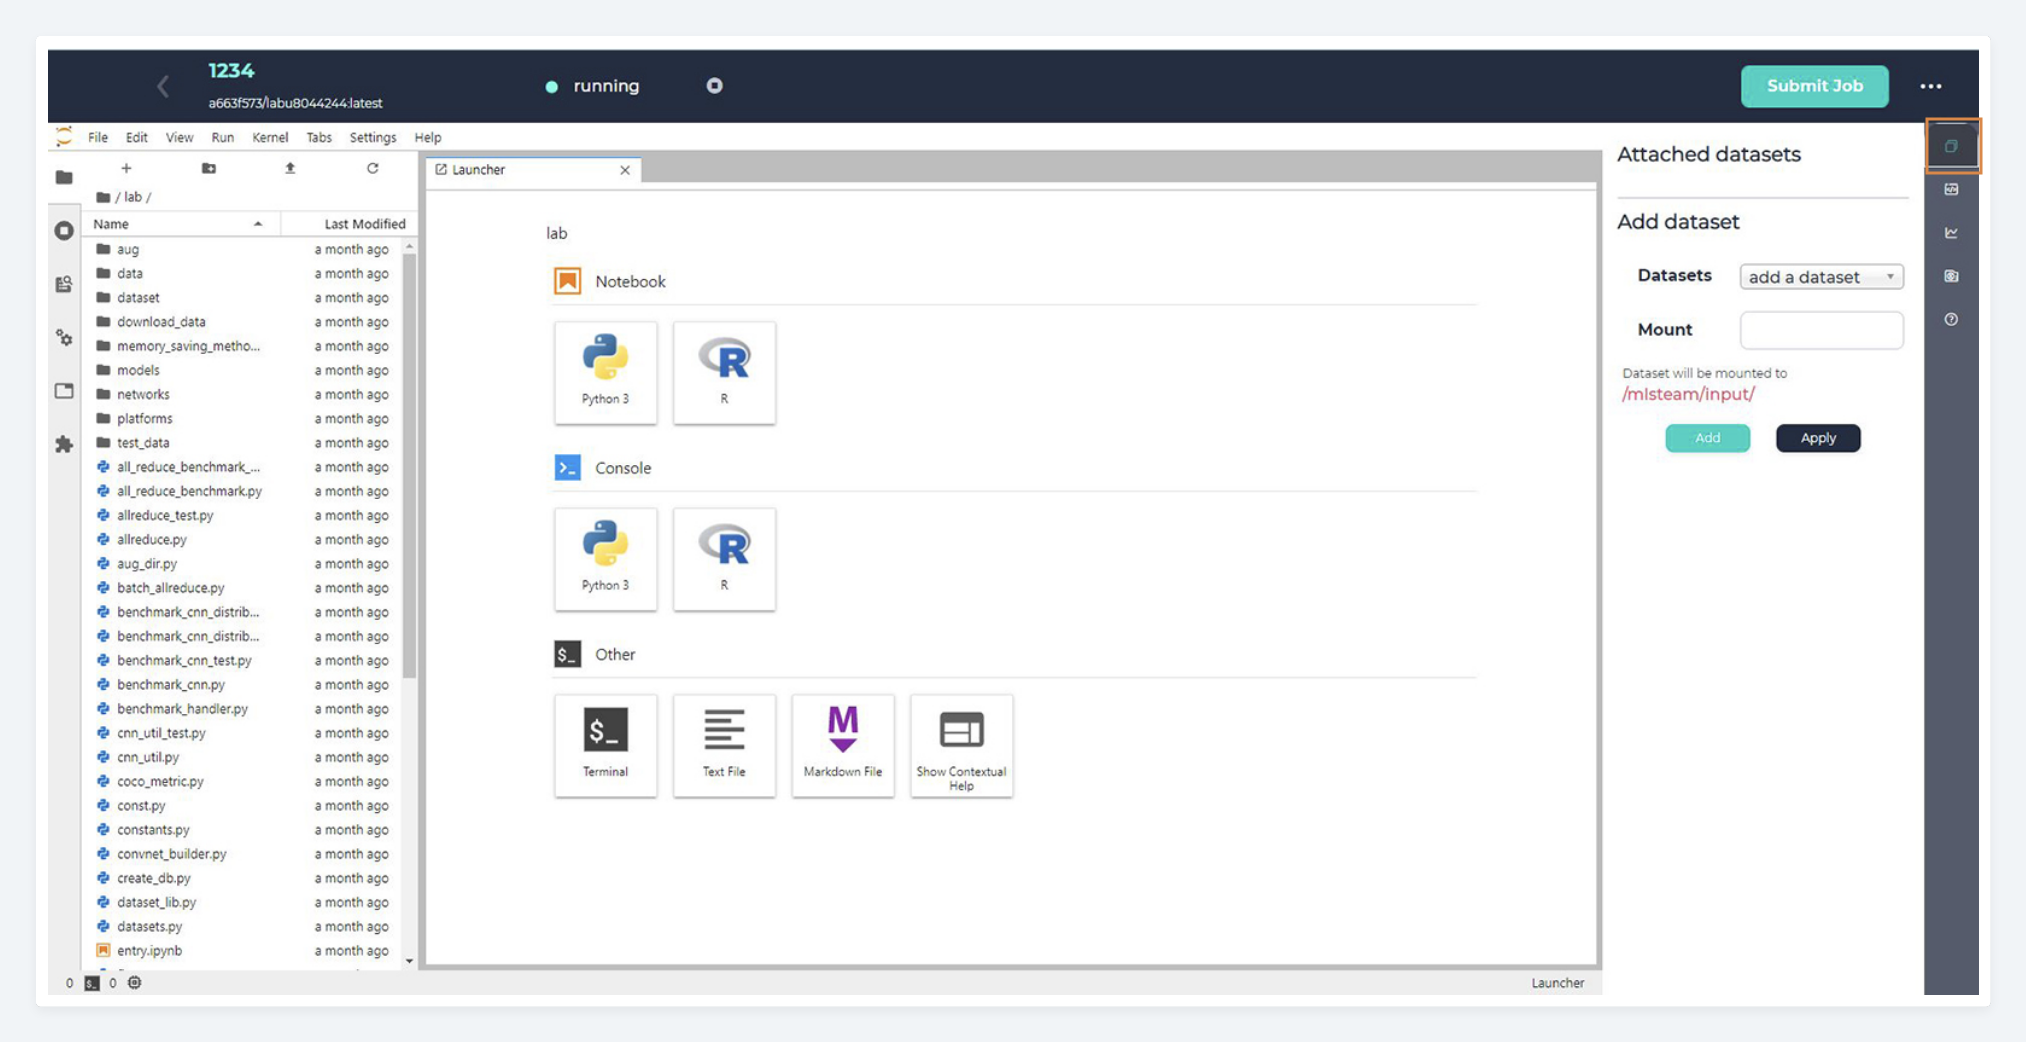
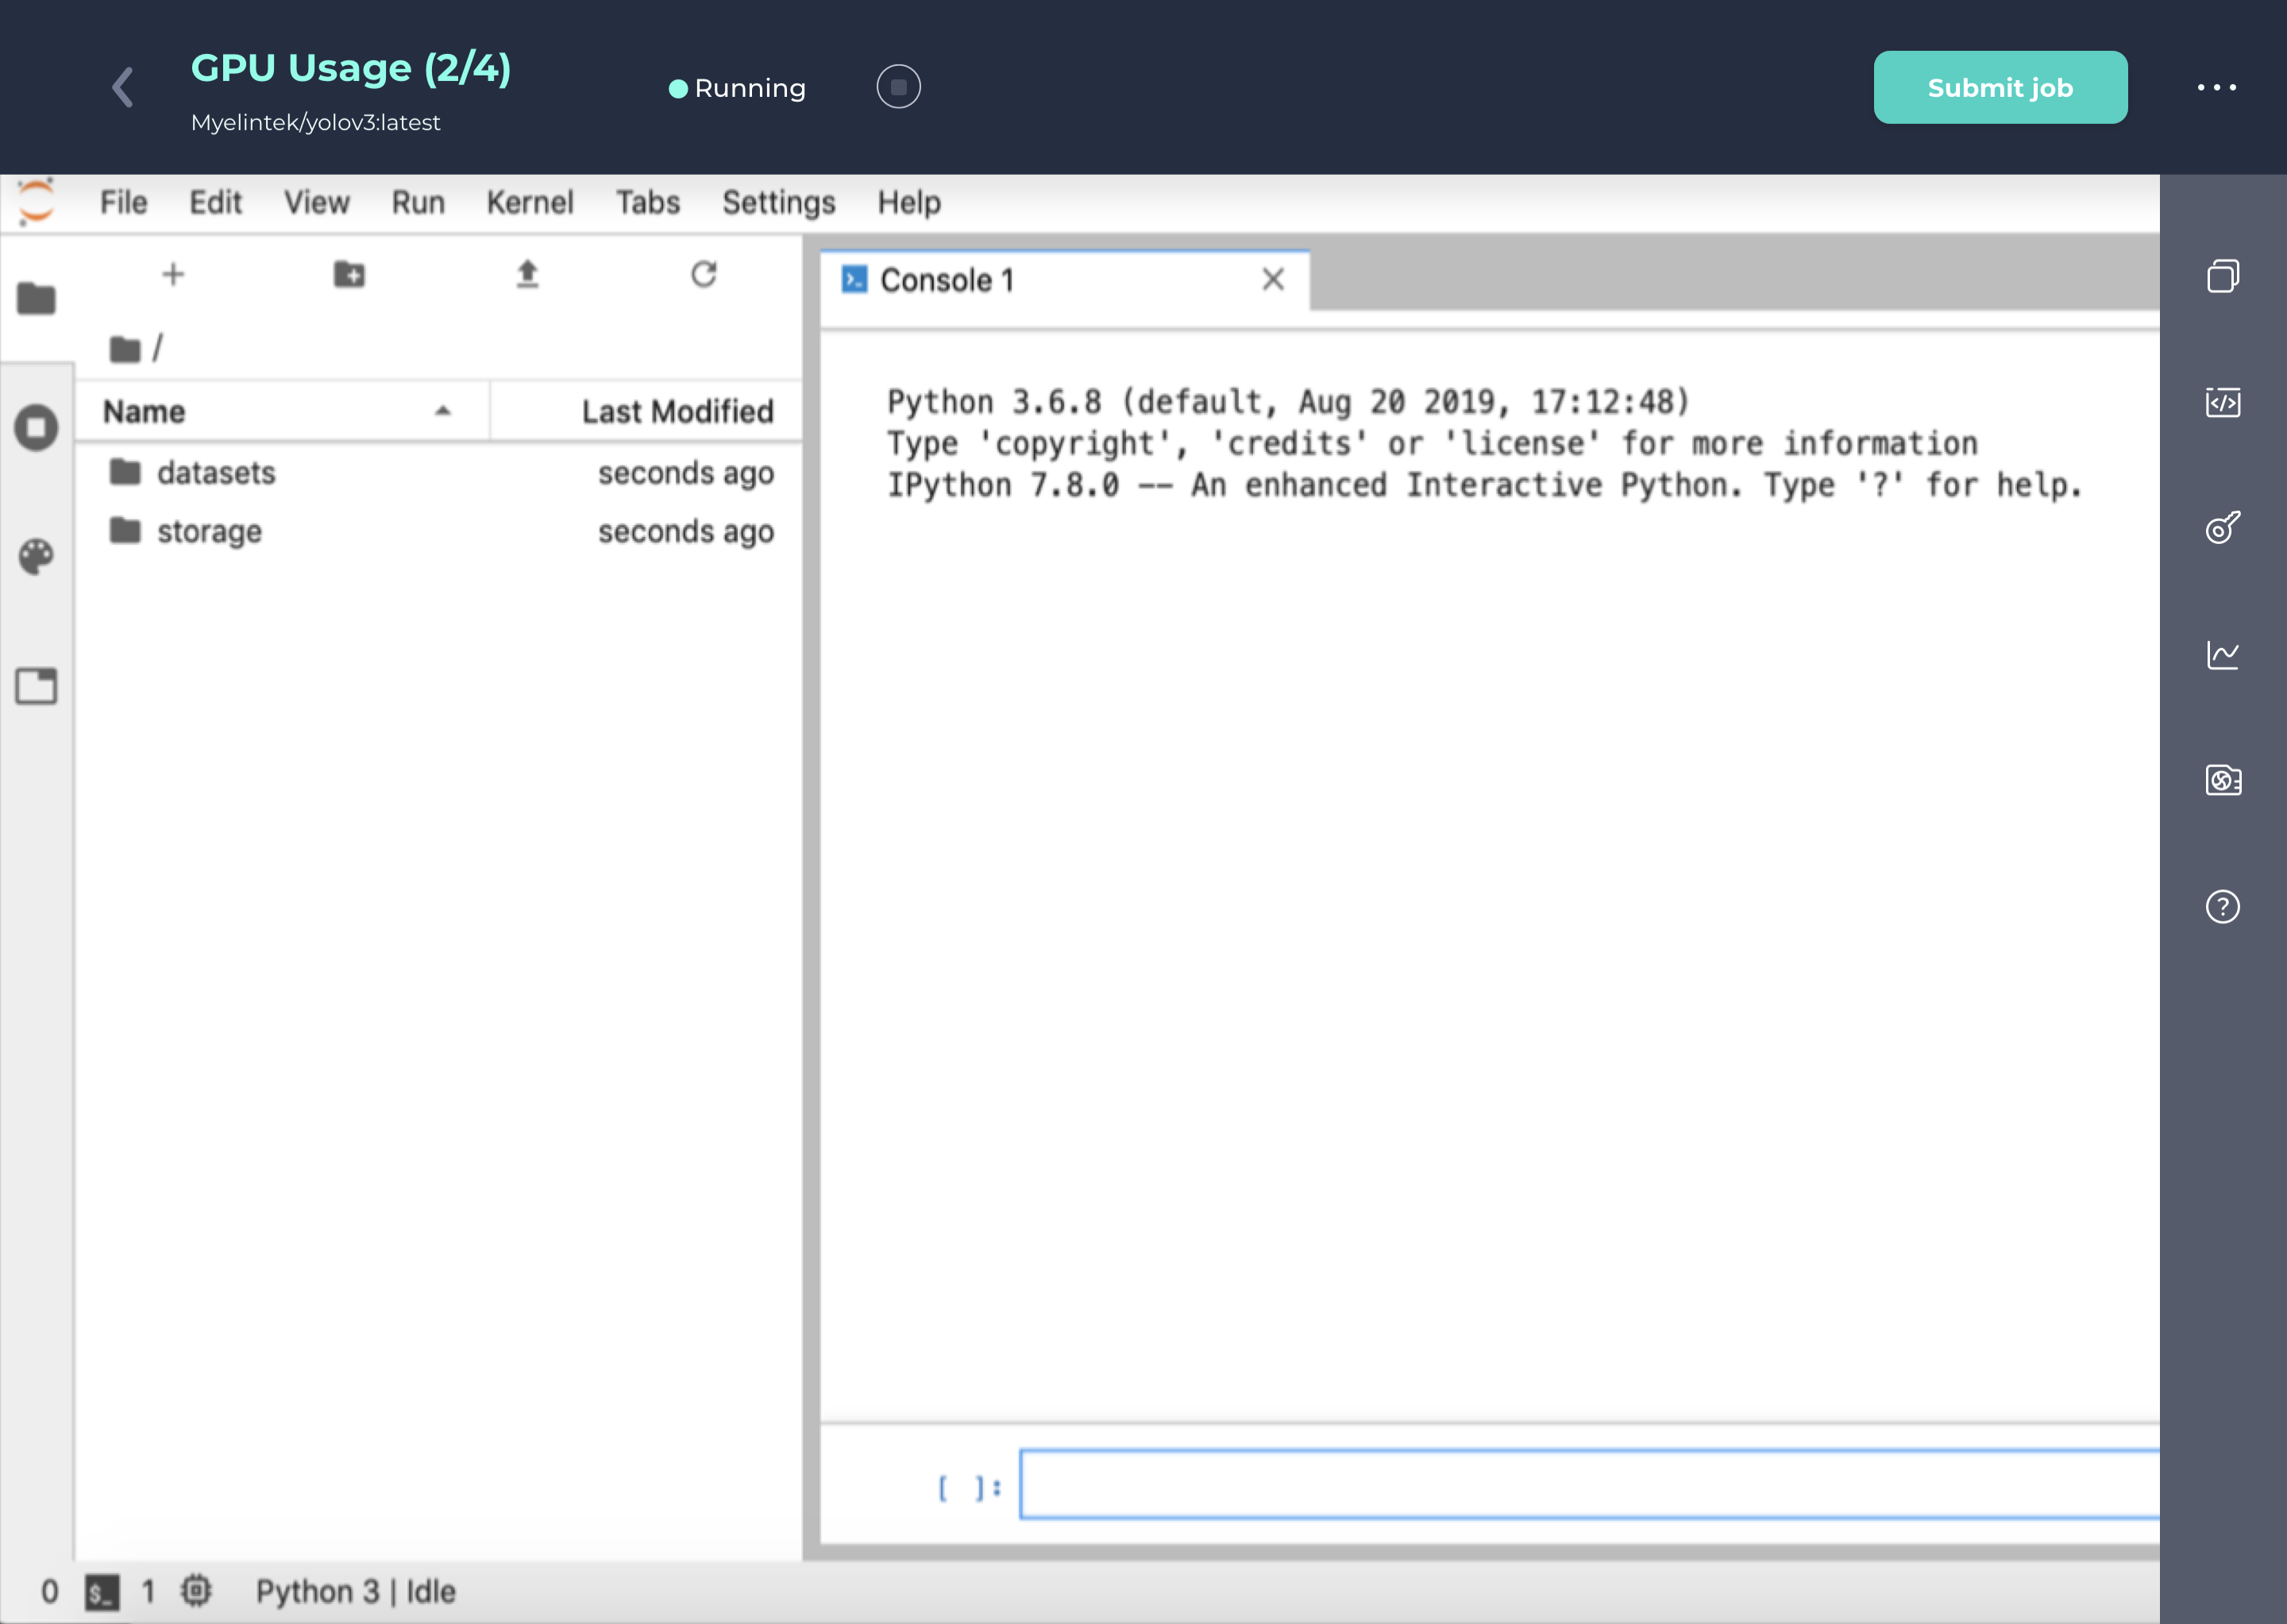
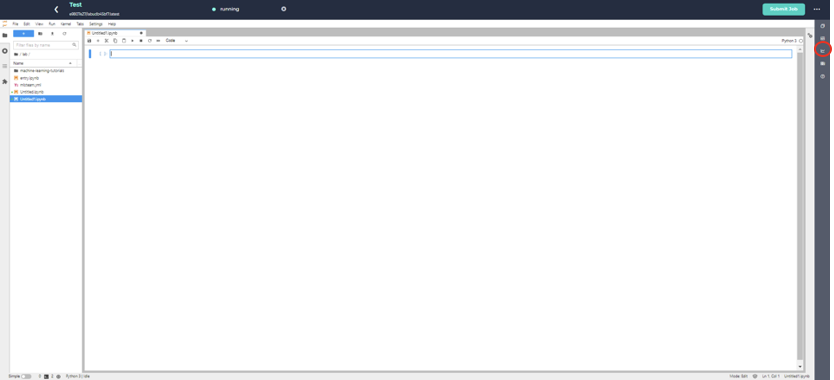
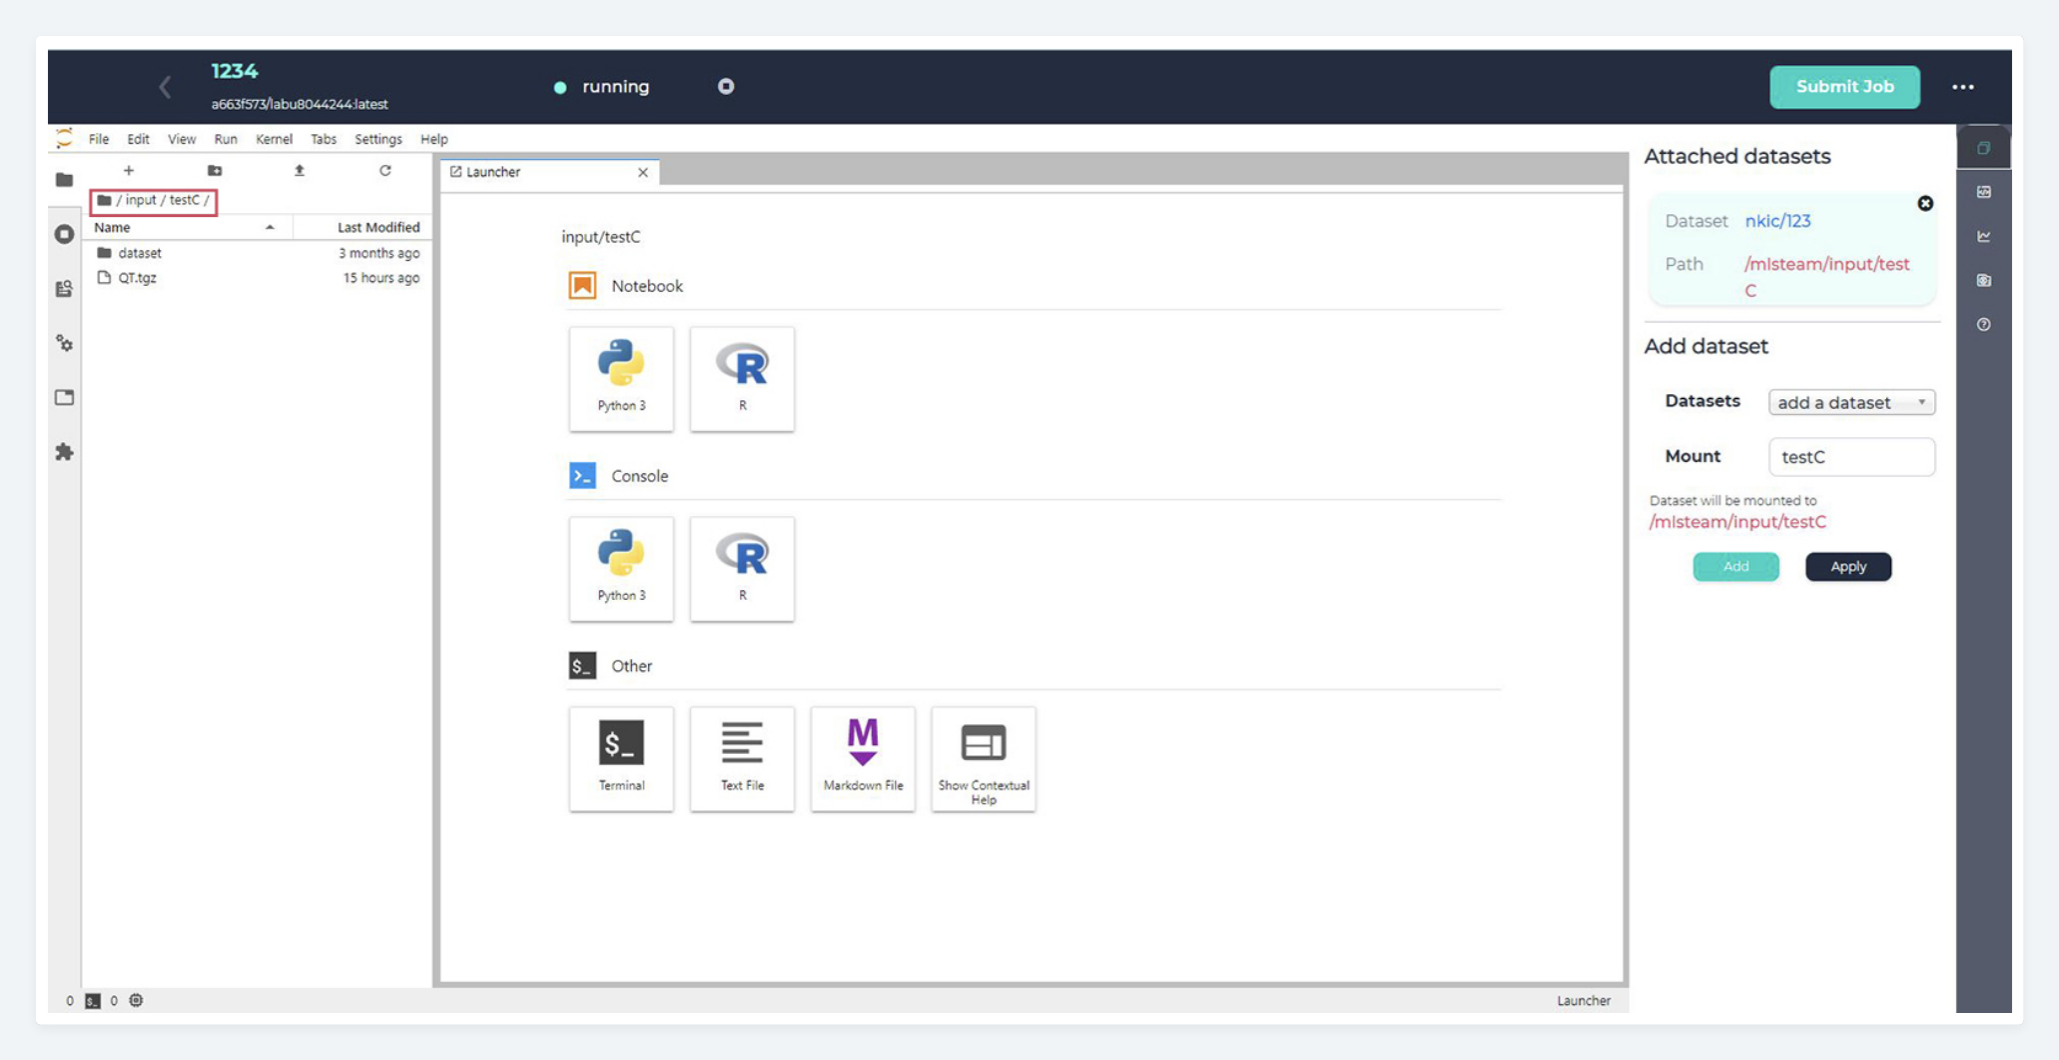
1. Inside the lab that you want to attach the dataset to, click dataset button on the right-side menu.

2. Click add a dataset to select desired data to be attached.
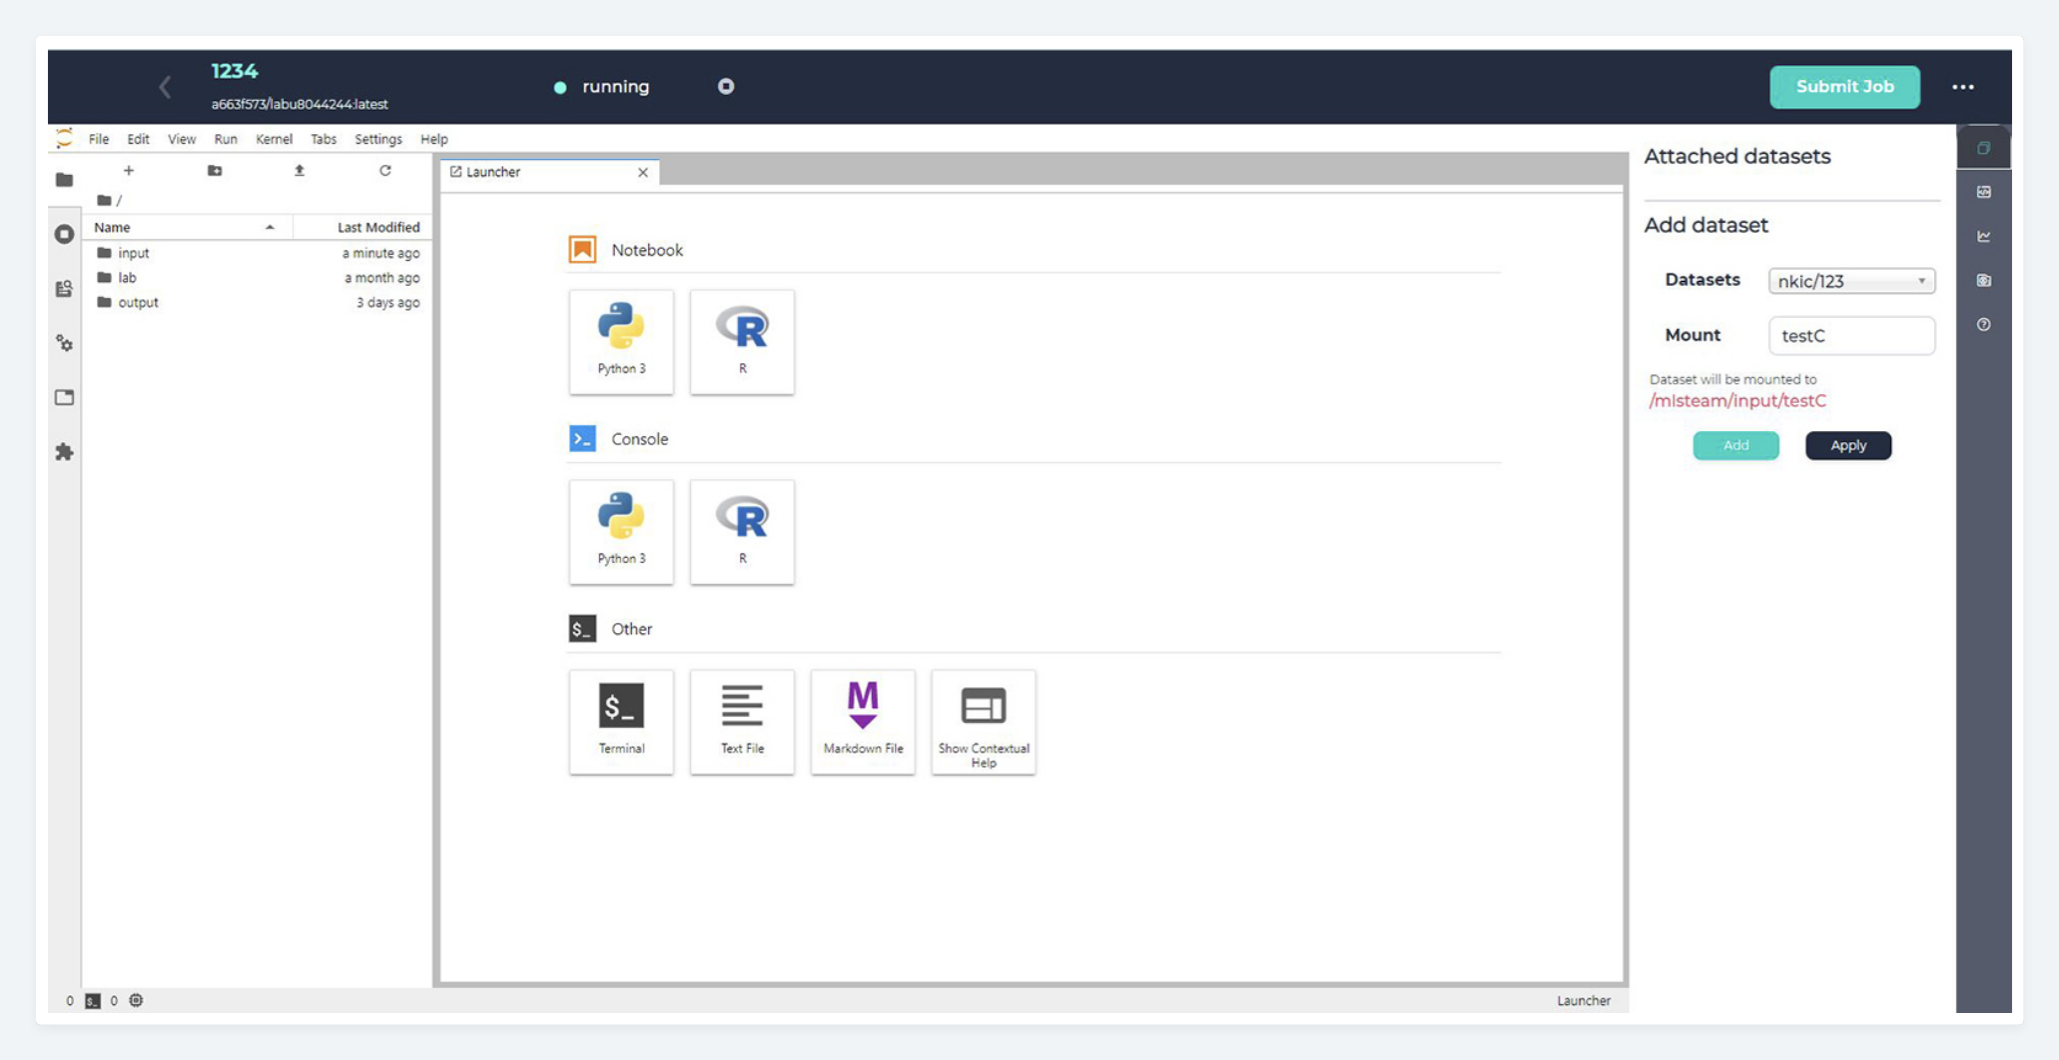
3. Enter Mount to set where you want the dataset to be mounted to and click Add.
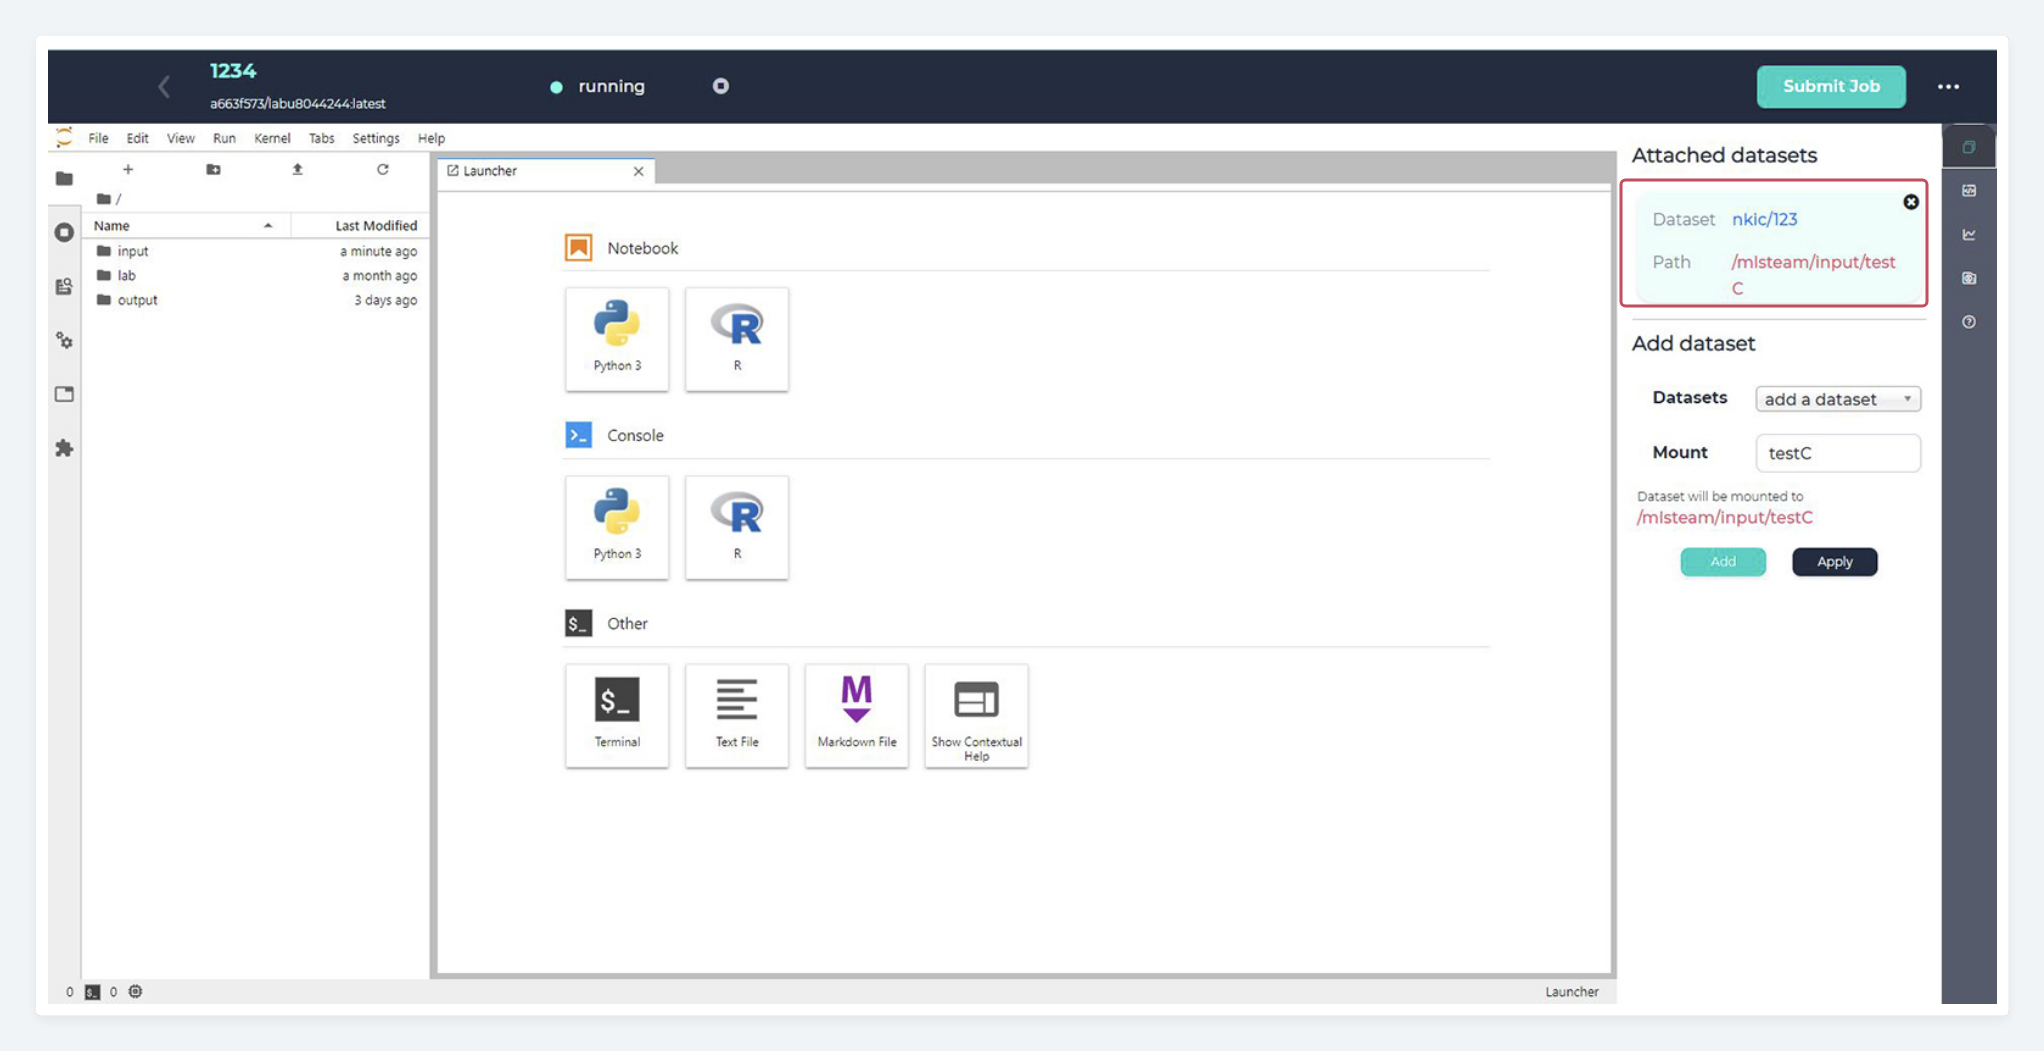
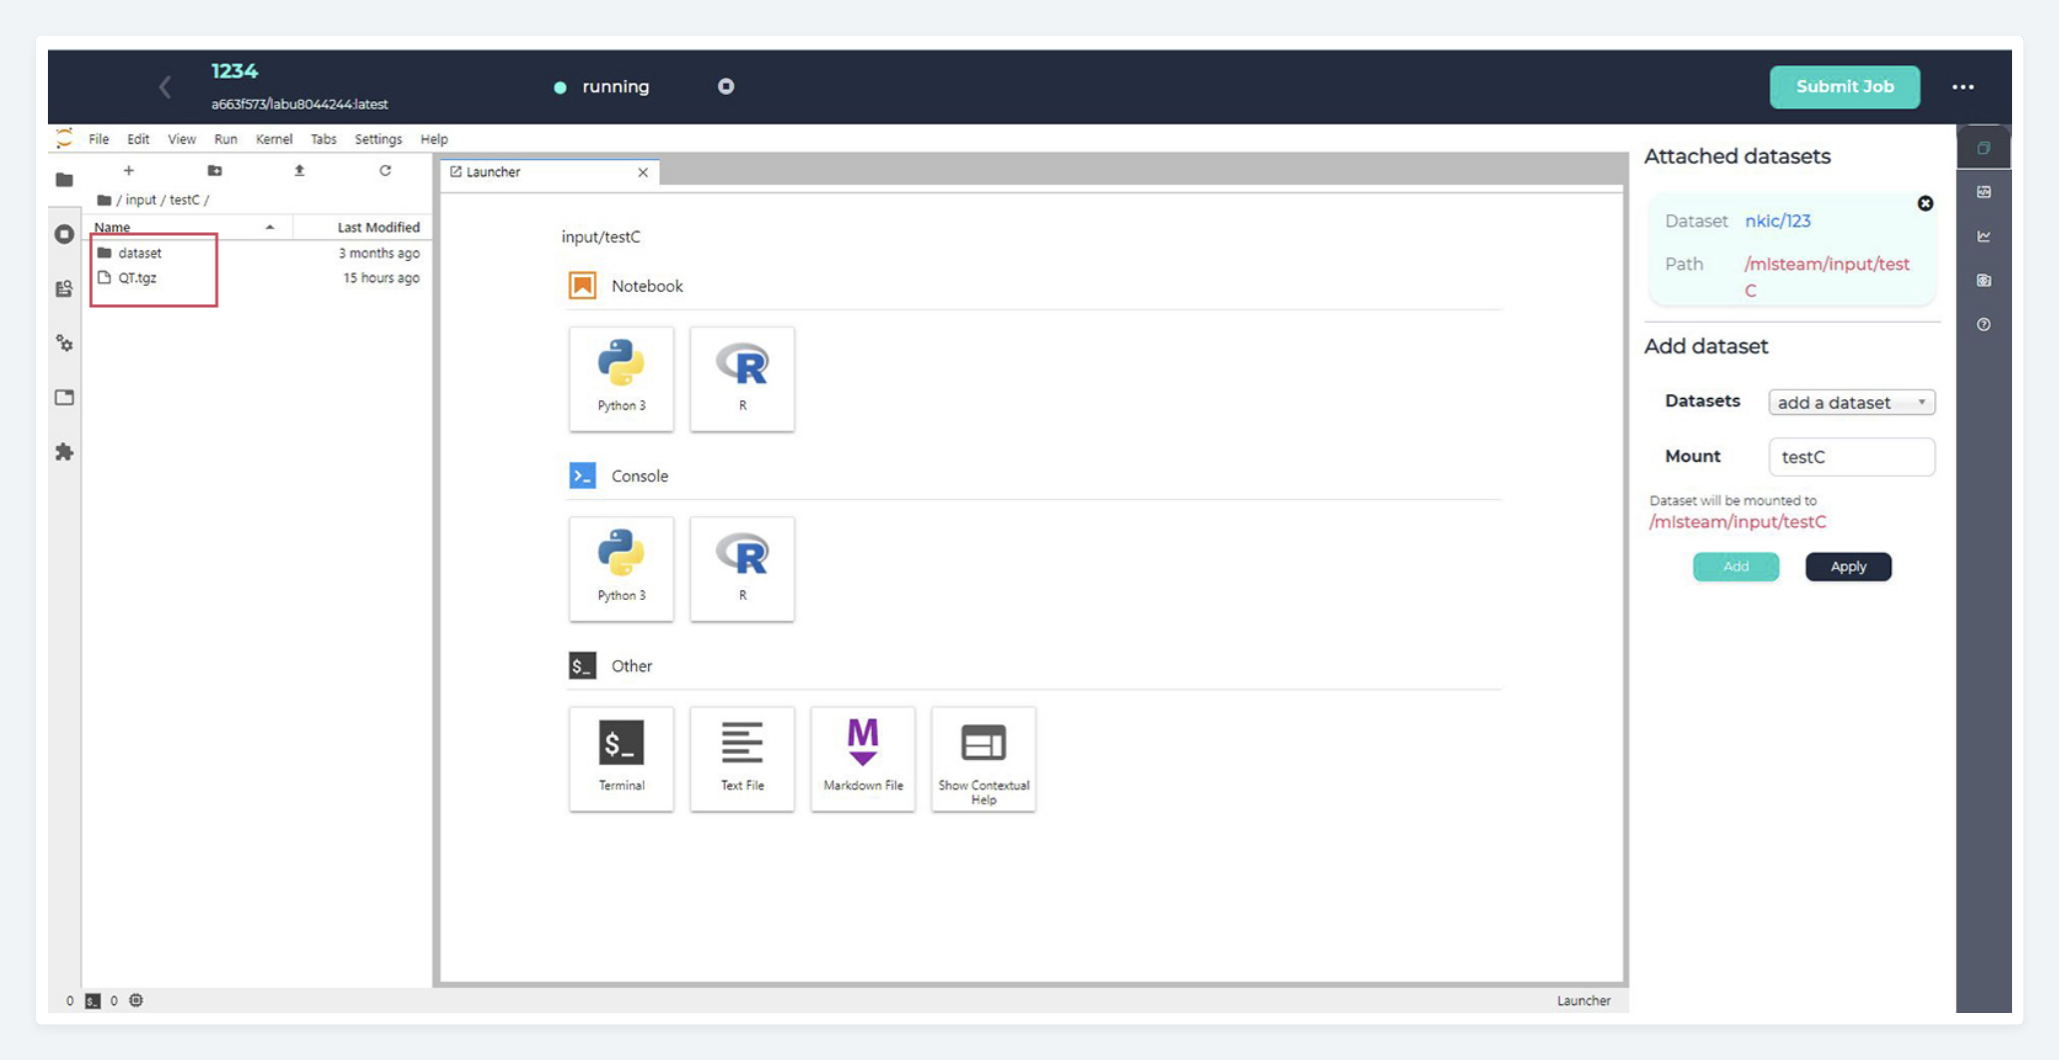
4. The selected dataset has been added. Check the information and click Apply.

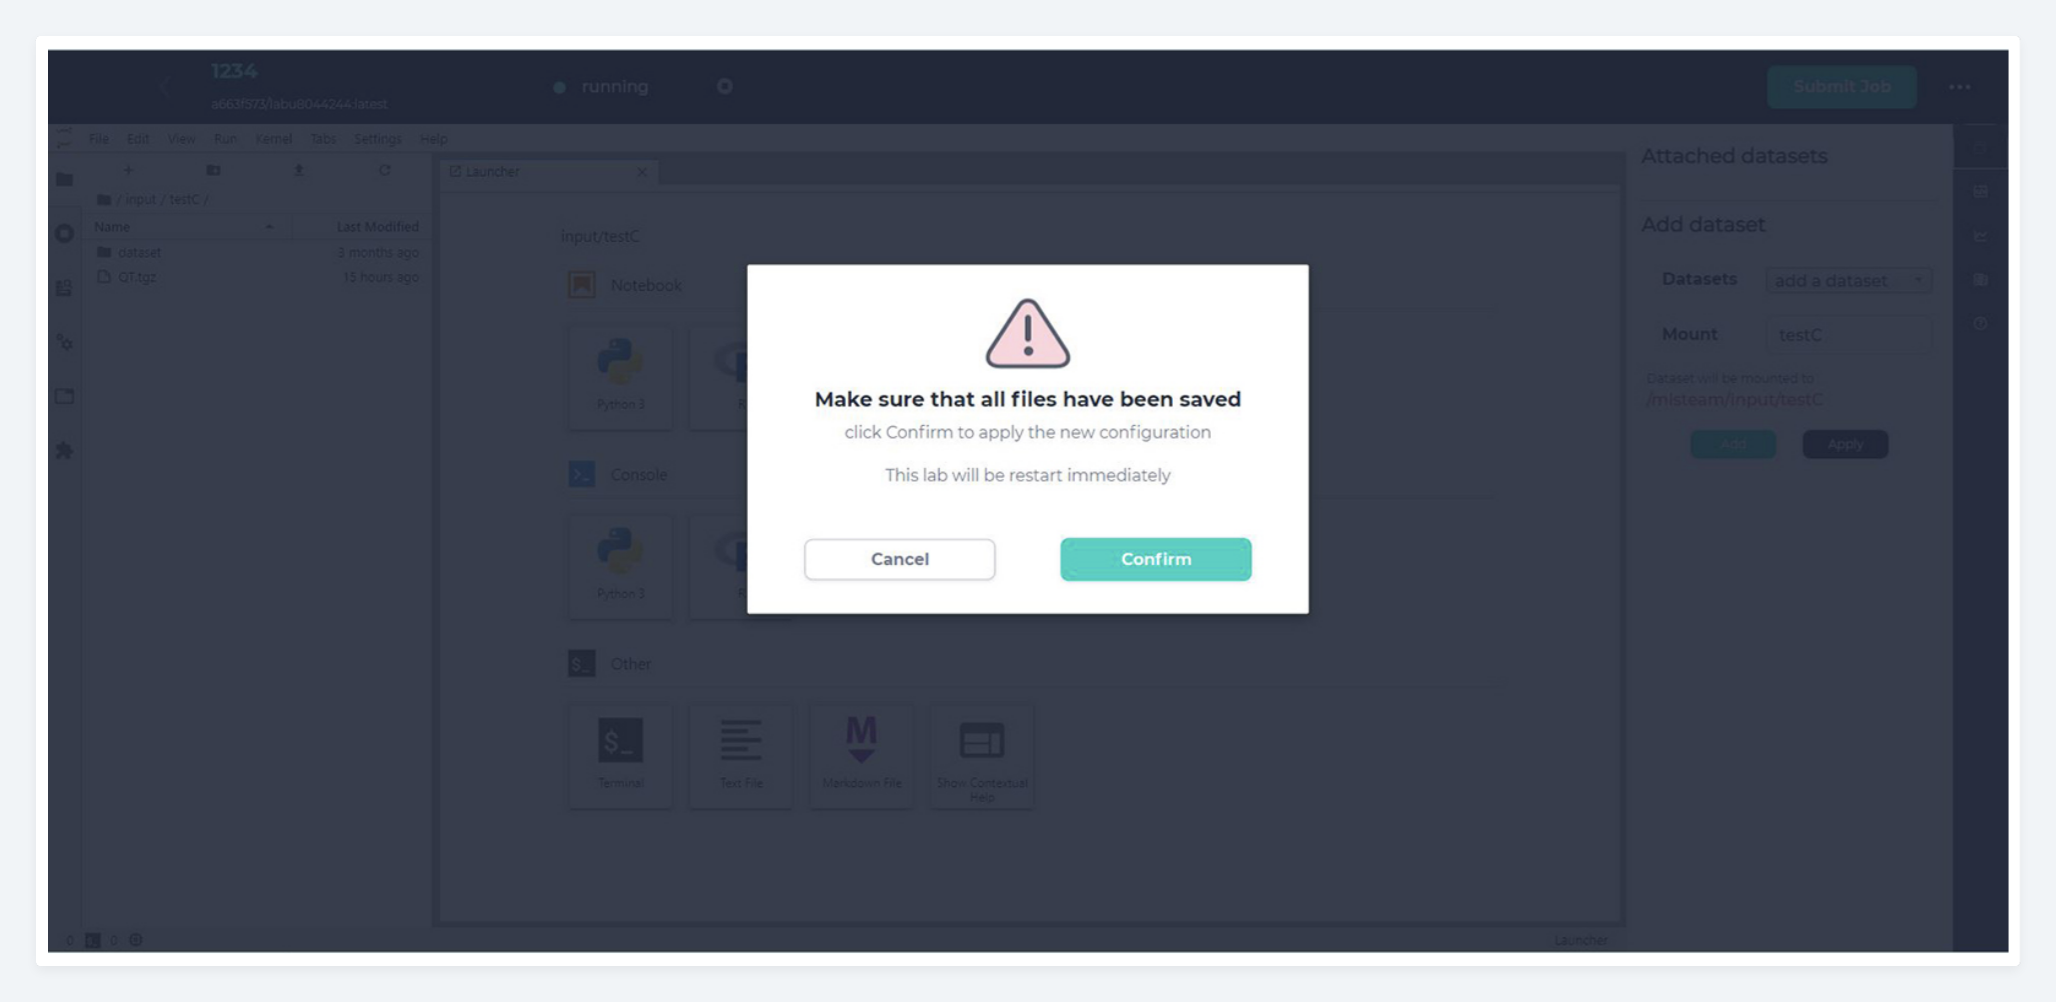
5. Click Confirm to attach the dataset.
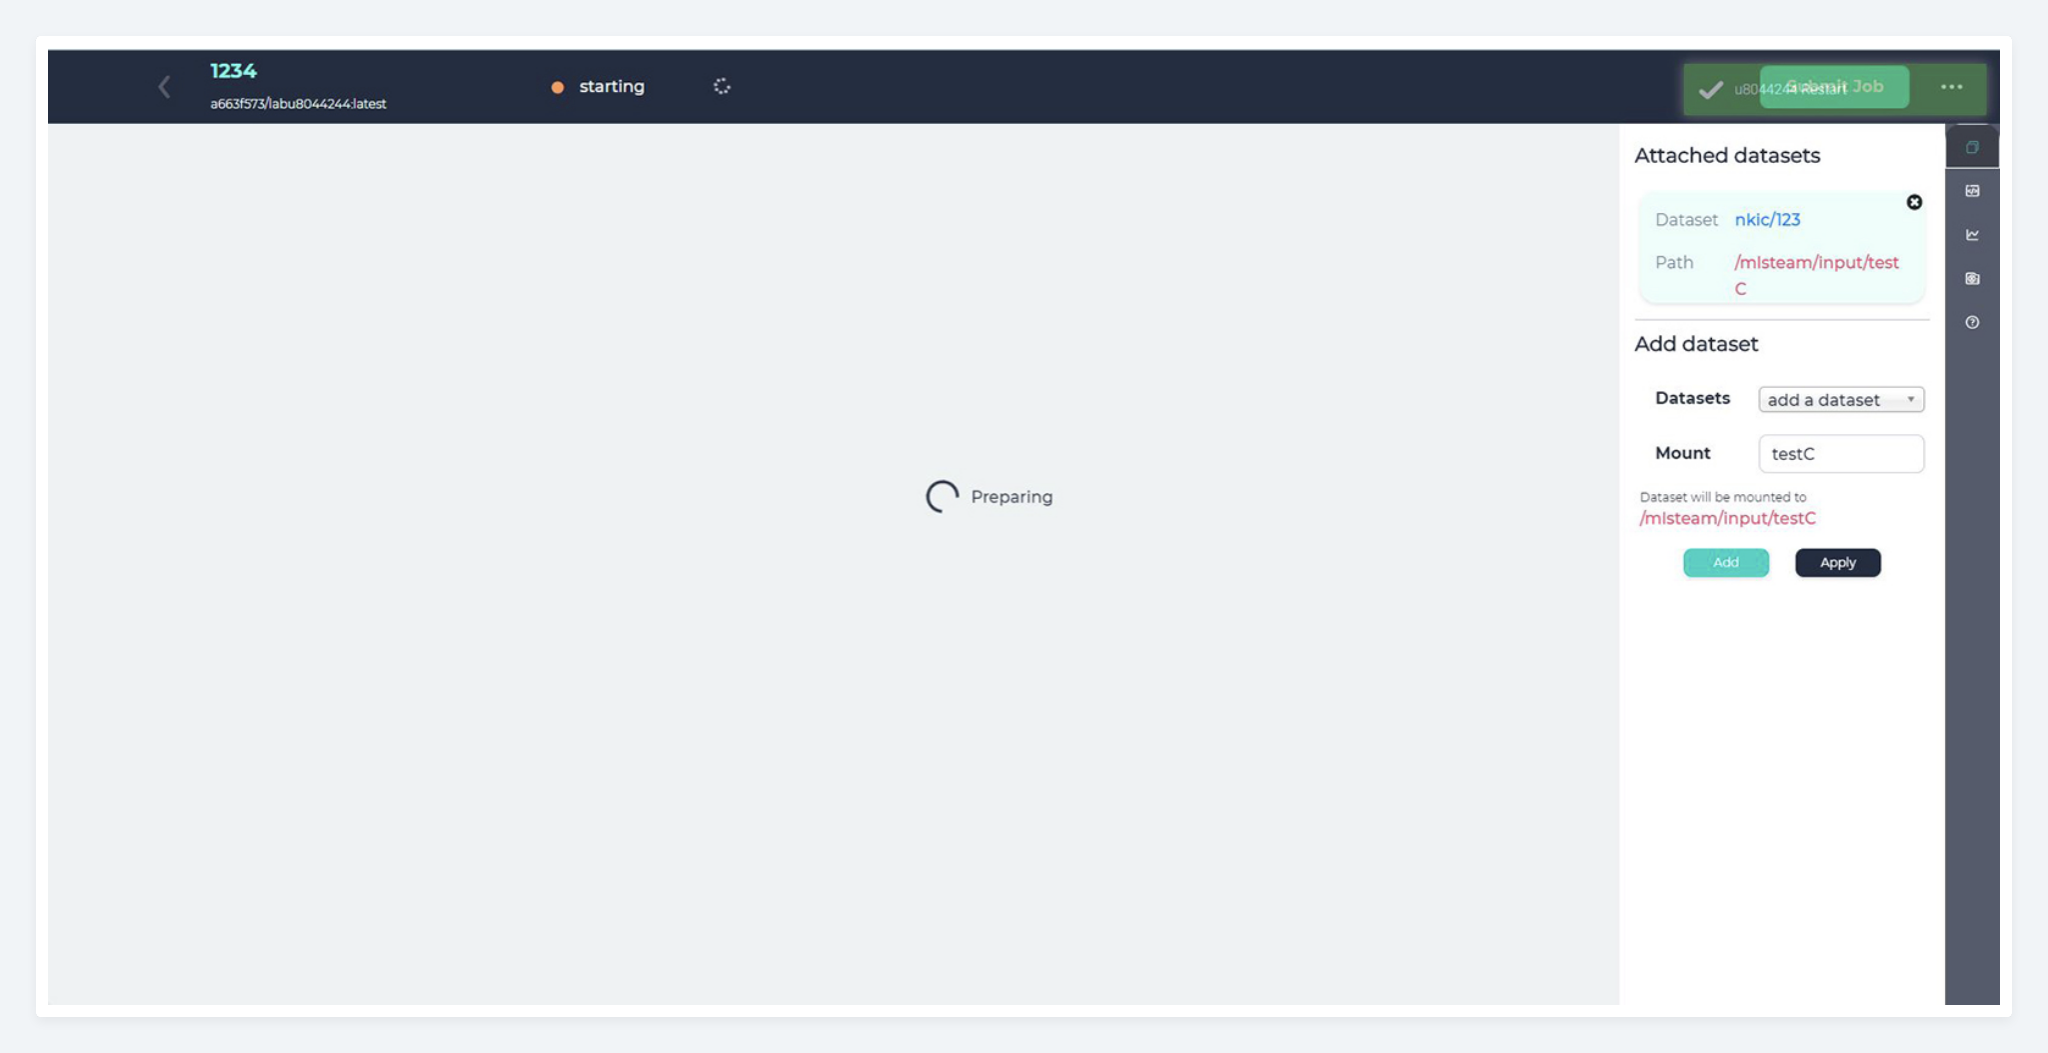
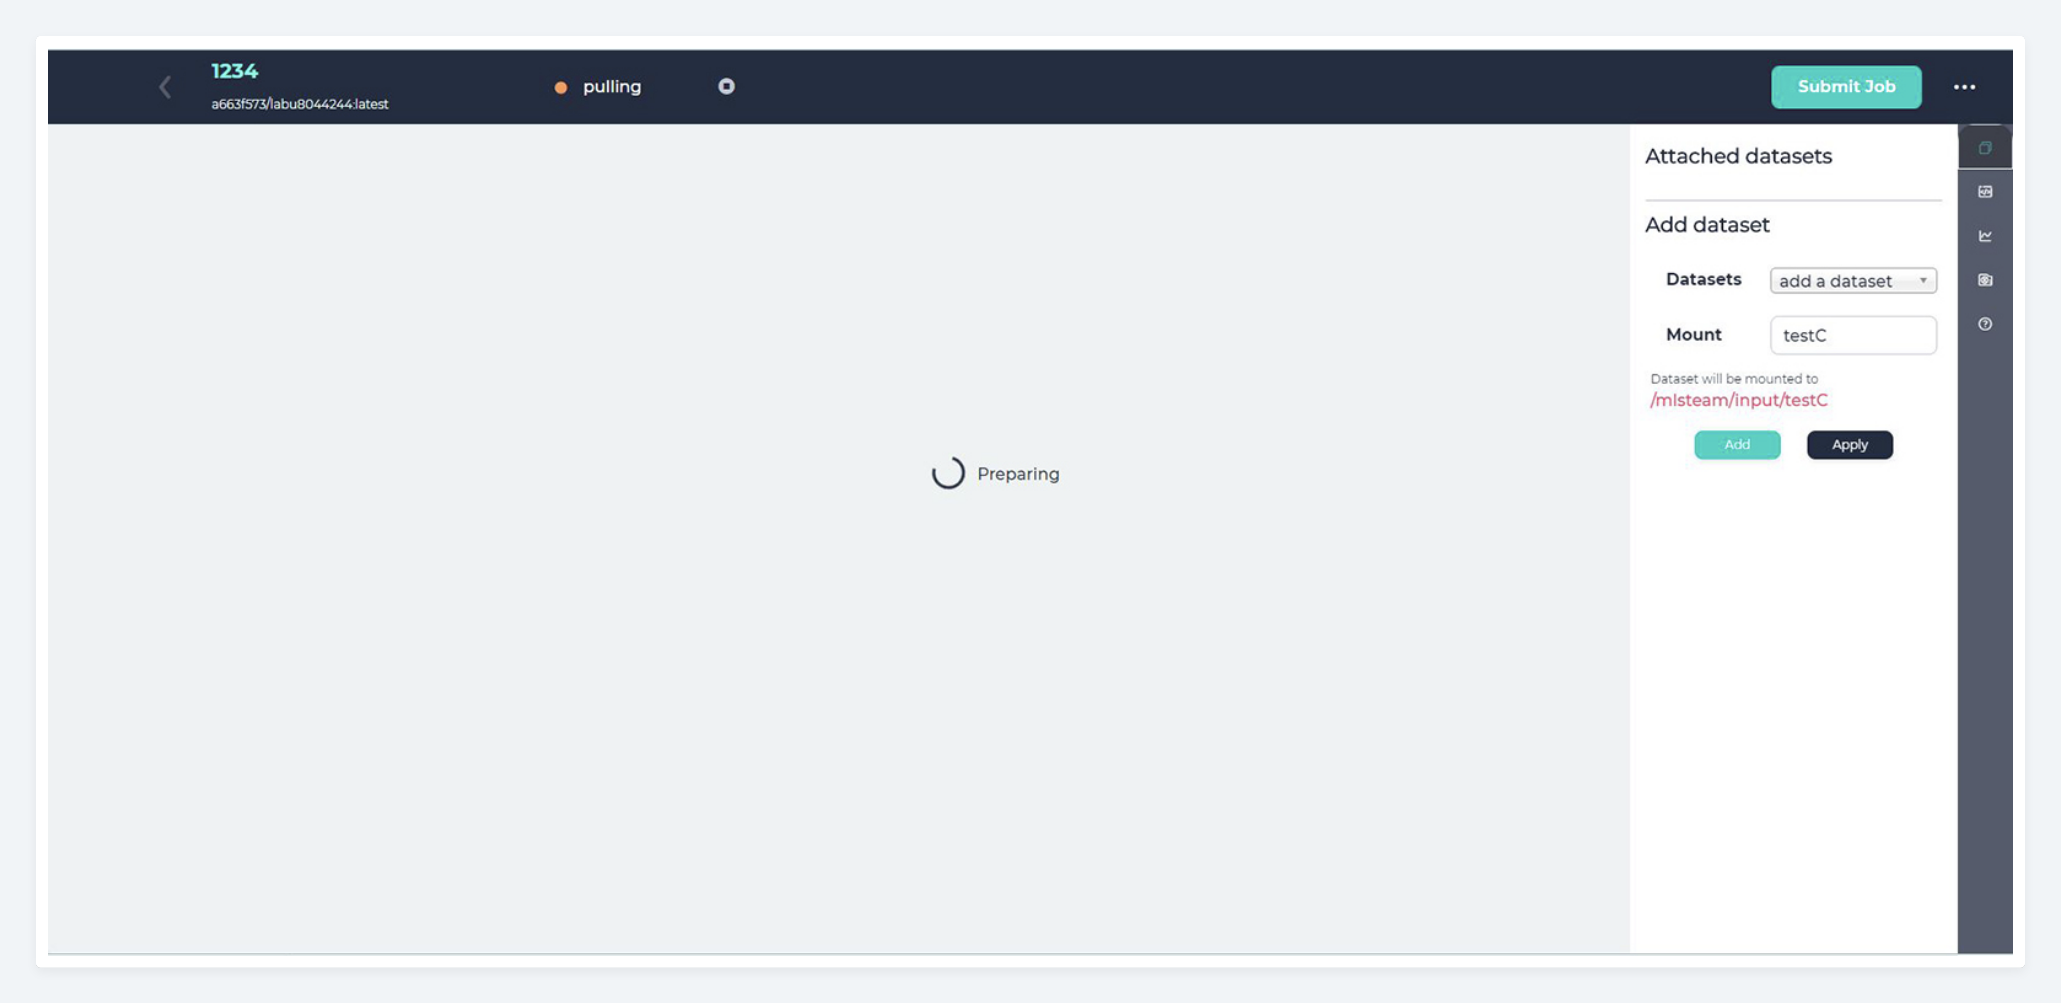
6. Loading
7. Selected dataset has been added!
1. Inside the lab, click dataset on the right-side menu, and click ✕ button of the top right corner of the attached dataset.

2. The attached dataset is removed and click Apply.
3. Click Confirm to apply deletion.
4. Loading
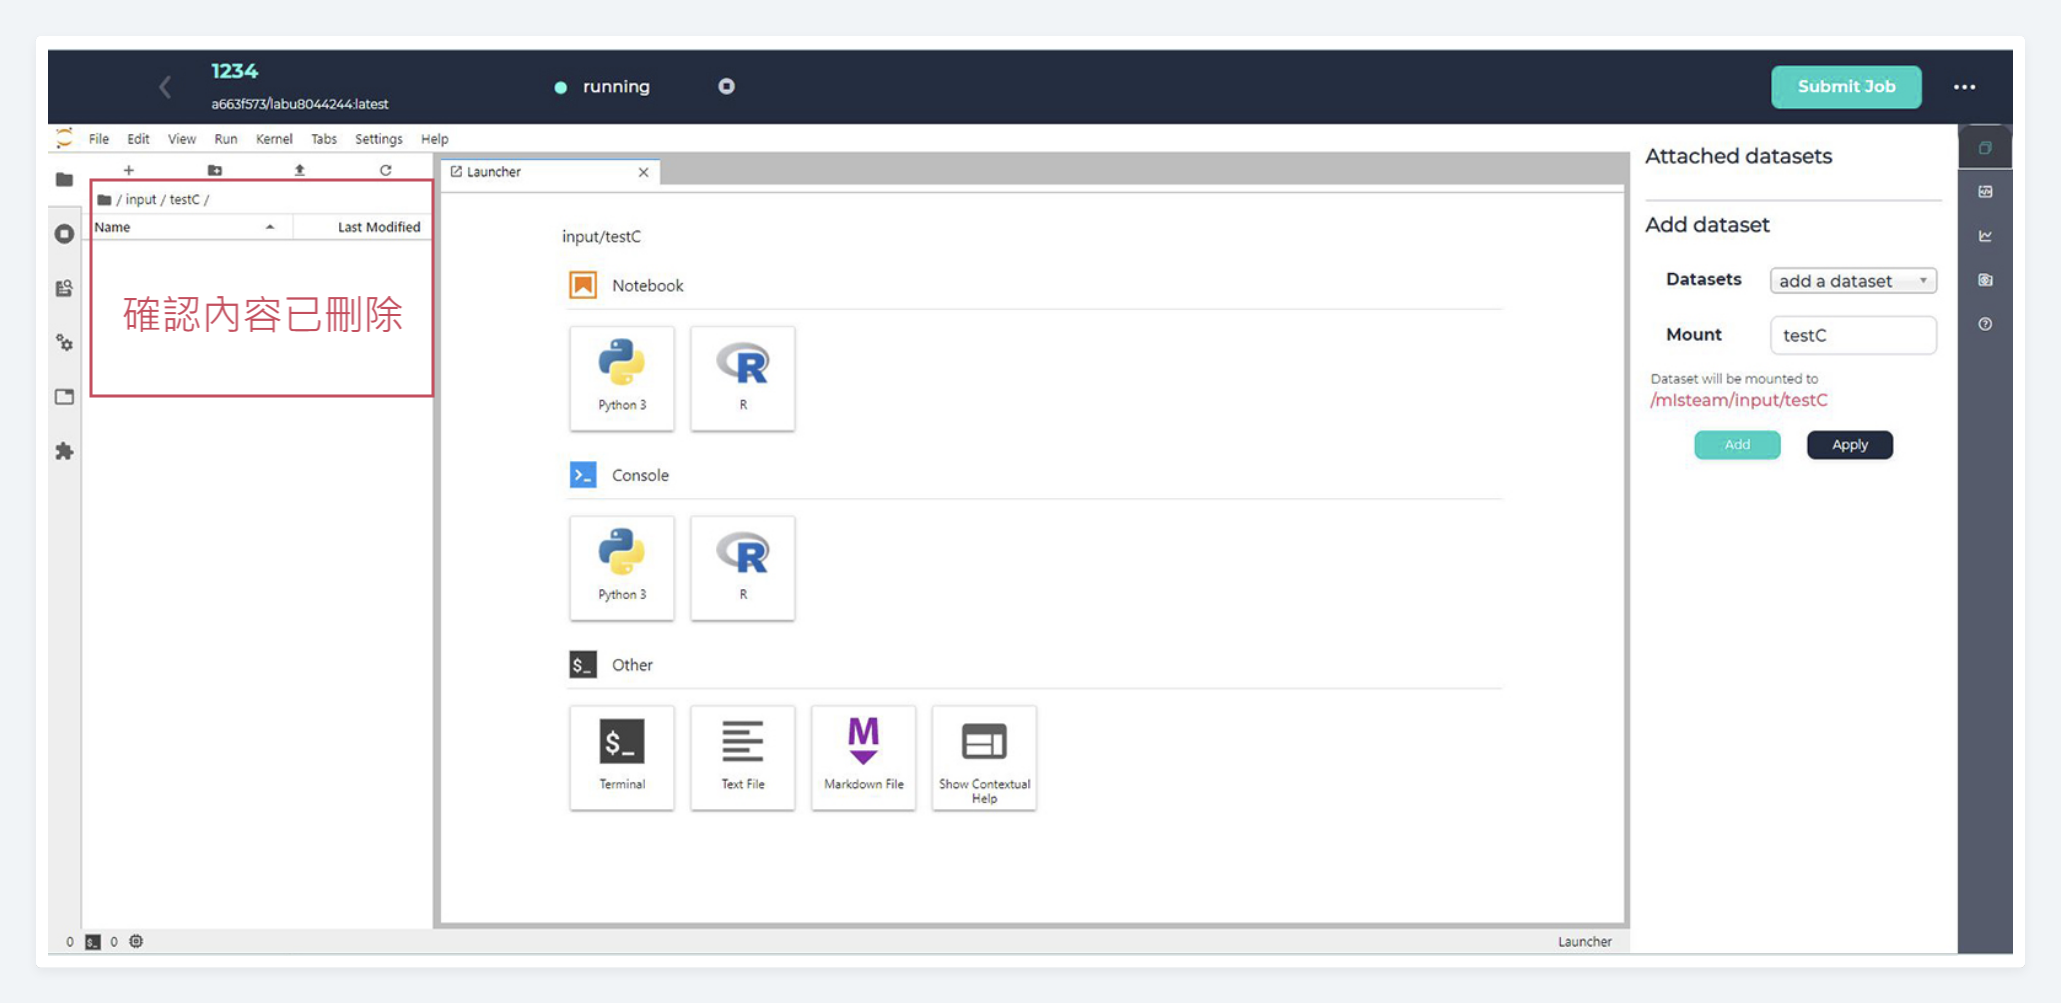
5. Deletion complete.